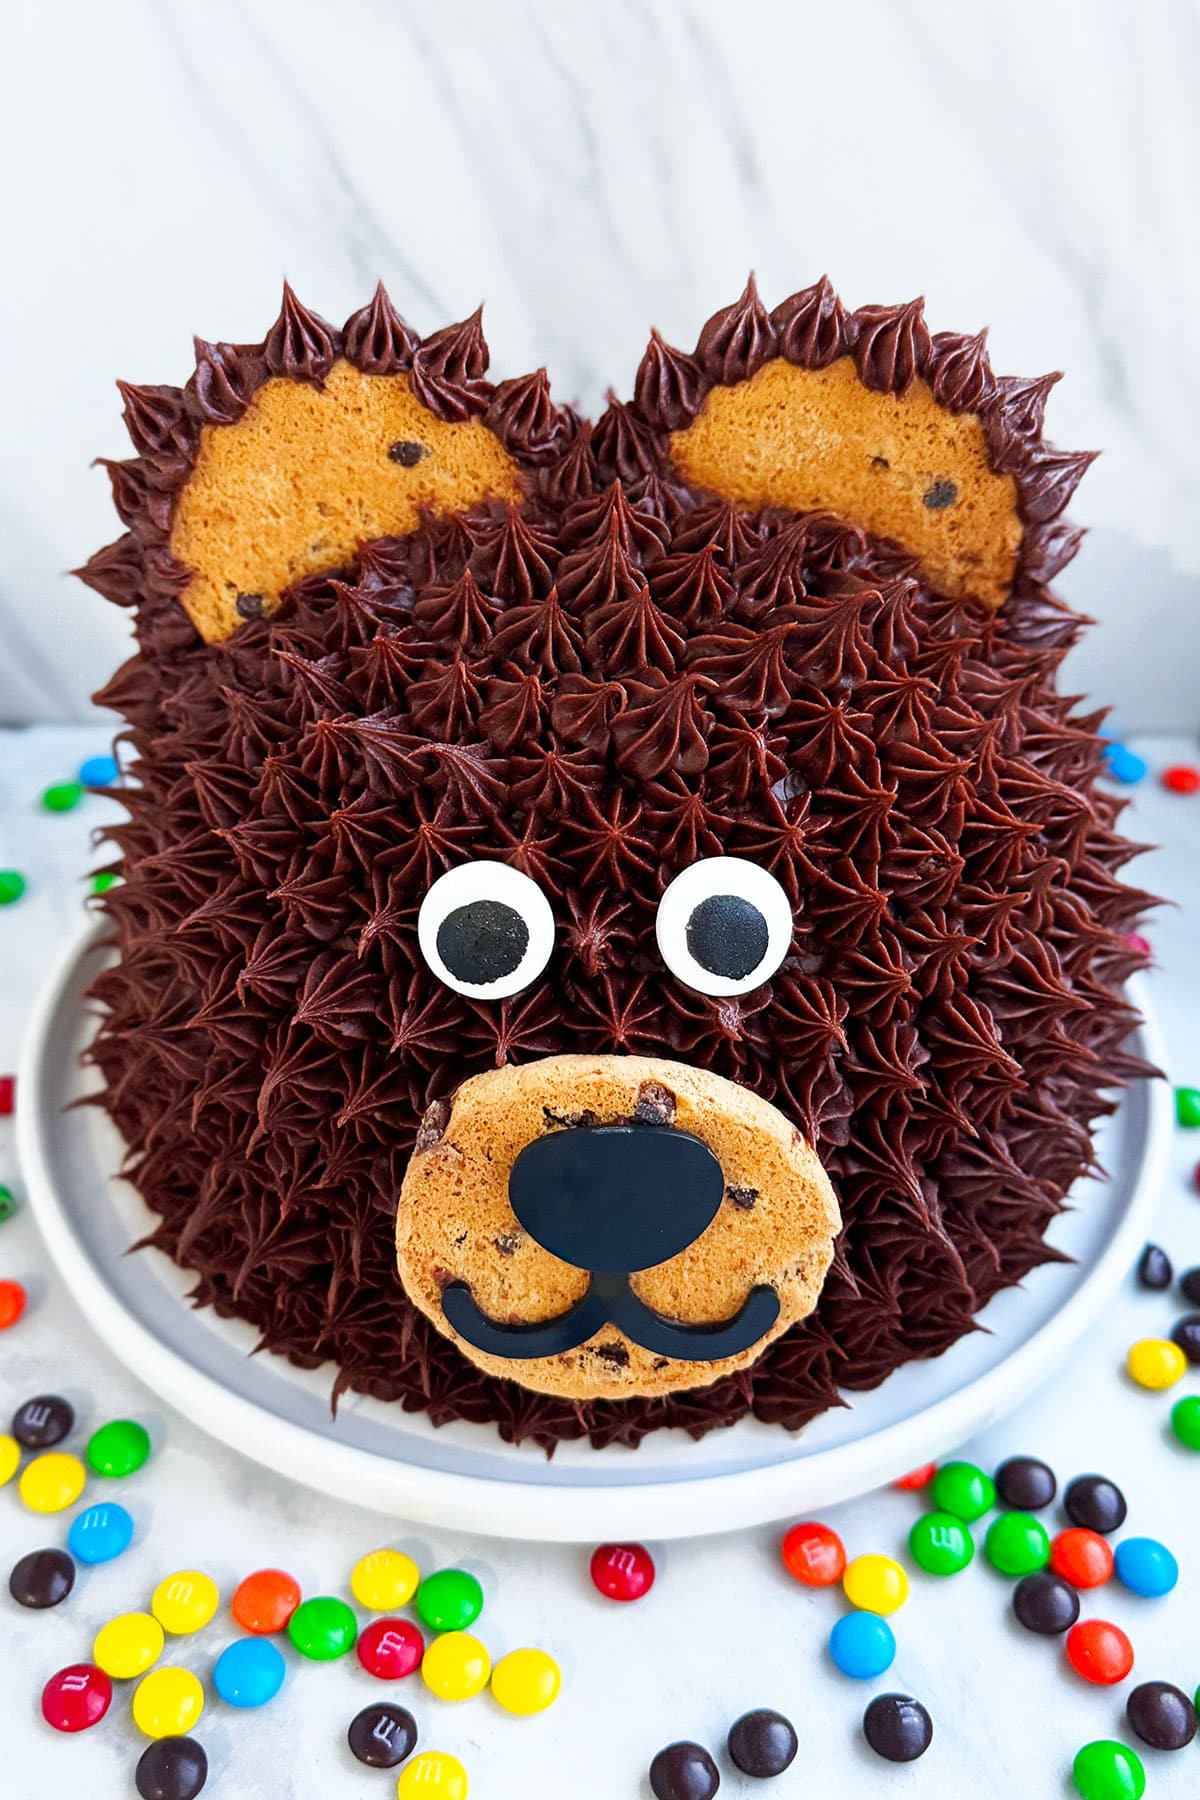
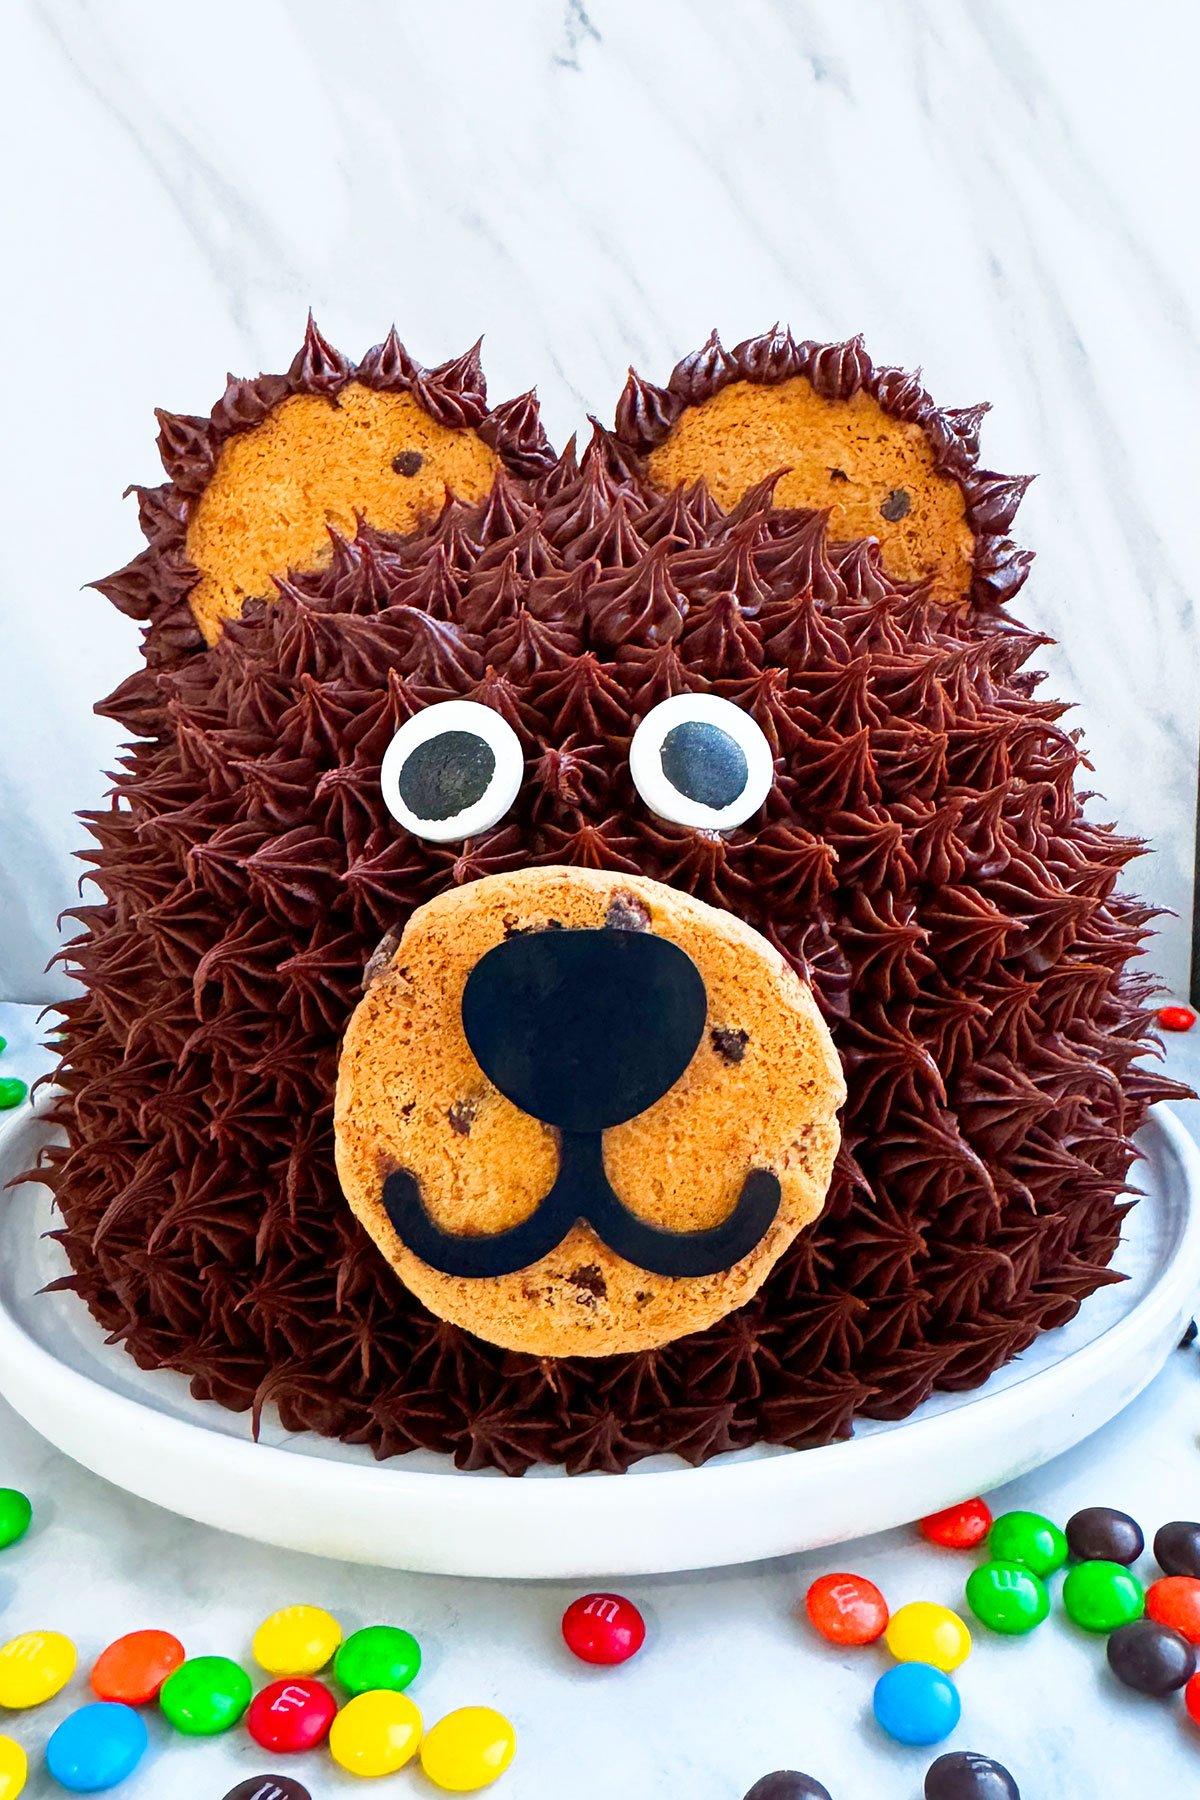
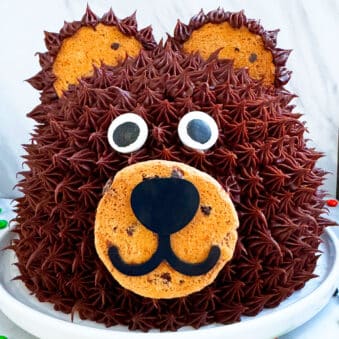
Easy teddy bear cake recipe and tutorial, homemade with simple ingredients. This kids happy birthday cake is decorated with chocolate buttercream icing. Party and dessert table details also included.
*Thank you Baskin-Robbins for sponsoring this post. As always, all opinions are my own.*
Want to Save This Recipe?
Enter your email & I'll send it to your inbox. Plus, get great new recipes from me every week!
By submitting this form, you consent to receive emails from CakeWhiz
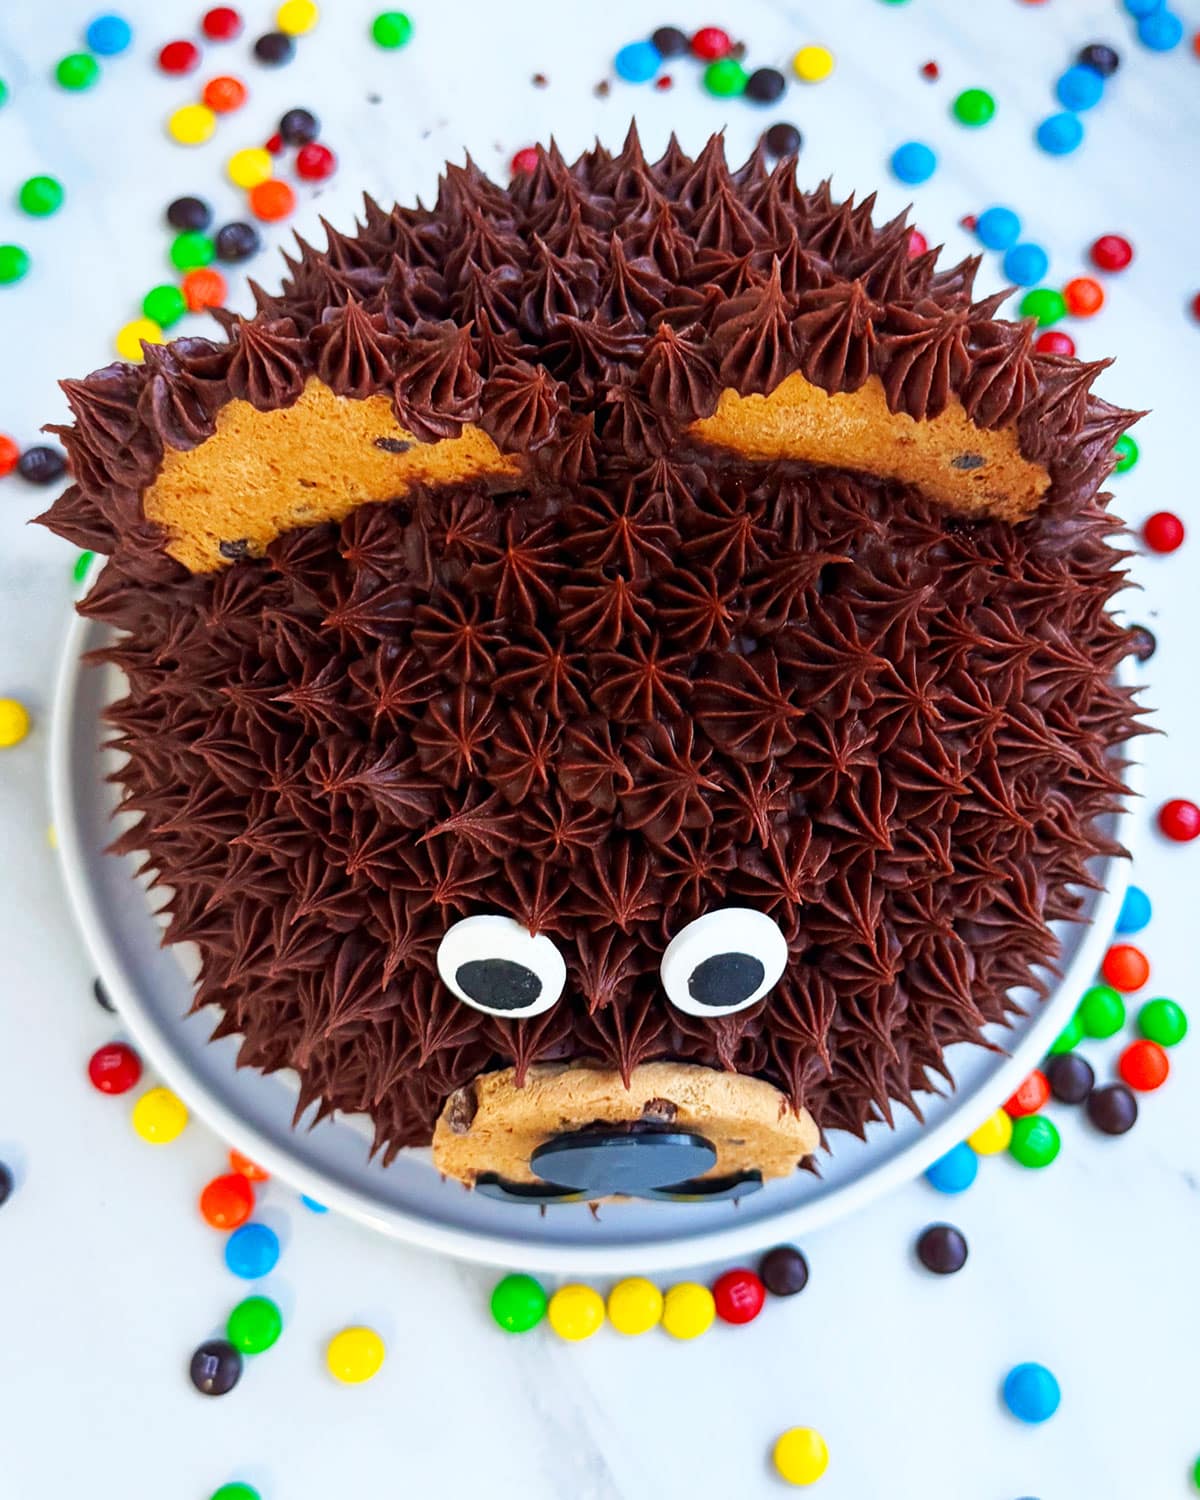
I made this cute cake for my son's birthday party and everyone loved it. I think it's great for 1st and 2nd birthday parties for boys and girls. It would also be great for a baby shower. It's one of those simple cake decorating techniques that people with no experience can make as well. For more fun cake ideas, be sure to check out these Easy Cake Decorating Ideas (Beginners) and these Birthday Cake Ideas.
Table of contents
Key ingredients for teddy bear birthday cake design
- Chocolate cakes- You will need to make two round cakes.
- Chocolate Buttercream Icing- This is a great option for efficient cake decorating.
- Black Icing- This is essential to add those details to the bear.
- Chocolate chip cookies- These can be homemade or bought from a store.
- Eyeball Sprinkles- Be sure they are the large kind for the big bear!
Variations
Make a simple round cake- That is iced smoothly in white or beige icing and then add a cake topper to it that is made out of Homemade Marshmallow Fondant.
Decorate with brown fondant- Applying the same overall ideas. This is for you seasoned cake decorators to have fun with your creativity.
For a girl version- Add a red or pink bow on one of the ears. This can be made out of real ribbon or you can make it out of gum paste or fondant. You can even print a bow on grease-proof thick cardstock paper. Cut it out and stick that on the cake. Also, pink frosting can be used instead of brown.
Use a different piping tip- To give the bear a different look. For example, you can use a french tip or even the grass tip I used for this Cookie Monster Cake (Sesame Street) and Easy Grinch Cake.
Use white icing- And apply the same concept but make a polar bear or panda bear.
Add cake fillings- Such as Chocolate Ganache, Caramel Sauce, Whipped Cream, Chocolate Whipped Cream, Strawberry Jam, Raspberry Pie Filling, Strawberry Pie Filling, Crockpot Apple Butter, or even Homemade Vanilla Pudding.
Use fondant instead of cookies and frosting- In order to make the bear's ears, nose, and mouth.
Use different cake flavors- Like this Best Vanilla Cake, Moist Chocolate Cake, Pink Champagne Cake, Red Velvet Cake, or Lemon Cake.
Make individual cakes- Or cupcakes using the same decorating techniques. You'd need to use mini chocolate chip cookies or fondant for the ears and nose area.
How to make easy teddy bear cake recipe without special pan?
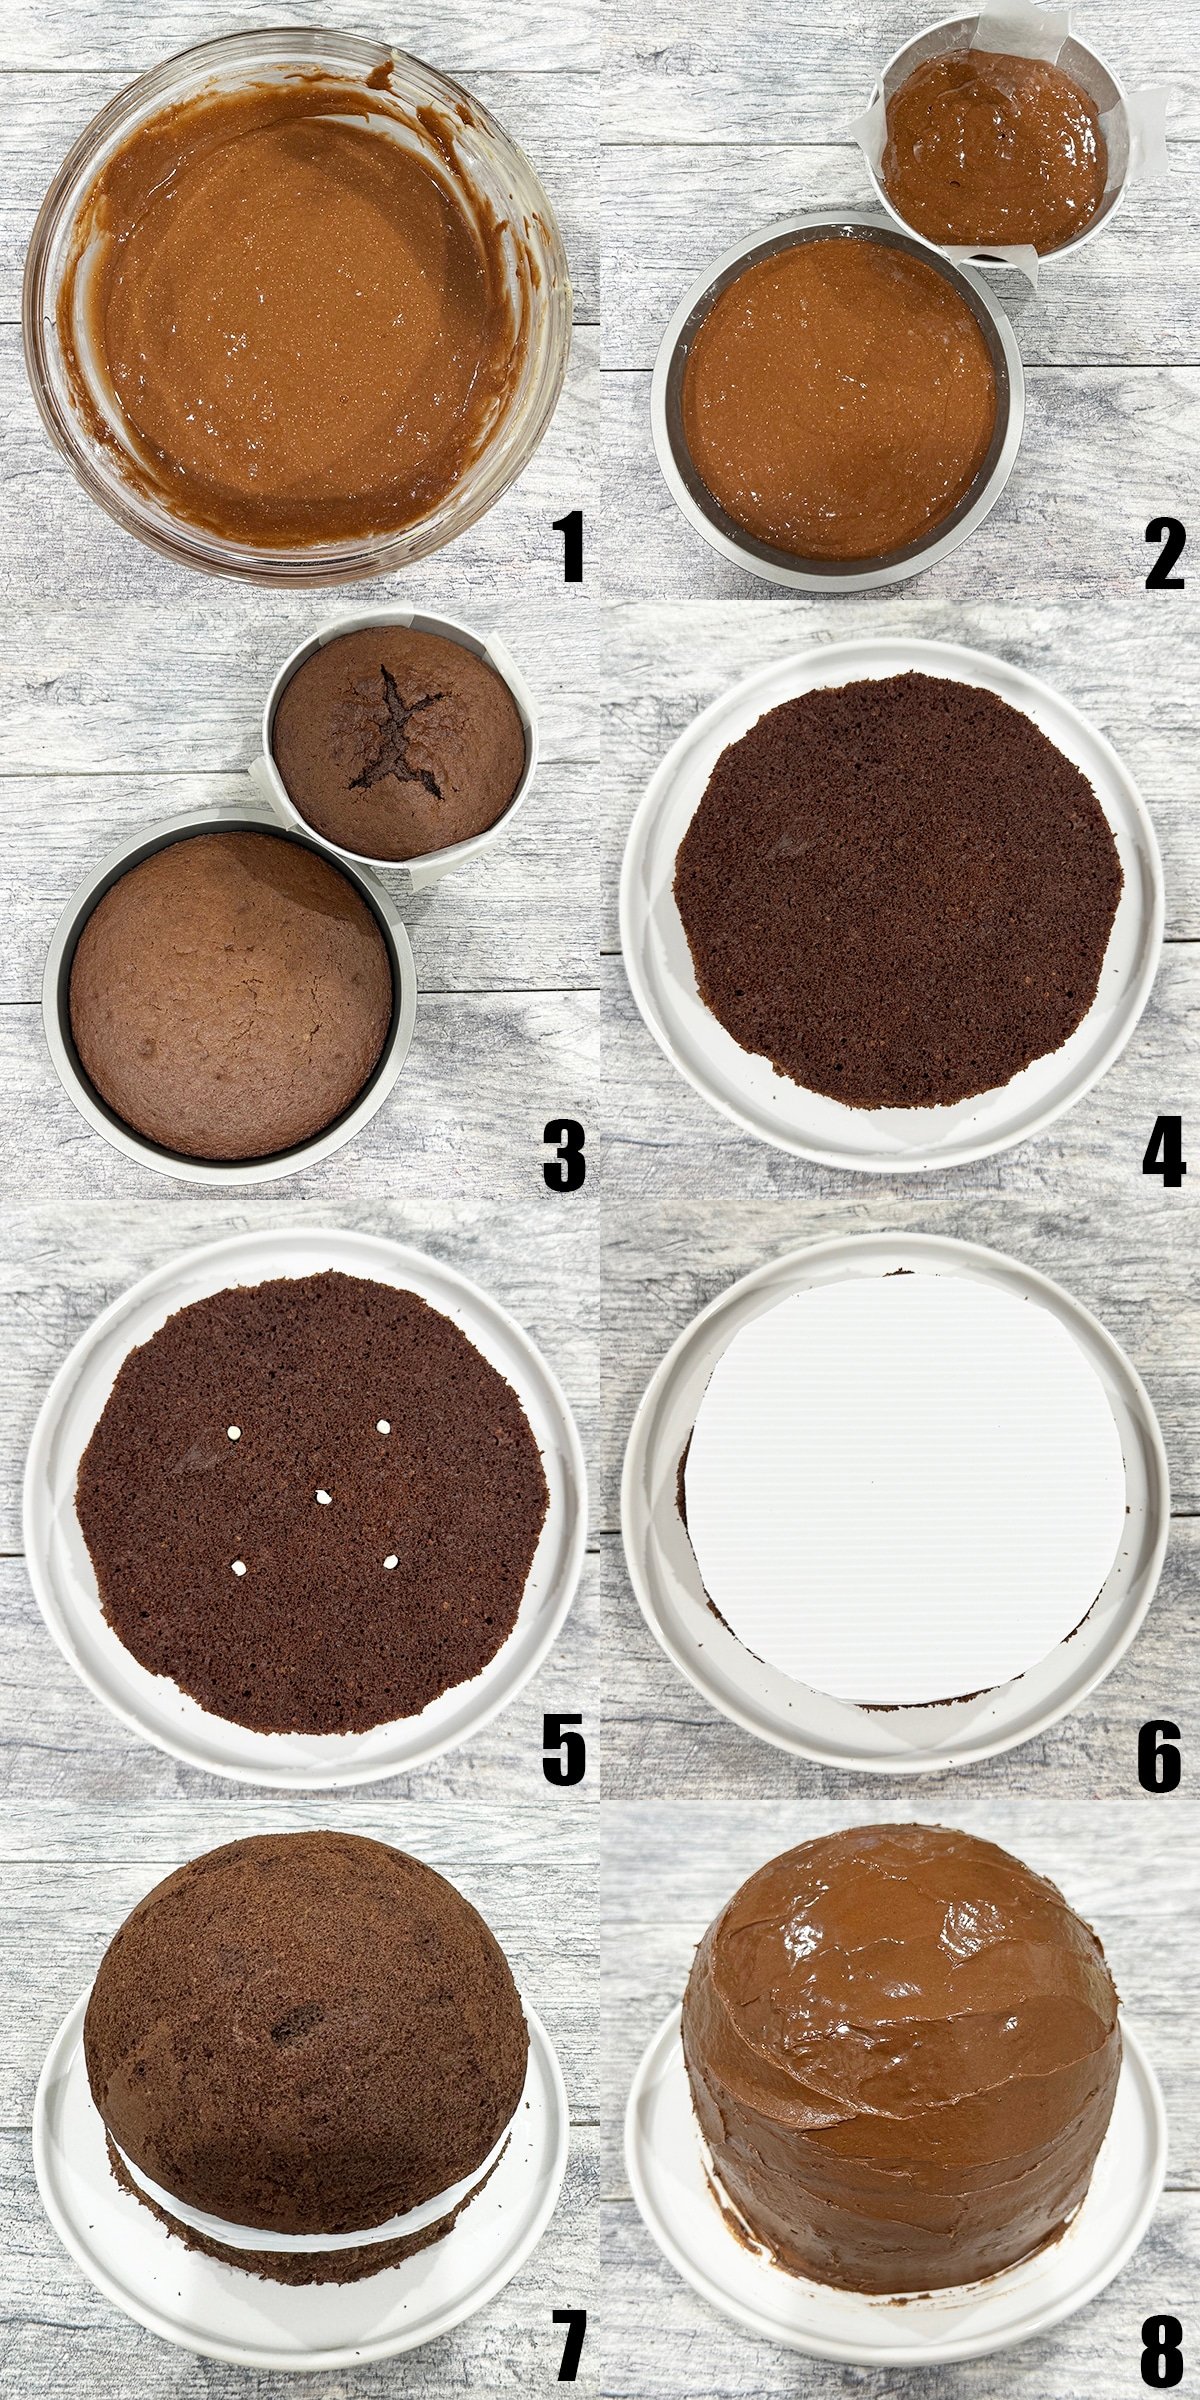
- Prepare cake batter- And pour into 2 separate prepared pans. (Image 1,2)
- Bake cakes- And allow them to cool completely while preparing the frosting. (Image 3)
- Use a sharp serrated knife- To trim the sides of the cake to ensure the overall width of both cakes is the same.
- Place the round cake- In the center of a cake stand. (Image 4)
- Push in 5 dowels- Around the middle of the cake for support. (Image 5)
- Spread icing on top of the cake- Then place a cake board on top (Image 6)
- Spread icing on top of the board- Then place the dome cake on top of the icing. (Image 7)
- Cover cooled cakes with icing- And then prepare piping bag and tips. (Image 8)
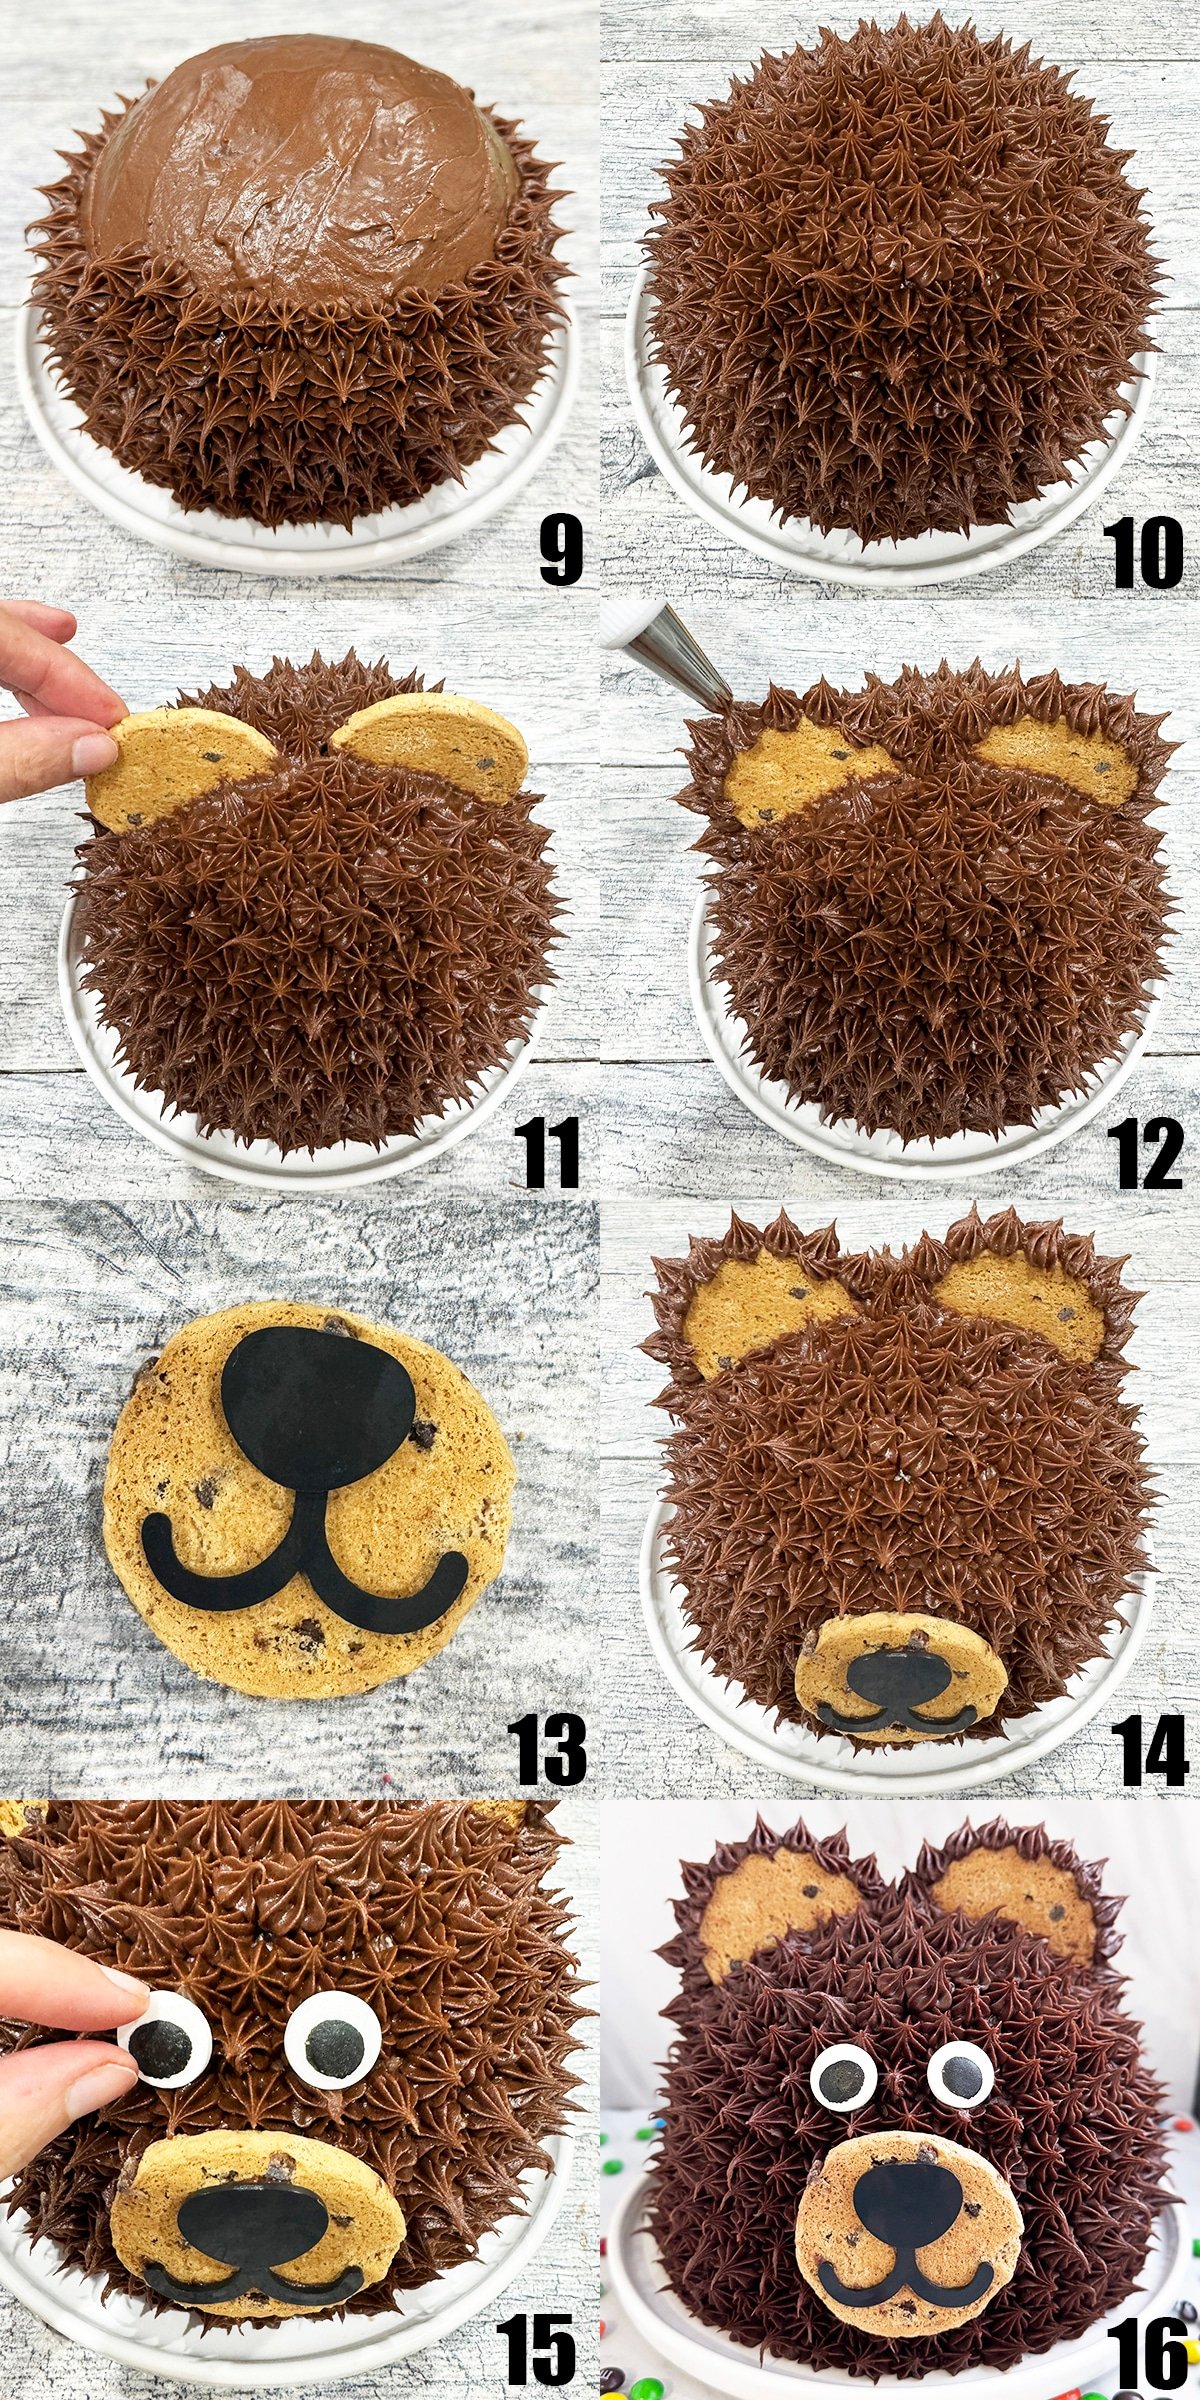
- Start piping from the bottom- Of the cake and work your way upwards. (Image 9, 10)
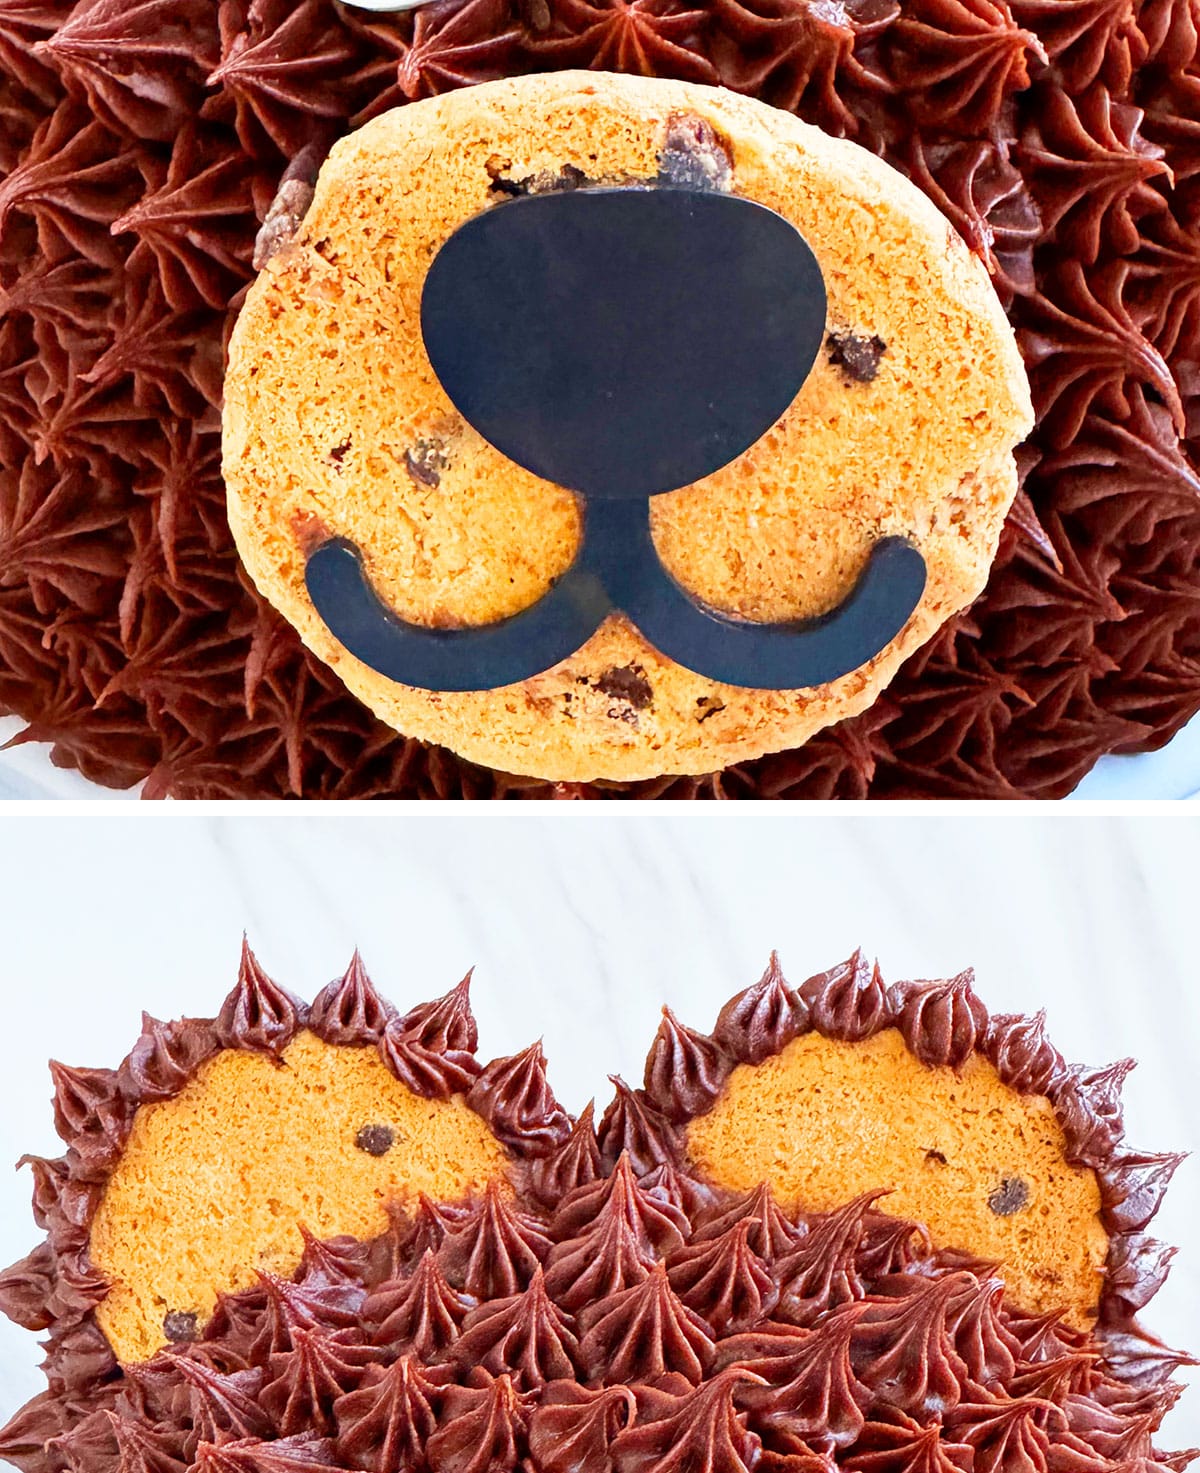
- Make the bear's ears- By pushing two cookies on top of the cake and piping stars along the edges. (Image 11,12)
- Pipe a nose and mouth- On top of a cookie with black frosting. (Image 13)
- Stick this cookie- On the frontal area of the cake. (Image 14)
- Place the two large sprinkle eyes- Above the nose and enjoy. (Image 15, 16)
Tips and techniques
Support is very important because- You don't want the cake to sink into itself. Use wooden dowels or bubble tea straws cut to the same height as the round cake and place them in the middle.
Don't do all the work in one day- Because it can take a lot of time and you don't want to rush the art! Give yourself breaks. Maybe bake the cake one day, make the icing the next day, and then decorate the cake on the third day. This is less stressful and then you can have more fun with it.
You can use homemade or store bought cookies- I used store-bought chocolate chip cookies to make ears for convenience but if you have time, make these Best Chocolate Chip Cookies (Soft and Chewy) or Small Batch Peanut Butter Cookies (With Chocolate Chips).
You may need to double the recipe- That's linked in the recipe card to fill both the round and domed pans.
Use a spatula to frost- The entire cake smoothly in icing.
Chill cake before decorating- You don't want to put frosting on a warm cake, because this makes the frosting melt and slide off the cake.
Frosting technique- Hold the piping bag at a 45 degree angle along the base of the cake. Squeeze bag until icing comes out and sticks to the cake and gently pull away while releasing pressure to pipe a pointy star. Continue doing this until the entire cake is covered is buttercream stars.
If you are short on time- Simply use store-bought frostings and cookies instead.
Recipe FAQs
Use a sharp serrated knife to efficiently cut the cake and ensure the dome and round cakes are both the same diameter.
You can a use a Wilton star tip #18 or #21 or a comparable star tip from another brand.
You need to fill your piping bag with firm to medium-firm frosting consistency. Hold the piping bag at a 45 degree angle then squeeze bag until icing comes out and sticks to the cake. Then gently pull away as you reduce pressure.
Storage
- Make ahead instructions- A decorated cake can be made and kept in the fridge 2-3 days in advance. You can also place the cakes and frostings in separate containers in the fridge for up to 3 days, then decorate per instructions. Or freeze separately for one month, thaw, and decorate.
- Room temperature- Don't leave out for more than 1 day, especially if it is hot, because you don't want the frosting to melt off. It's best if served within 2-3 hours. If you add a perishable filling like whipped topping, don't leave out for more than a few hours and otherwise keep in the fridge.
- Refrigerate- Leftovers can be stored in a sealed container in the fridge for up to 3 days.
- Freeze- Unfrosted cake and the frosting can be placed in separate sealed containers and placed in the freezer for up to 1 month. Thaw in the fridge overnight and decorate per instructions.
More easy decorated cakes
- Easy Caterpillar Cake (And Party)
- Football Cupcakes Cake (And Party)
- Pink Ombre Mother's Day Cake (And Party)
- Easy New Year Cake (Clock Cake)
- Easy Karate Cake (Black Belt Cake)
Teddy bear party details
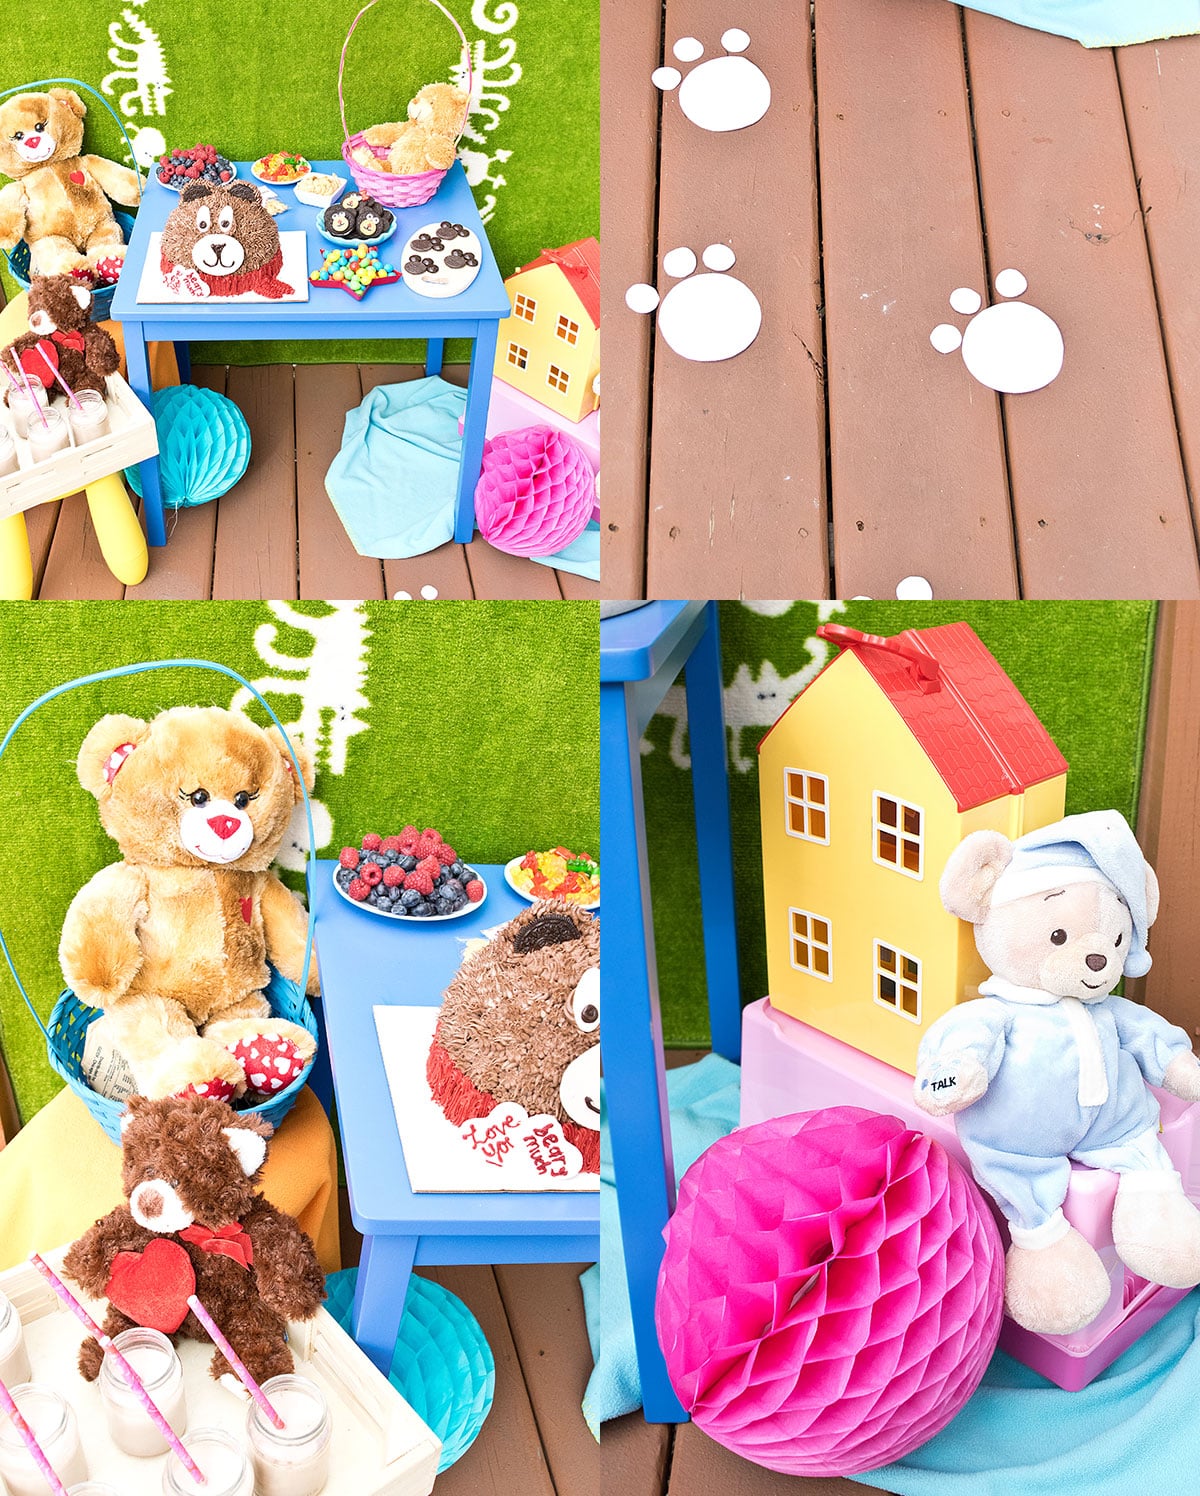
Every party needs a dessert table and I set up mine outside in the backyard with a lovely green backdrop. My little one even offered me his teddy bears, his favorite toy house and his little blue table and even yellow stool. I used all of those items to set up this fun dessert table. I placed some colorful poofy pompoms near the table to give everything a pop of color. As for those teddy bears, I put them in baskets and placed them randomly around the table. I even cut out paw prints, using white paper and taped them on the floor, leading from the main door all the way to the dessert table.
Dessert table details
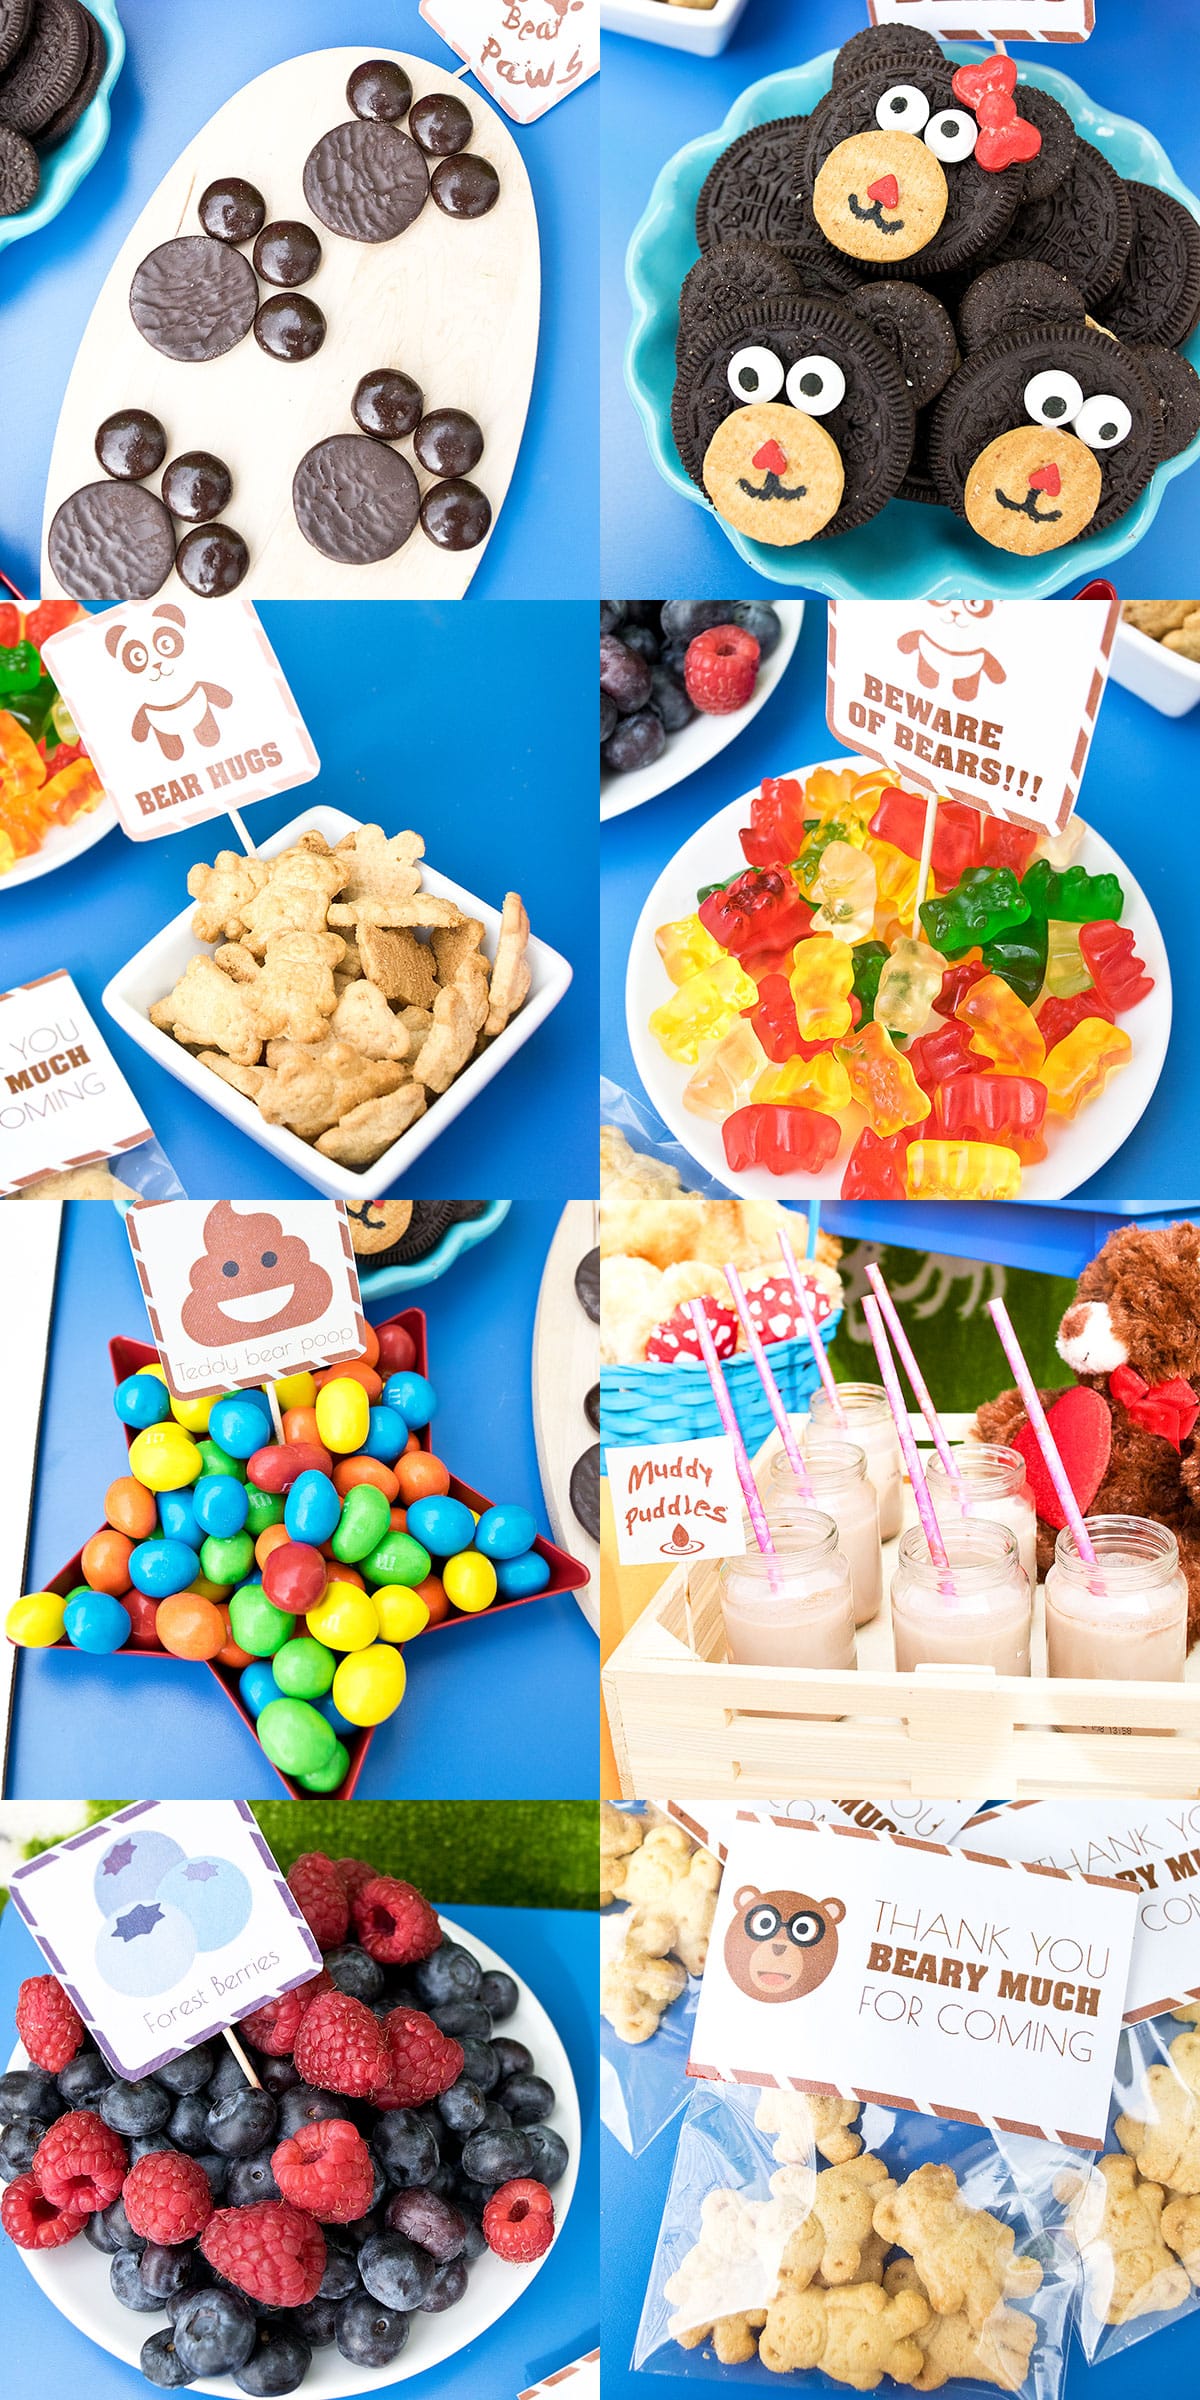
I think every party needs a dessert table. Here are some of the cool treats I made:
- Teddy bear poop- These were actually M&M candies.
- Muddy puddles- This was just small bottles of chocolate milk.
- Gummy bears- I got the colorful ones.
- Bear paws- These were round Thin Mint and Junior Mint candies arranged to look like a paw print.
- Bear hugs- These were simply teddy graham crackers.
- Forest berries- This was just a bowl full of fresh raspberries and blueberries.
- Teddy Oreos- I made boy bears and girl one. The girly ones had a red bow.
Obviously, you need party favors. I filled little bags with teddy graham crackers and a note saying: "Thank you beary much for coming!"
Party cake
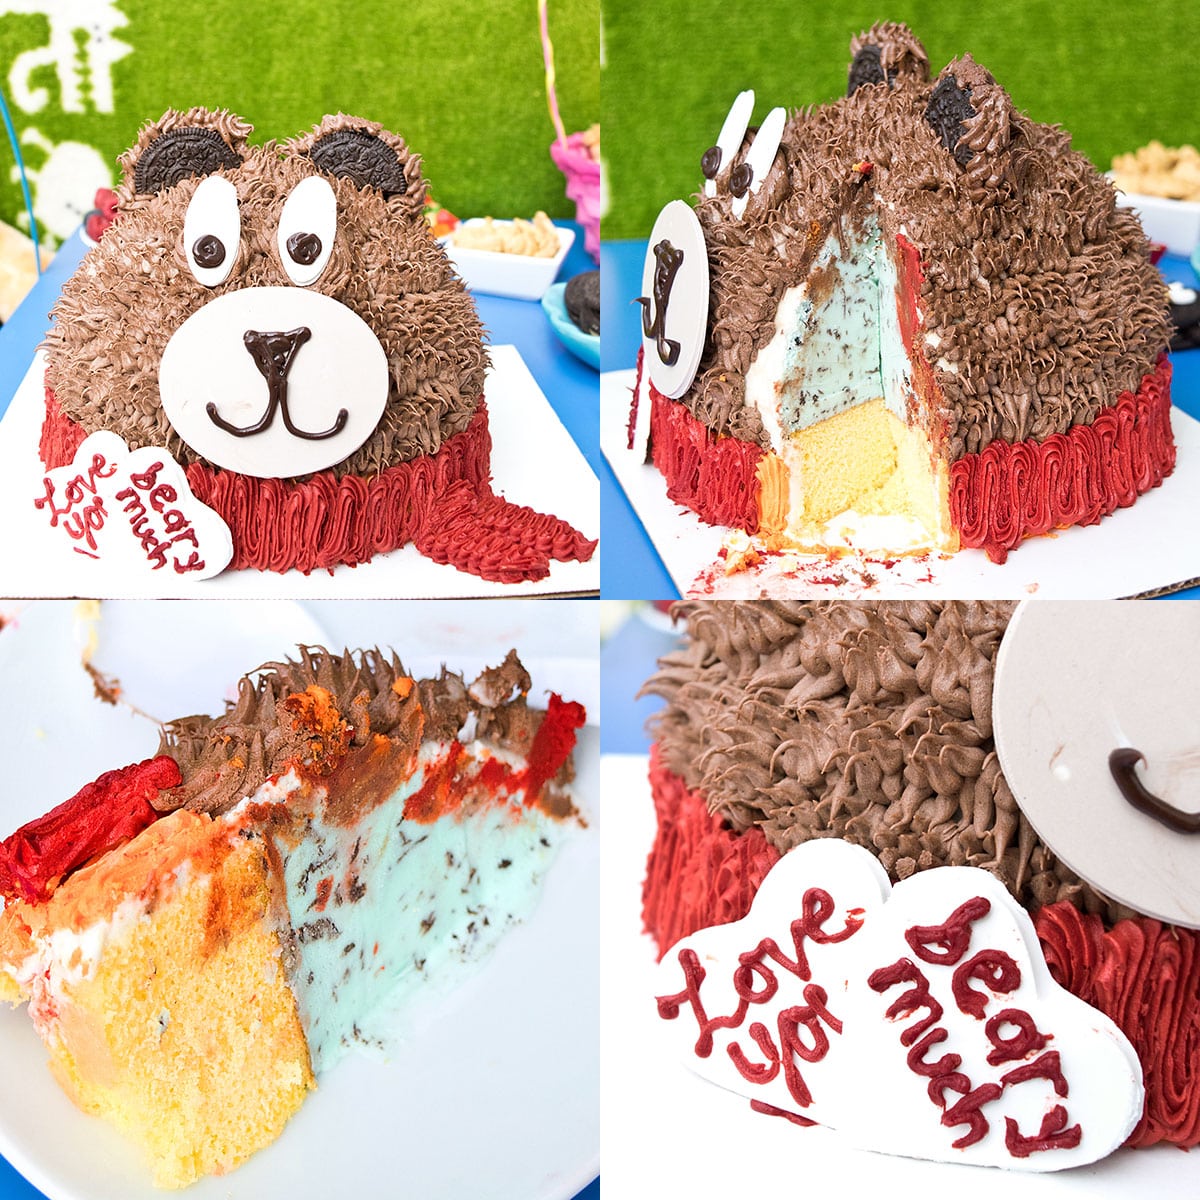
A party just won't be complete without a cake and this party had one show-stopping cake. Since I was busy with all the set up, I ordered an ice cream teddy cake from Baskin-Robbins. I even asked them to write a customized message on the cake: "Love your beary much." You can order this cake online with your own personalized message and it will be ready for pickup in 24 hours. This was a scrumptious mint chocolate chip ice cream cake with a vanilla cake base. The ears were made with Oreo cookies and the bear was even wearing a red scarf. By the way, you can also make a very similar cake, following the tutorial I have shared earlier in this post.
Recipe
Easy Teddy Bear Cake (With Chocolate Frosting)
Want to Save This Recipe?
Enter your email & I'll send it to your inbox. Plus, get great new recipes from me every week!
By submitting this form, you consent to receive emails from CakeWhiz
Ingredients
- 2 Chocolate cake Round 8x3 and 8 inch dome
- 4 cups Chocolate buttercream icing
- ⅓ cup Black icing
- 3 Chocolate chip cookies Can be homemade or store-bought
- Large eyeball sprinkles
Instructions
- Prepare cake batter and pour in an 8x3 cake pan and an 8 inch dome pan. You may need to double the recipe that's linked in the recipe card.
- Bake cakes and allow them to cool completely.
- While the cakes and baking the cooling, prepare the chocolate buttercream icing and black frosting.
- Use a sharp serrated knife to trim the sides of the cake (if necessary) to ensure the overall width or diameter of both cakes is the same.
- Place the round cake on a cake stand.
- Push 5 dowels around the middle of the cake for support.
- Spread icing on top of the cake.
- Place a cake board (same width as the cake) on top and press gently to secure into place.
- Spread icing on top of the board.
- Place the dome cake on top of the icing and press gently to secure into place.
- Use a spatula to frost the entire cake smoothly in icing.
- Chill cake in the refrigerator for 20 minutes.
- Fill a piping bag with chocolate icing and attach Wilton star tip # 18 or 21.
- You will start piping from the bottom of the cake and work your way upwards. Hold the piping bag at a 45 degree angle along the base of the cake. Squeeze bag until icing comes out and sticks to the cake and gently pull away to pipe a pointy star. Continue doing this until the entire cake is covered is buttercream stars.
- To make ears, push two chocolate chip cookies on top on the cake. Pipe buttercream stars along the edges of the cookies.
- Fill a piping bag with black icing and a small round tip. Pipe a nose and mouth on top of a cookie.
- Stick this cookie on the frontal area of the cake.
- Finally, stick the two large sprinkle eyes above the nose and enjoy.
Notes
- A cake like this will get heavy and can collapse. That's why wooden dowels are very important for support.
- Don't decorate a warm cake.
- Instead of using chocolate chip cookies to make ears, nose and mouth, you can use fondant too.
- If you are short on time, use store-bought frostings.
- Read additional tips and variations above.
- Leftovers can be stored in a sealed container in the fridge for up to 3 days.
Nutrition
An automated tool is used to calculate the nutritional information. As such, I cannot guarantee the accuracy of the nutritional information provided for any recipe on this site.

Leave a Reply