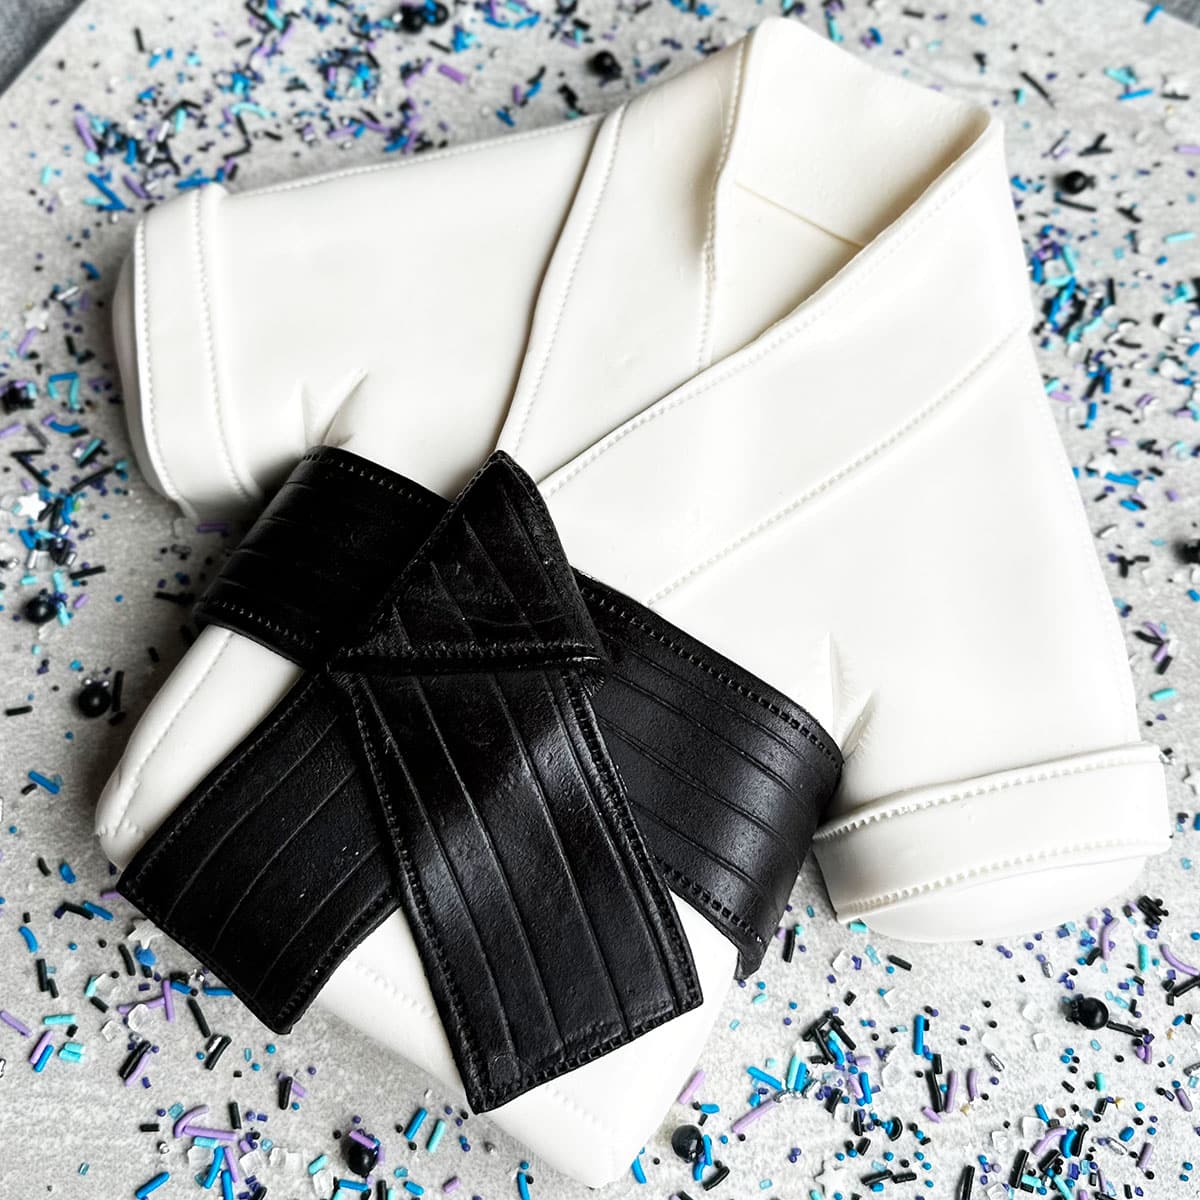
Learn how to make easy karate cake that's homemade with simple ingredients. This black belt cake is decorated with buttercream icing and fondant. Recipe and step by step tutorial are both included.
Want to Save This Recipe?
Enter your email & I'll send it to your inbox. Plus, get great new recipes from me every week!
By submitting this form, you consent to receive emails from CakeWhiz
This is the perfect birthday cake to celebrate your kiddo, or your rising star! In fact, I made this cake for my son who just got his black belt after almost 2 years of training and a lot of hard work. I wanted to copy his uniform in cake form to celebrate. I know it looks complicated, but it is really pretty easy to make. My son loved it! With the help of a few simple fondant tools, and a willingness to trust the process, you will be able to confidently make this cake too. For more fun ways to celebrate, check out this Treasure Chest Cake {With Kit Kat} that would make any kid ecstatic!
Jump to:
Key Ingredients
- Cake- I used a yellow sheet cake.
- Icing- Buttercream frosting makes a great crumb coat.
- Fondant- Black and white are needed.
How to make easy Karate cake with buttercream icing and fondant?
- Bake, cool, and freeze cake- Until it's firm.
- Cut a shirt shape- Using a sharp knife and template if needed.
- Ice cake- Fully.
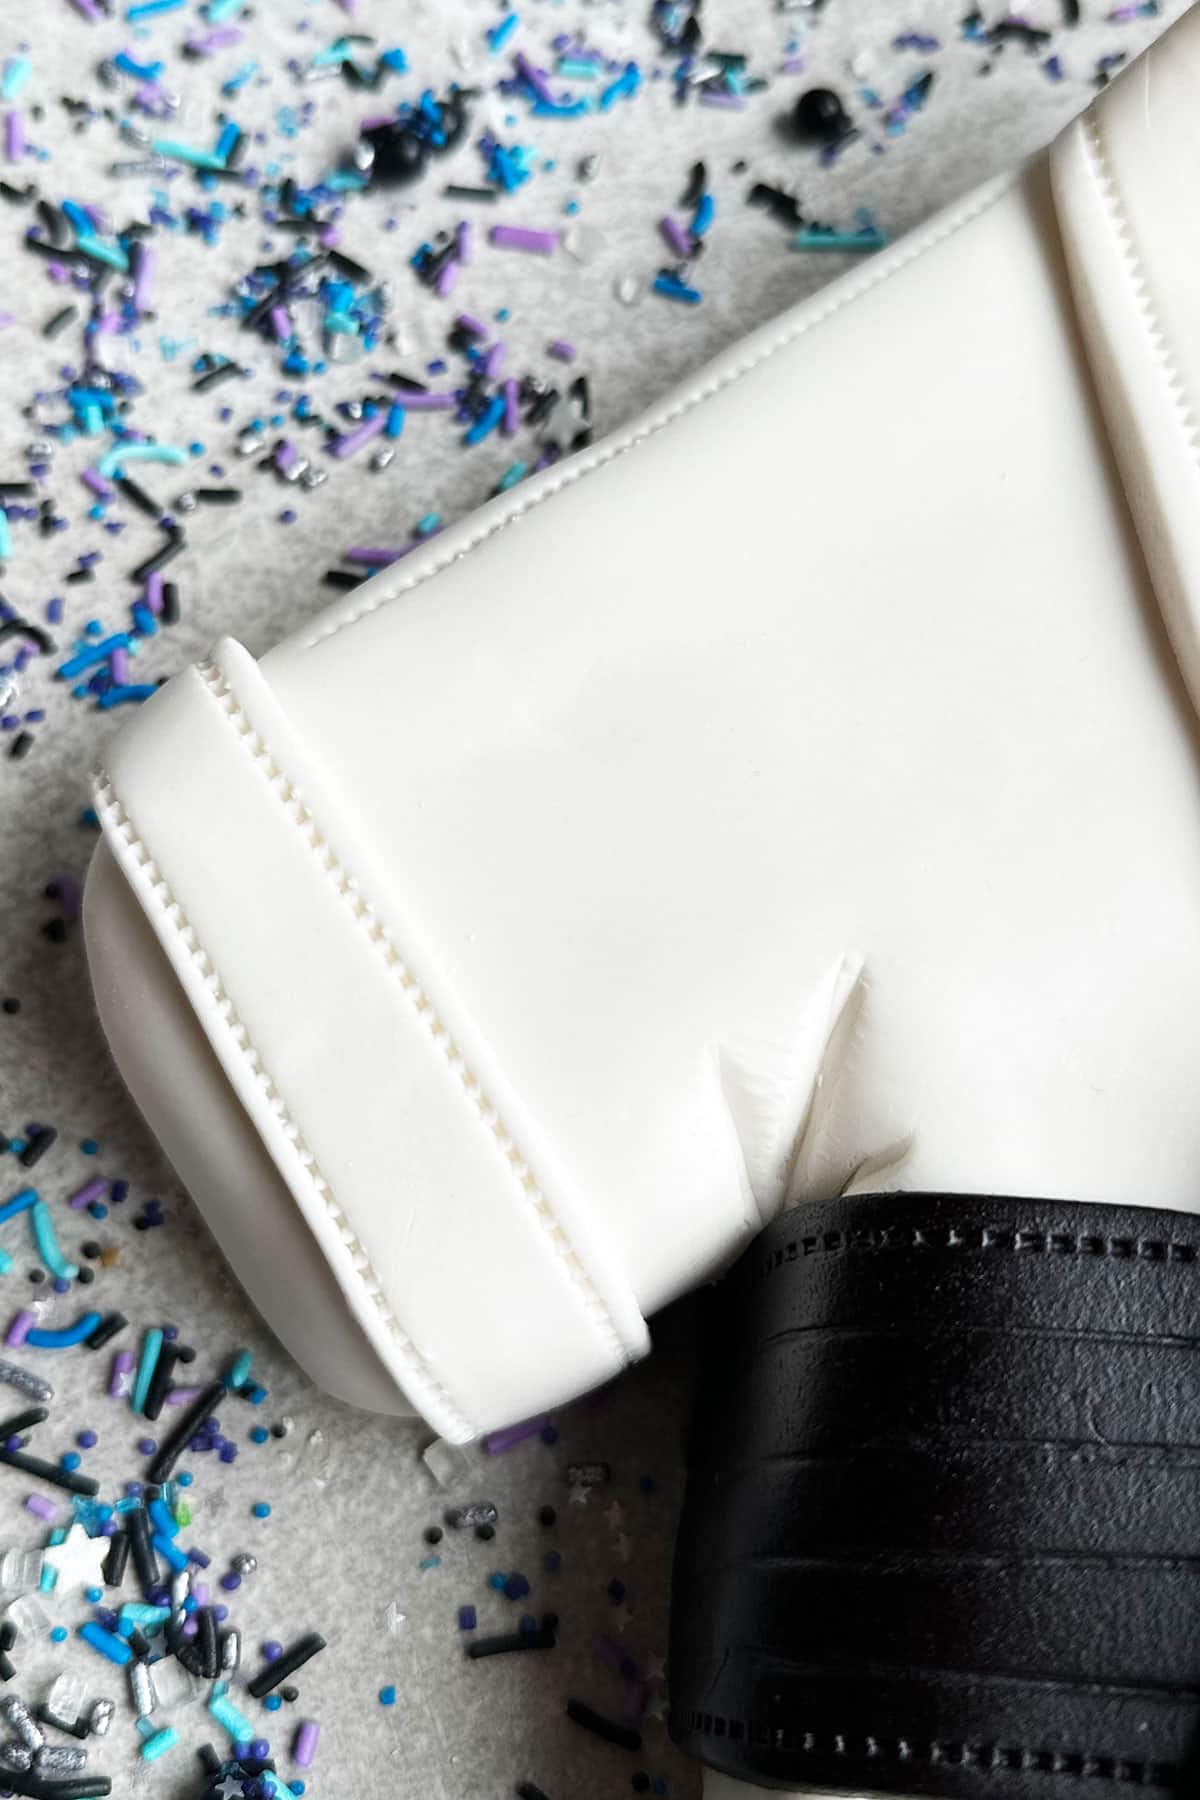
- Cover cake in white fondant- Add details on the sleeve, and crease in the "armpit."
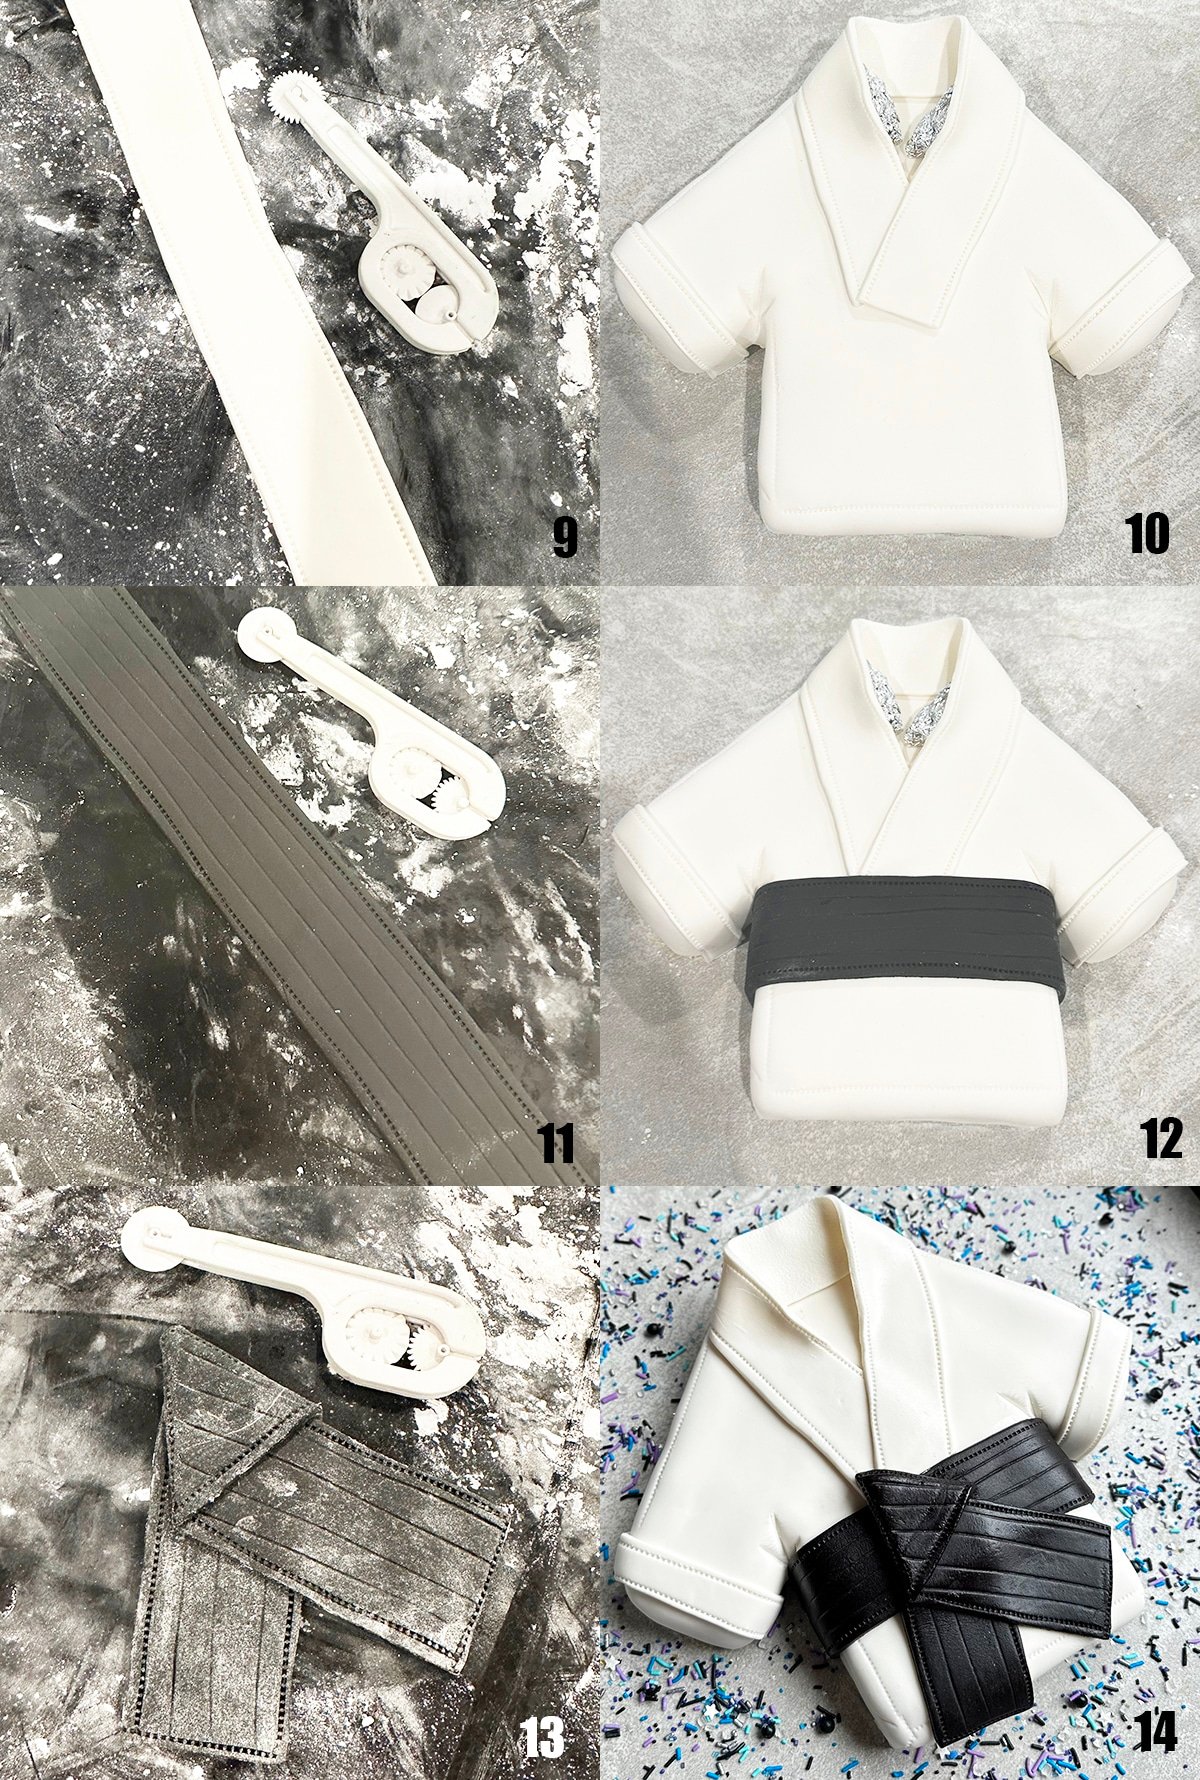
- Make the collar- Add "stitches" and attach to the cake.
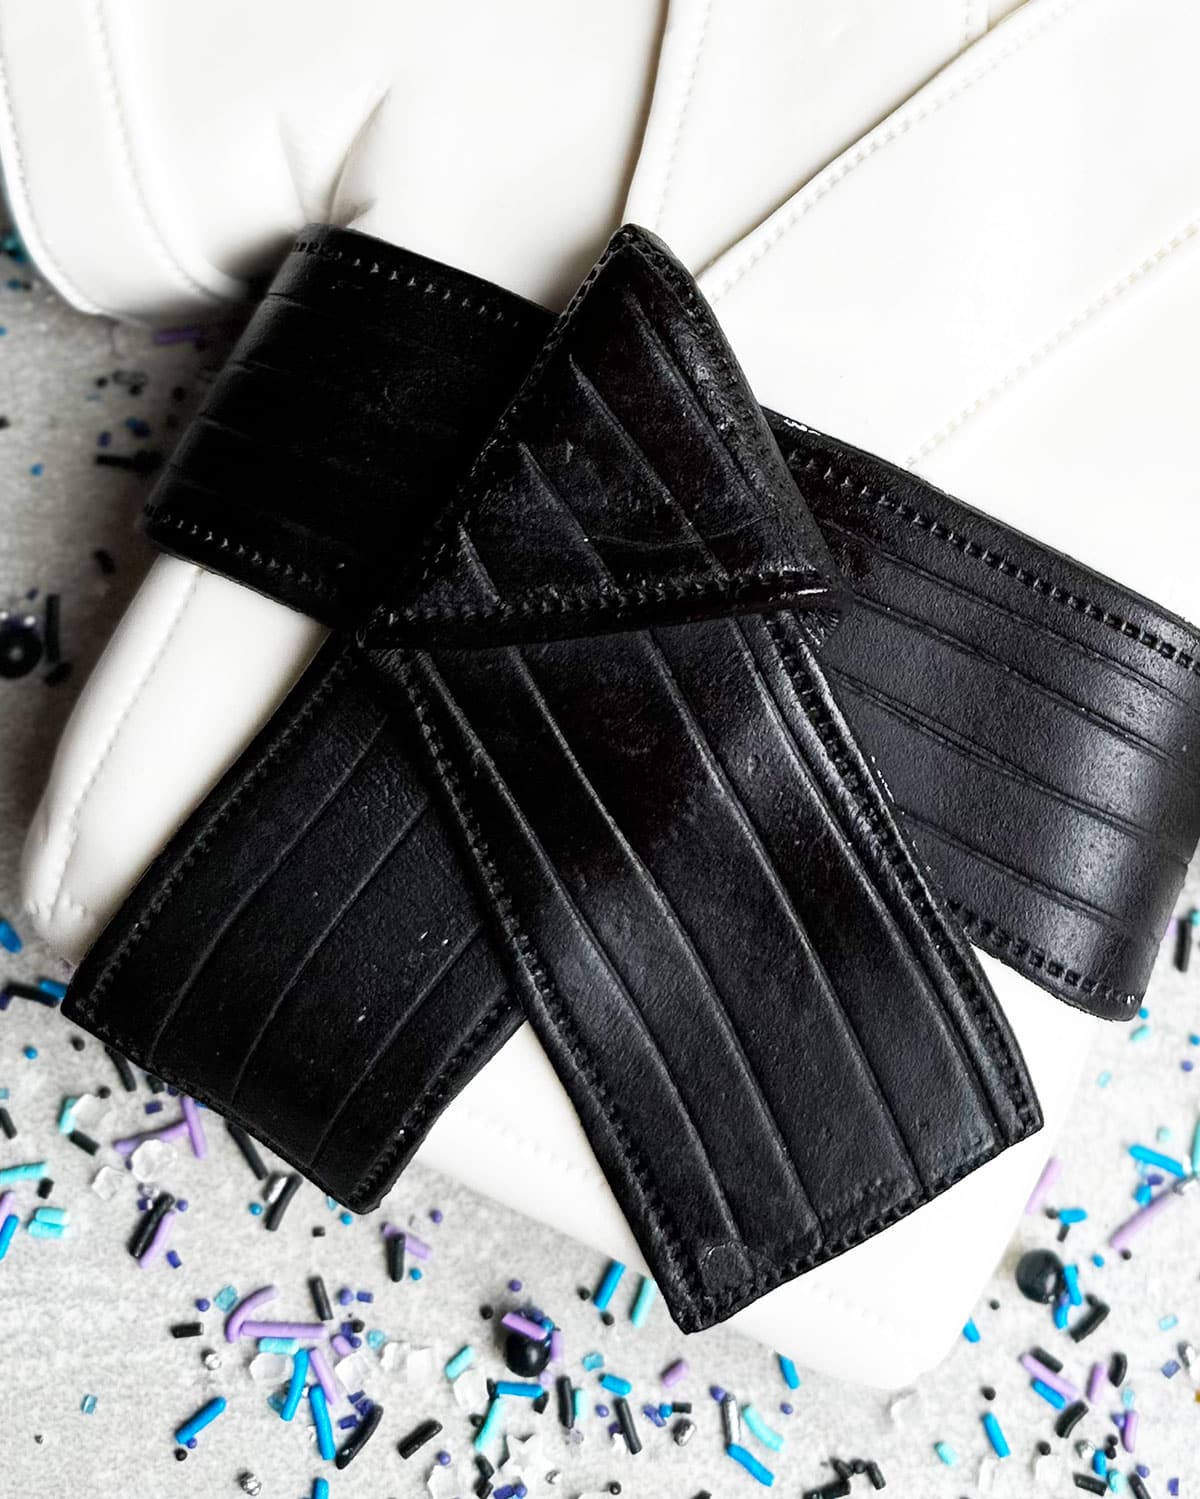
- Make the black belt- Using the "stitch" roller again. Attach it by brushing some water.
- Steam the cake- To add a nice shiny finish to the cake. Enjoy
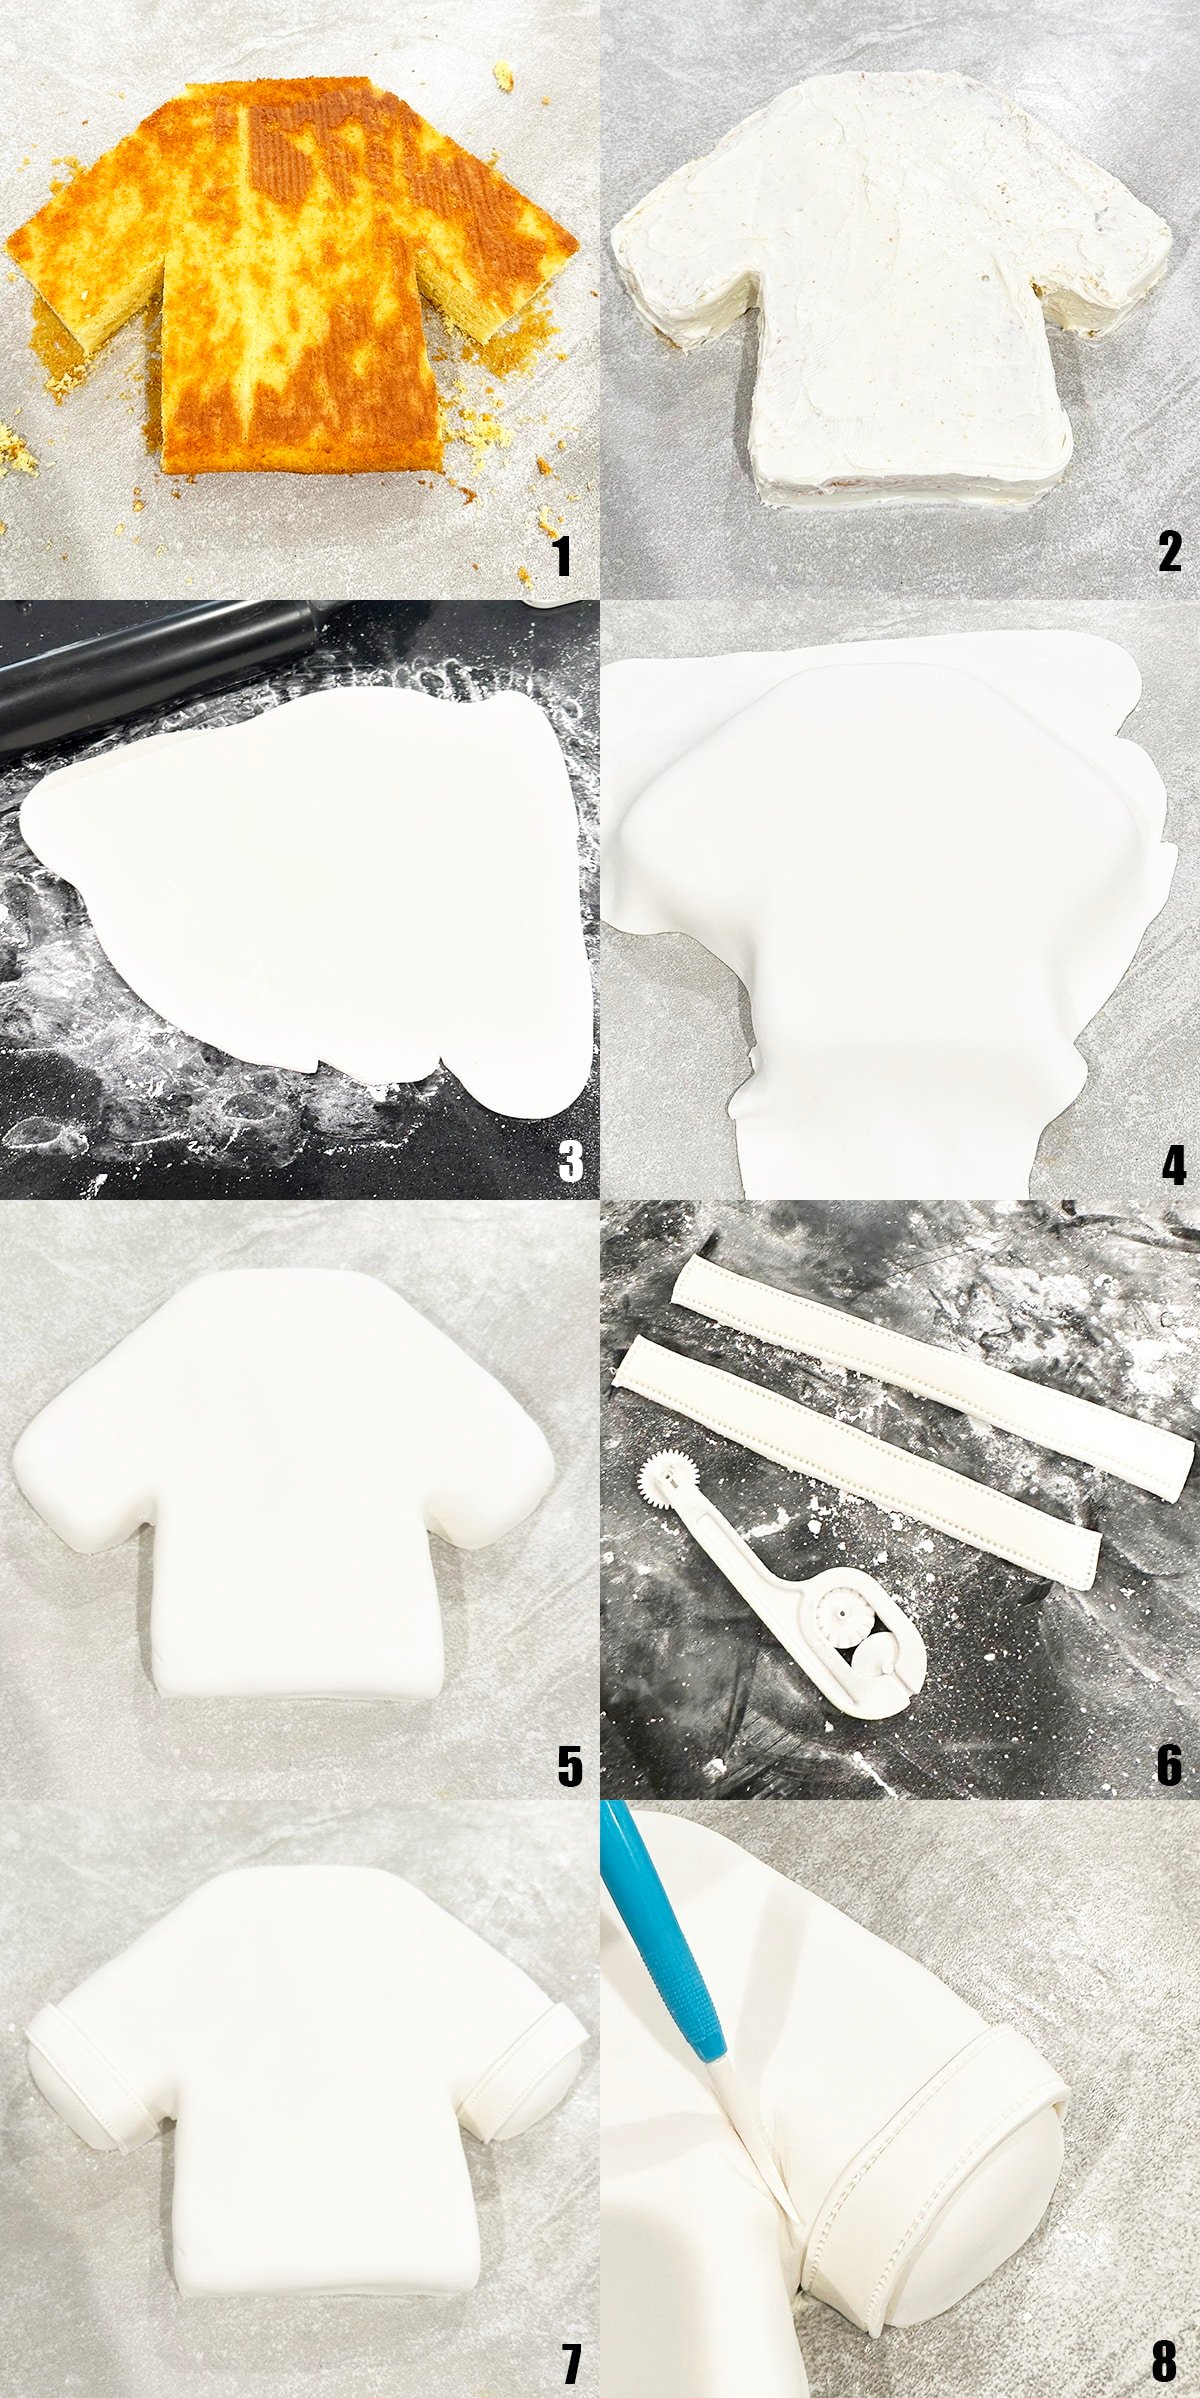
Hope you find this detailed step-by-step tutorial helpful in creating this cake.
Variations for martial arts cake
- Try other cake flavors- Such as this Chocolate Sheet Cake {With Cake Mix}or Texas Sheet Cake {From Scratch}. These both work well because you need a flat surface to cut the cake into a uniform shape.
- Try other frosting flavors- Such as White Chocolate Buttercream Frosting, Chocolate Buttercream Frosting Recipe, or Best Cream Cheese Frosting {Stable}.
- Fill cake- I didn’t do it, but you can add one such as How to Make Raspberry Pie Filling, How to Make Strawberry Pie Filling, or Homemade Cherry Pie Filling {Fresh or Frozen}.
- Make different colored belt cakes or striped belt- Change the color depending on the level that your child is at in class. Just use the right color of fondant.
- Decorate for another form of martial arts- Slight fondant decor modifications to this uniform cake can make it perfect for tae kwon do, judo or jujutsu.
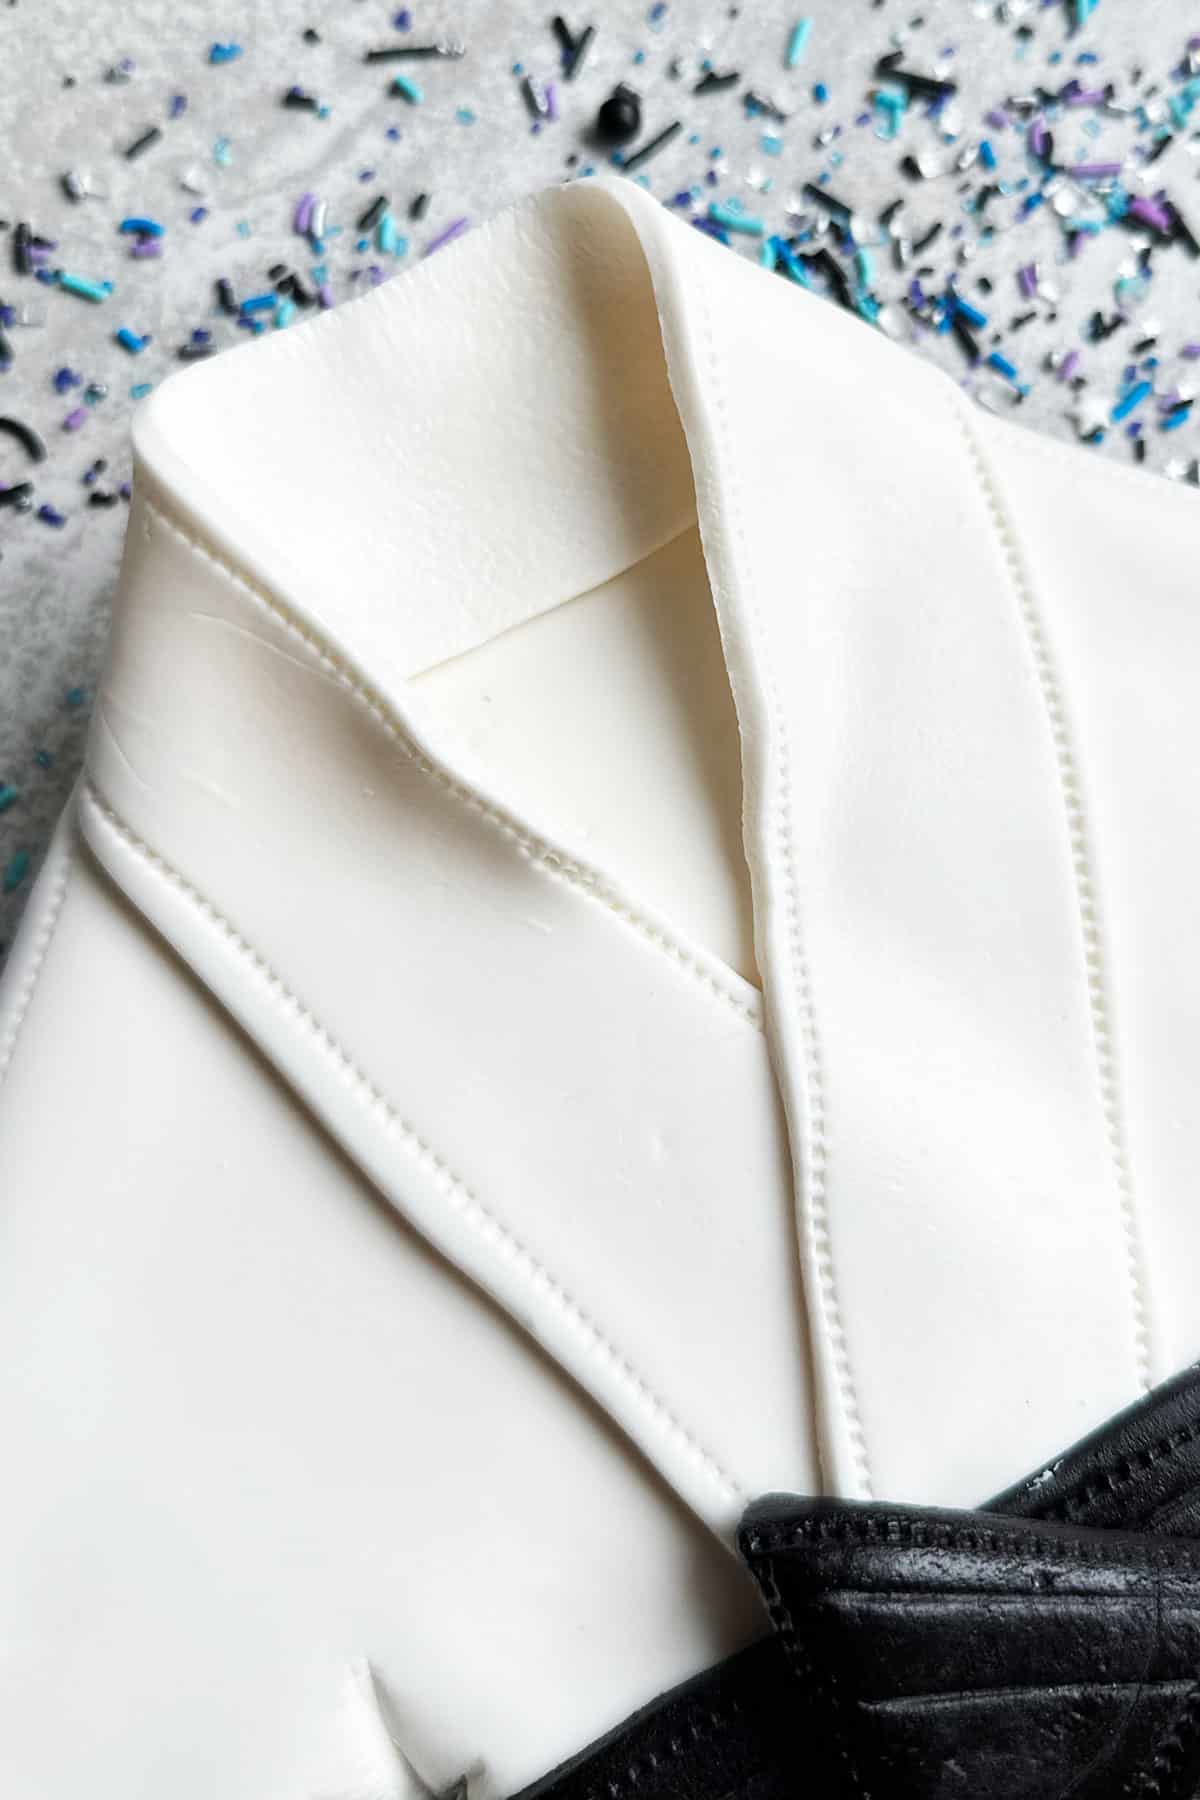
- Add details on the collar- My son’s uniform has writing in an Asian language on the collar that I could not replicate but if you are good at it, use an edible marker and draw those details there or use a fine tip brush and edible black food coloring. Just be careful and use a steady hard. You can’t go back and fix your mistakes because it’s black on white and any error will be very prominent. You will have to tear off the collar and redo it again if this happens.
Tips and techniques for black belt cake
- Must dust your work area with powdered sugar- Because this prevents the fondant from sticking and ripping.
- Definitely buy black fondant- It’s super hard to achieve that perfect deep color at home. It always ends up being super dark gray or dark navy blue.
- You need to fill the collar area with crumpled tissue or aluminum- Do so until the collar can hold its shape on its own. Remove it prior to steaming the cake.
- You must steam the cake- Because it gets rid of the powdered sugar residue.
- How to attach fondant details? Simply use brush on a little water as a "glue."
- Freeze the cake before cutting- Because this allows you to get cleaner shapes with a lot less crumbs.
- Use a pizza cutter to trim fondant– Because this makes cutting around the cake so much easier and smoother than using a knife.
- Cool cakes completely prior to icing– Because this prevents the frosting from melting and slipping right off the cake. It also prevents the fondant from becoming sticky.
Storage
- Make ahead instructions- This cake can be made a day in advance. Store it at room temperature in a covered box away from direct heat, sunlight, and moisture.
- Refrigerate- In a sealed container for up to 3 days. Know that the fondant will become slightly sticky upon refrigeration.
- Freeze- This is not recommended because when the cake thaws, condensation beads will make the fondant decorations sticky. However, you can make the cake and frosting ahead of time and freeze separately in sealed containers for up to 1 month. When you are ready to make this cake, thaw to room temperature and decorate as per the instructions below.
More easy homemade birthday cakes
- Cookie Monster Cake {Sesame Street}
- Easy Dinosaur Cake {Dino Cake}
- Easy Construction Cake {Excavator Cake}
- Easy Pig Cake {Fondant Pig Topper}
- Erupting Volcano Cake {With Dry Ice Smoke}
Recipe
Easy Karate Cake (Black Belt Cake)
Want to Save This Recipe?
Enter your email & I'll send it to your inbox. Plus, get great new recipes from me every week!
By submitting this form, you consent to receive emails from CakeWhiz
Ingredients
- 1 Yellow sheet cake
- 2-3 cups Buttercream frosting
- 1 cup Powdered sugar For dusting your surface when rolling out fondant
- 5 cups Marshmallow fondant White, black
Instructions
- Bake cake and allow it to cool to room temperature.
- Remove cake from pan and cover in saran wrap.
- Chill in freezer overnight or 3-4 hours until it's firm.
- Remove cake from freezer and discard saran wrap.
- Use a sharp knife to cut out a shirt shape. You can draw a template on parchment paper and place that on top of the cake and use it as a guide, when making your cuts.
- Use a spatula to cover the entire cake in icing smoothly. A few crumbs are fine.
- Sprinkle your work surface generously with powdered sugar.
- Roll out white fondant.
- Spread it over your iced cake and trim excess along the bottom with a pizza cutter.
- Add details on the sleeves. Roll out white fondant and cut two thin strips. Use the "stitch" cutter to create the stitch pattern. Stick these two strips on both the sleeves by brushing some water.
- Use a rounded fondant tool (or even the non-pointed side of a wooden skewer) to create crease marks in the "armpit" area of the sleeve.
- Make the collar. Roll out white fondant and cut out a thick strip. Use the "stitch" cutter to create the stitch pattern. Wrap this around the neck area of the cake by brushing some water. Hold the collar shape by stuffing it with crumpled gift wrapping tissue paper or crumpled aluminum foil.
- Make the black belt. Roll out black fondant and cut out a thick strip. Use the "stitch" cutter to create the stitch pattern. Stick this along the waist of the shirt by brushing some water.
- Roll out black fondant and cut out a thick strip again. Use the "stitch" cutter to create the stitch pattern. Fold it over to create a "knot." Stick this in the center of the belt by brushing some water.
- Use a steamer (that you use for clothes) to steam the cake from about 1 feet away. This will dissolve all the powdered sugar residue that's on your cake and also add a nice shiny finish to the cake. Enjoy!
Notes
- Read all my tips above.
- Leftovers can be stored in a sealed container in the fridge for up to 3 days. Please note that fondant decorations will come slightly sticky from the moisture in the refrigerator.
Nutrition
An automated tool is used to calculate the nutritional information. As such, I cannot guarantee the accuracy of the nutritional information provided for any recipe on this site.


Leave a Reply