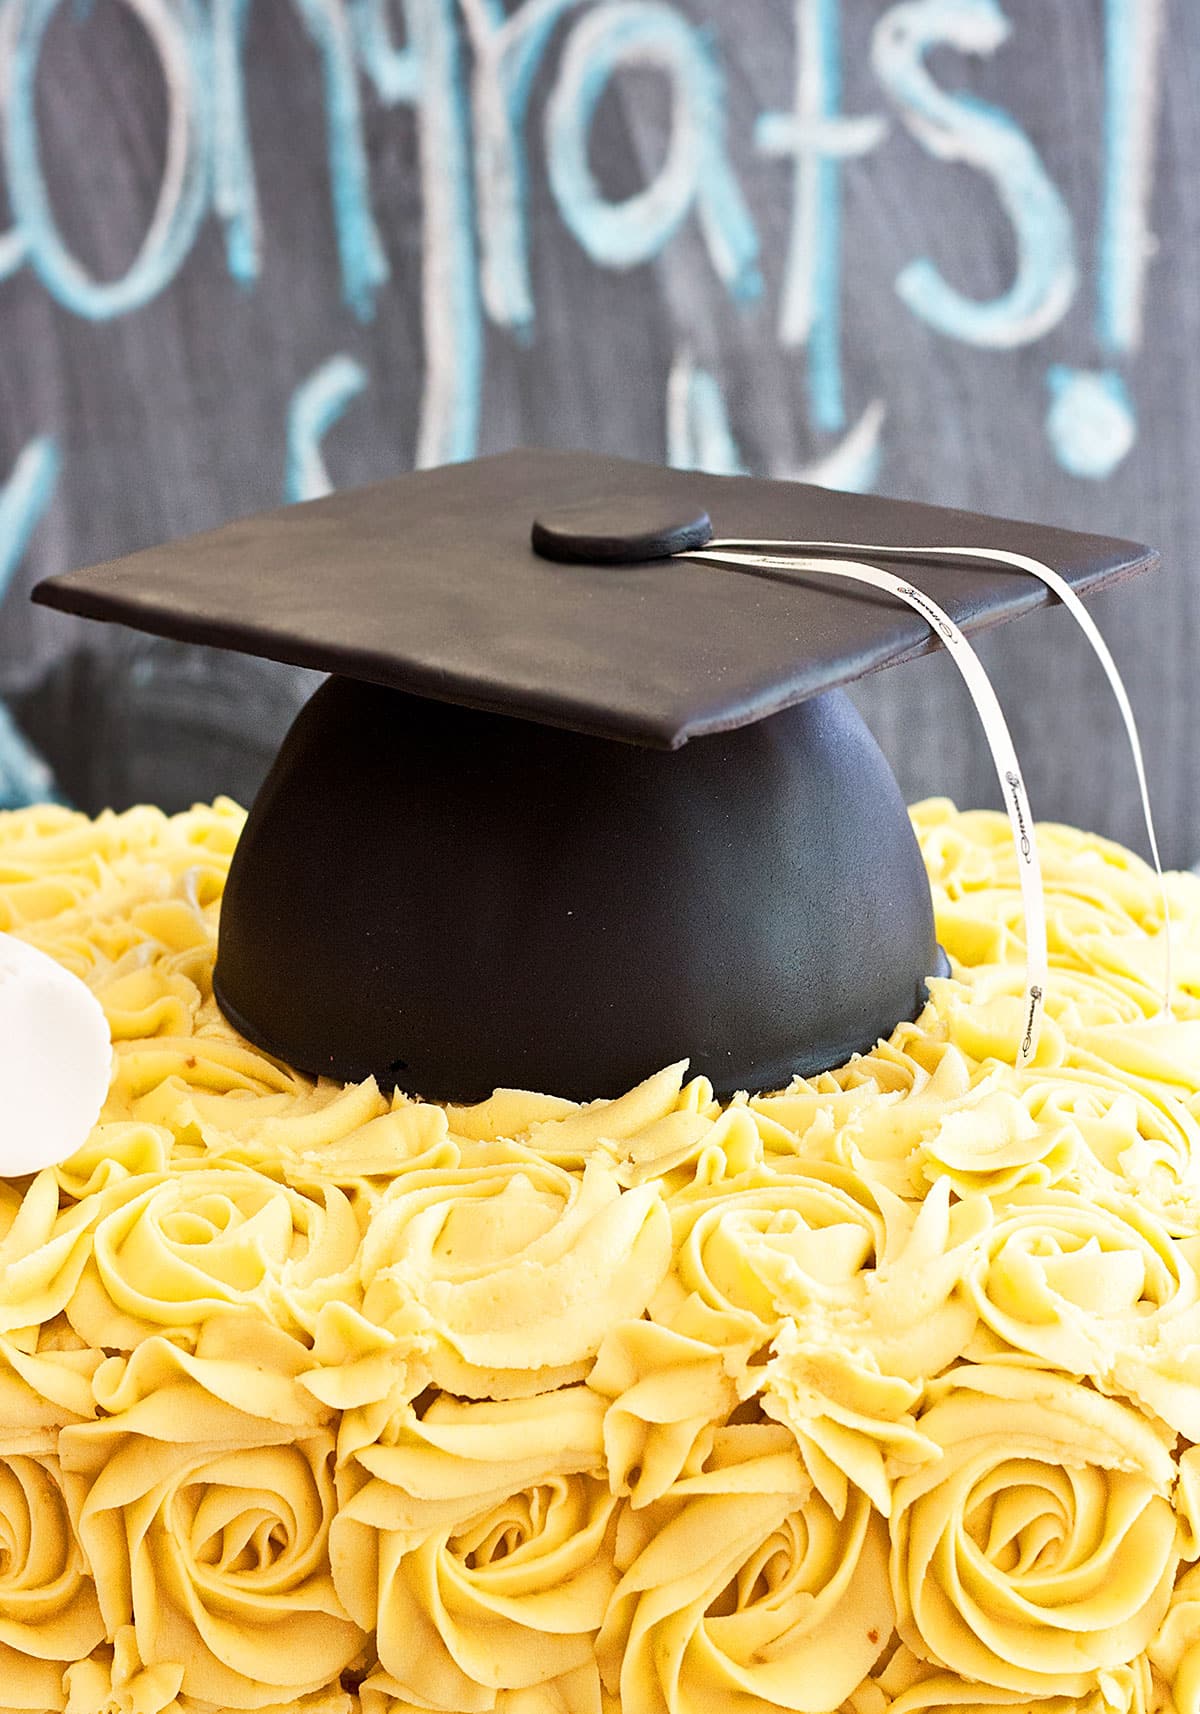
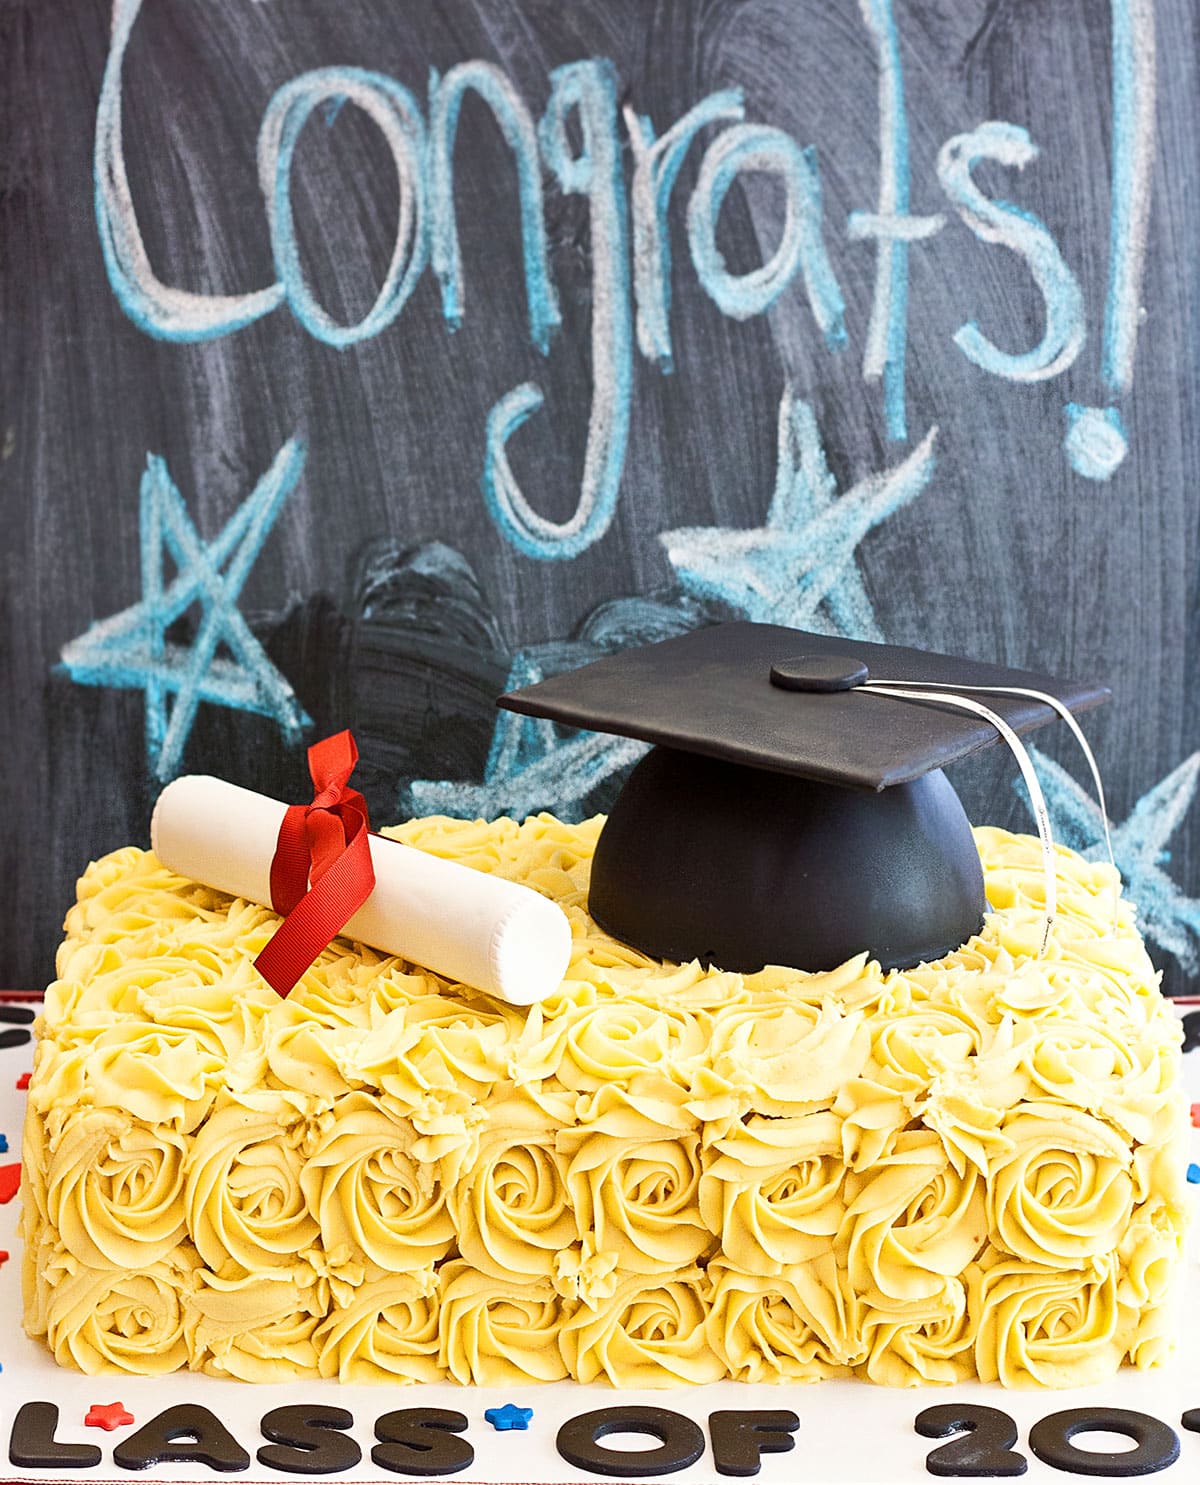
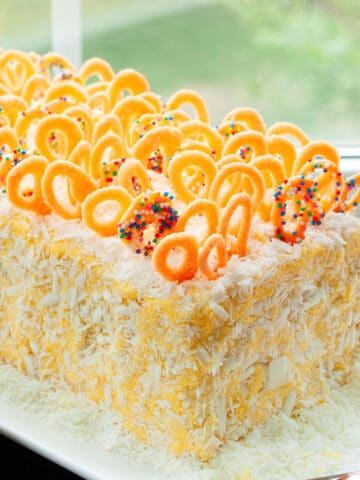
Learn how to make easy graduation cake with this step by step tutorial. This sheet cake is decorated with marshmallow fondant and buttercream frosting and includes a cap and diploma. Perfect for Kindergarten, high school or university graduates.
Want to Save This Recipe?
Enter your email & I'll send it to your inbox. Plus, get great new recipes from me every week!
By submitting this form, you consent to receive emails from CakeWhiz
I made this cake for my sweet cousin's grad party. All she said was that she wanted a cap and diploma. The result was this big sheet cake that includes both of her requests. This turned out just as cute as my Graduation Cupcakes (Diploma Topper).
Jump to:
Key ingredients for graduation cake
- Cake- You will need to prepare 5 cakes for this.
- Frosting- I like to use classic buttercream.
- Rice krispie treats- This is used to create the diploma.
- Fondant- Used to make graduation cap.

Variations
- Try other cake flavors- Including my Best Red Velvet Cake. You can also make things extra celebratory by making this Funfetti Cake.
- Pair with another frosting- Like Best Cream Cheese Frosting or White Chocolate Buttercream Frosting.
- Use another color of icing- Instead of yellow, you could match it to the school colors using gel food coloring. Or just use the recipes for Red Frosting, Mint Frosting, or Easy Orange Frosting.
- Make smaller roses- I piped large roses on this cake but you can pipe smaller rosettes. That would also look very pretty. If you have never done this, check out this post on How to Make Rosette Cake (Buttercream).
- Make a fondant ribbon- Like I did with the Graduation Cupcakes instead of using a real piece of ribbon.
- Add a filling- Such as Homemade Caramel Sauce, Strawberry Jam, or Nutella. You can also make a Pinata Cake and fill it with sprinkles, mini candies, or chocolate chips.
- Try a different decorating technique- You don't have to do the rosettes, though I think they go beautifully with the graduation theme. Check out these Easy Cake Decorating Ideas (For Beginners) for new, simple ideas.
How to make easy graduation cap cake?
- Bake cakes- You will need two sheet cakes and a dome cake.
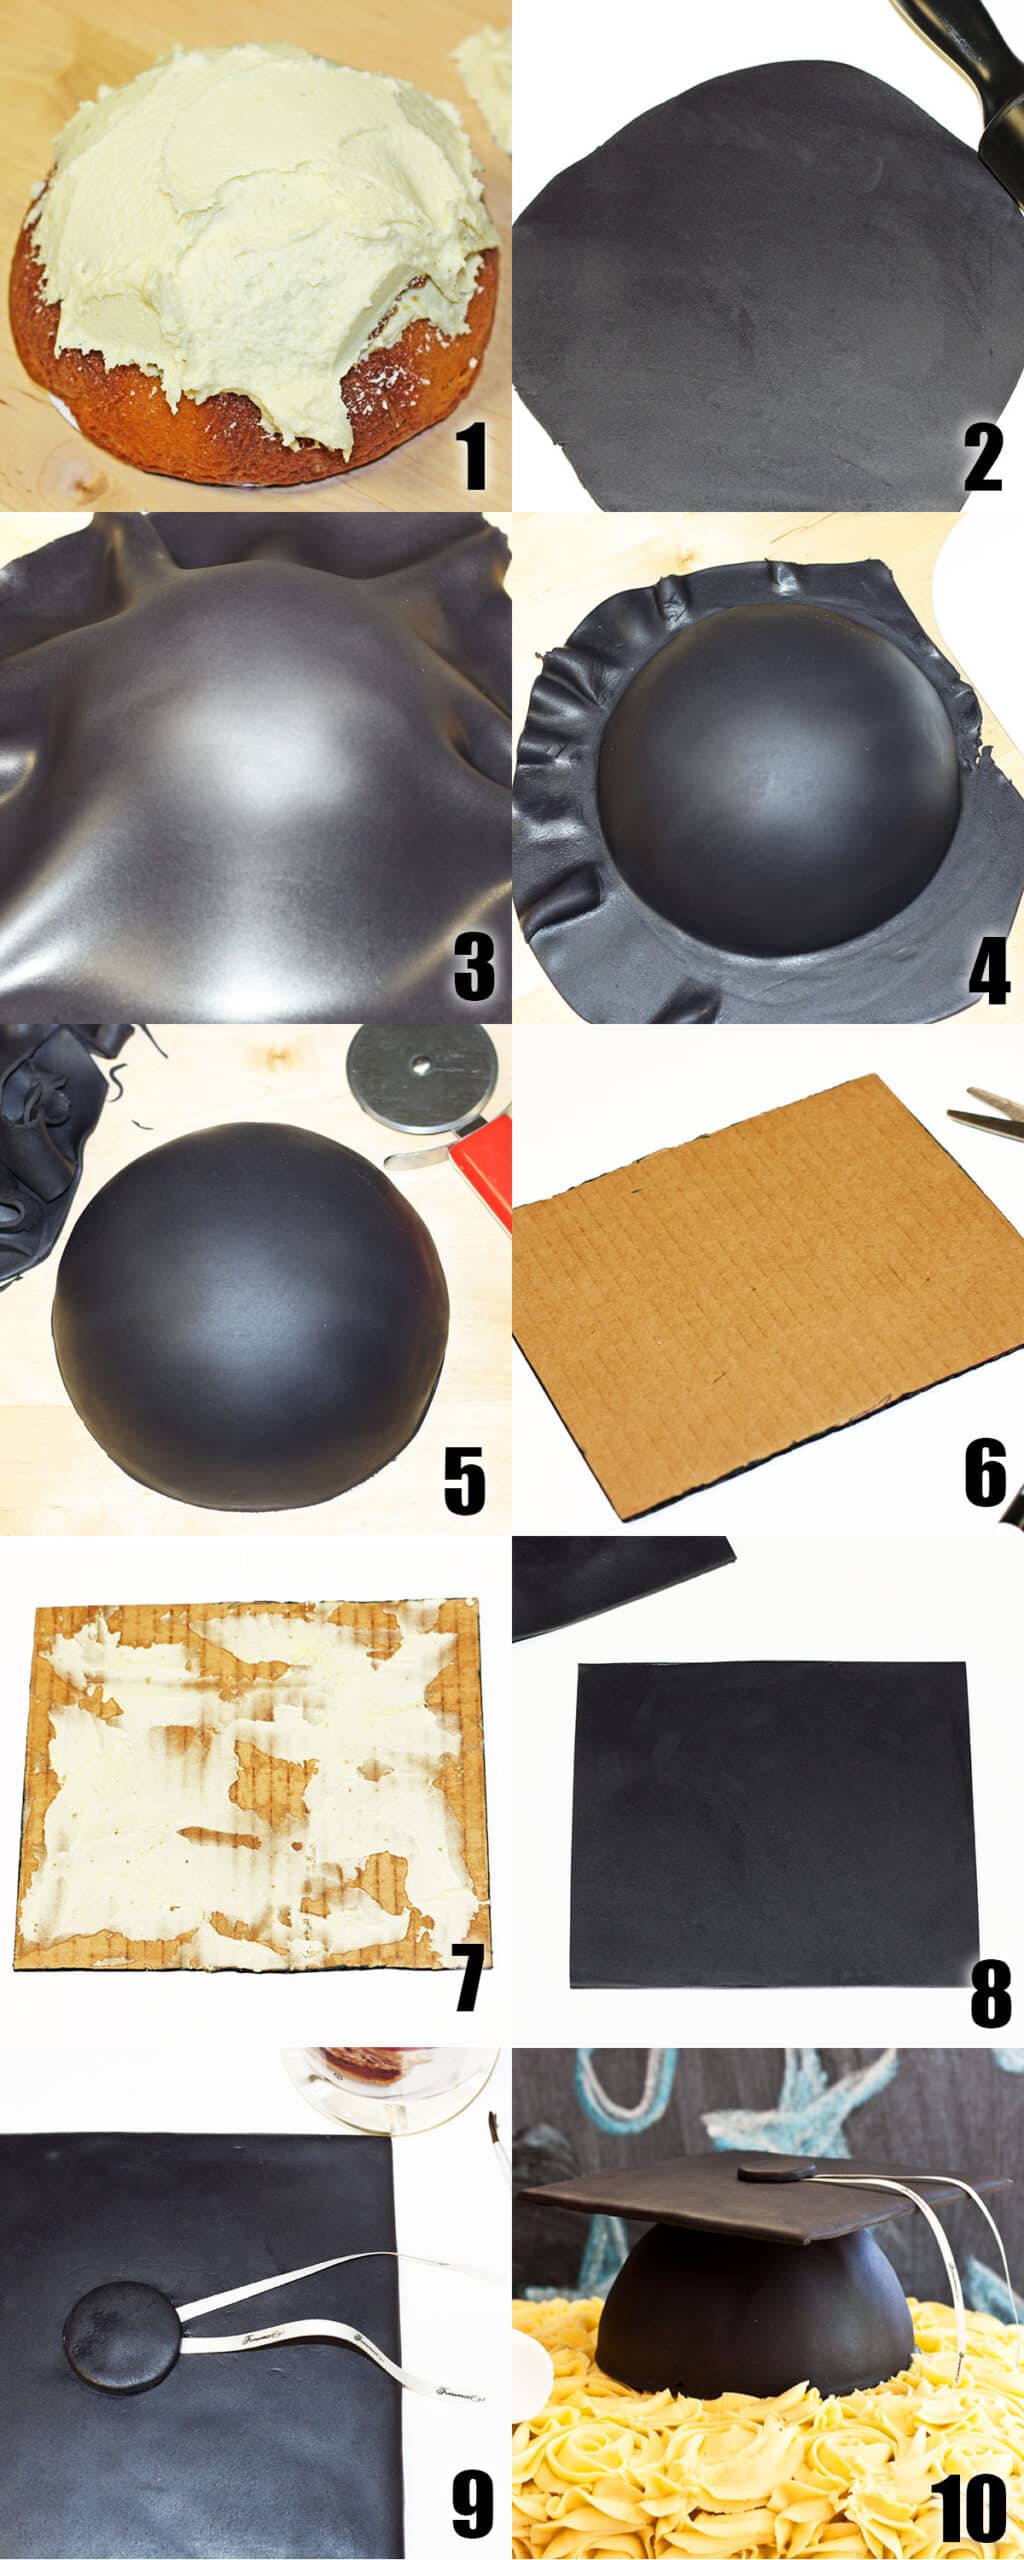
- Cover the dome cake- With icing and black fondant (Images 1-5).
- Use a square cardboard piece- And cover it in icing, black fondant, and details. Then stick on top of the dome (Images 6-9).
- Make an edible diploma- With rice krispie treats and fondant.
- Fill and ice the sheet cakes- Then pipe yellow roses all over.
- Place the dome cake and diploma- On top of the sheet cake (Image 10).
Tips and techniques
- Use dowels or bubble tea straws for support- When placing the cap cake and fondant diploma on top of the sheet cakes. If you don't use support, the weight will be too much and these pieces will dig into the cake and make a mess.
- Plan ahead- Bake the cakes and prepare the frosting about 2 days in advance and store them in sealed containers in the fridge. Assemble and decorate everything 1 day in advance. It will be less stressful this way.
- Use fresh marshmallows- When making rice krispie treats and fondant for best texture and flavor.
- Treat the frosting like glue- When making the cap and don't allow it to dry too quickly or it won't be tacky enough to stick things together.
- Edible marker- Can be used to cover anything the black fondant misses on the cardboard of the graduation cap.
- Cool all cakes fully- Before applying any frosting, fondant, or decoration.
- Chill frosting in the fridge- To make it easier to pipe and firm it up on the cakes before adding other decorations.
- Use a pizza cutter or knife- To cut off excess fondant.
- Sprinkle powdered sugar- On your work surface to prevent fondant sticking to it and getting too messy.
- Steam the fondant cake- Because this will dissolve the powdered sugar used on the work surface and give the cake a nice sheen.
Recipe FAQs
This depends on many factors including how experienced you are, if the cakes are already made and cooled, how big the cake is, and if you already have the fondant and frostings prepared. Altogether, making, preparing, and decorating a cake takes hours. Be sure to set aside a chunk of time or several chunks of time throughout the week to get this done. You don't want to do a rush job.
Brush it off with paintbrush to get most of it and/or steam the cake from a distance, which also gives a nice sheen.
Storage
- Make ahead instructions- You can make this cake up 1-2 days in advance and place it in a sealed container in the fridge.
- Room temperature- If there are no perishable fillings, then this cake can be left covered for about 5 hours.
- Refrigerate- Leftovers can be stored in a sealed container in the fridge for up to 3 days but the fondant decorations will become slightly sticky from the moisture in the refrigerator.
- Freeze- An unfrosted cake can be stored in a sealed container for up to 1 month. Store frosting in a separate airtight container for 1 month as well. Thaw and decorate as per instructions below when you are ready.
More easy decorated cakes
- East Gender Reveal Cake (Baby Shower)
- Easy Caterpillar Cake (And Party)
- Easy Summer Cake
- Pink Ombre Mother's Day Cake
- Easy Camping Cake (Indoor Camping Party)
Recipe
Easy Graduation Cake (Cap and Diploma)
Want to Save This Recipe?
Enter your email & I'll send it to your inbox. Plus, get great new recipes from me every week!
By submitting this form, you consent to receive emails from CakeWhiz
Ingredients
- 2 Yellow sheet cake
- 2 Chocolate sheet cake
- 1 Cotton candy cake
- 10 cups American buttercream frosting Tinted yellow with gel food coloring
- 4 cups Marshmallow fondant 2 cups of black and 2 cups of white
- 1 batch Rice krispie treats Can also use store-bought
Instructions
- Bake 2 yellow sheet cakes (Dimensions: 9x13), 2 chocolate sheet cakes (Dimensions: 9x13) and 1 cotton candy dome cake (5 inch diameter). Please note you will have leftover cotton candy cake batter than you can use to make cupcakes for another project of your choice.
- Keep these cakes aside to cool completely.
- While those are baking and cooling, prepare the yellow buttercream frosting.
Cap cake
- Let's make the cap cake first. Place the dome cake on a cake board that's the same size as your cake. Frost it smoothly in buttercream. Chill it for 20 minutes in the refrigerator. Roll out black fondant and spread it over this chilled cake. Smooth it out with a fondant smoother. Cut excess along the base of the cake with a pizza cutter. Push a bubble tea straw in the center. Keep aside.
- Make the top portion of the cap by cutting out a square piece of cardboard, using scissors. Use a black edible marker to color the edges so that if your black fondant doesn't entirely cover the sides, the cardboard won't show through. Spread a thin layer of icing on top and spread black fondant. Cut excess along the sides with a pizza cutter or knife.
- For the final touches of this cap, use a small circle cutter to cut out a small circular piece. Brush some corn syrup at the center of the square cardboard piece. Fold a ribbon in half and stick it here and then place the circle fondant piece on top. Press gently until it all sticks into place.
- Stick this prepared square cardboard piece on top of the dome cake with melted chocolate or thick royal icing. Steam everything to get rid of the powdered sugar residue.
Edible diploma
- Roll rice krispie treats in a long cylinder shape. Spread buttercream along the sides.
- Place this iced rice krispie treat log on rolled out white fondant. Roll from one end to the other end until the sides are covered. Cut excess with a sharp knife.
- Cut out 2 white fondant circles, using a cookie cutter and stick those on the top and bottom of the log with buttercream icing. Wrap a red ribbon around this diploma.
Assembling
- Place the 2 chocolate sheet cakes side by side on a large rectangle cake board. Spread icing on top. Place the other 2 yellow sheet cakes on top of the icing. Spread icing smoothly on the top and sides of the cake.
- Fill a piping bag with yellow icing and attach the large star tip (Wilton tip 1M) and pipe roses along the sides of the cake as well as the top of the cake. If you have never done this, check out this post on How to Pipe Red Rose Cupcakes where I share detailed instructions.
- Decide where you want to place the diploma and the cap on this sheet cake. Add dowels or bubble tea straws in those spots for support. Place those prepared pieces on the cake.
- To fill up space on the cake board, cut out the letters for "Congratulations Class of 2024" using cookie cutters. Stick them on the cake board with buttercream icing. Enjoy.
Notes
- Try other cake flavors.
- Pair with other frosting flavors. I kept it very simple with classic vanilla buttercream.
- Add a fun filling like caramel sauce or jam or Nutella.
- Working with fondant can sometimes be sticky. Sprinkle powdered sugar generously on your work surface to prevent stickiness and mess.
- To remove the white powdered sugar residue, steam the fondant cake at the end which will dissolve the sugar and give it a subtle sheen as well.
- Read additional tips and variations above.
- Leftovers can be stored in a sealed container in the fridge for up to 3 days but the fondant decorations will become slightly sticky from the moisture in the refrigerator
Nutrition
An automated tool is used to calculate the nutritional information. As such, I cannot guarantee the accuracy of the nutritional information provided for any recipe on this site.

Leave a Reply