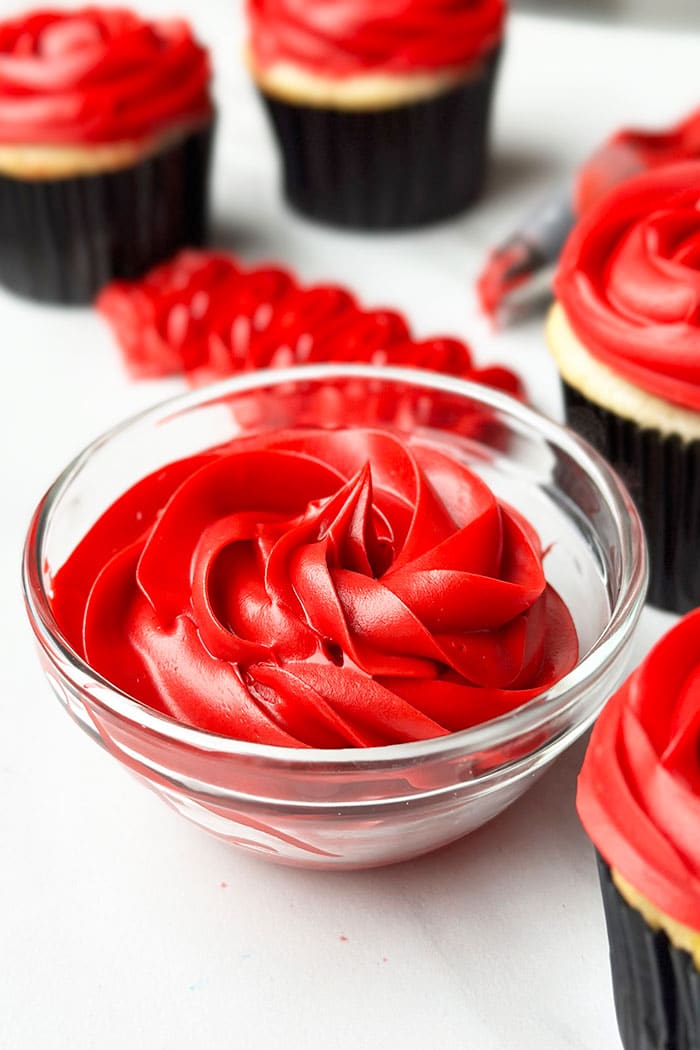
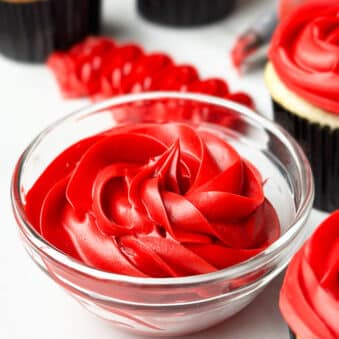
Easy red frosting recipe that's not pink, homemade with simple ingredients. This deep, dark red velvet icing is bright, vibrant, rich, creamy and perfect for piping.
A vibrant red frosting is not an easy task! Determining exactly how many drops of food coloring to reach a true red color can take a lot of experimenting and even more stirring. Allow me to take all the guess work and wasted time out of it for you. Just follow this easy and fool-proof recipe and never end up with pink frosting again. This is perfect for Valentine's baking, Mother's Day desserts, or even a fire engine themed kids birthday party. These Best Red Velvet Cake {From Scratch} and Best Red Velvet Cupcakes {With Cream Cheese Frosting} would also be perfect for all of the themes listed.
Want to Save This Recipe?
Enter your email & I'll send it to your inbox. Plus, get great new recipes from me every week!
By submitting this form, you consent to receive emails from CakeWhiz
Table of contents
- How to Make Homemade Red Frosting That’s Not Pink From Scratch?
- Key Ingredients For Easy Red Velvet Frosting
- Why Does My Frosting Taste Bad And Bitter? How to Fix This?
- Bright And Vibrant Icing Food Coloring Options
- Microwave Method
- Black Gel Coloring Method
- Why Is My Frosting Still Pink?
- Tips And Techniques For Red Buttercream Icing
- Storage
- More Cake Decorating Tips
How to Make Homemade Red Frosting That’s Not Pink From Scratch?
- Mix ingredients- Including butter and shortening, then vanilla extract, powdered sugar, and milk one at a time.
- Add red food coloring- About 3 deep squirts and mix.
- Transfer icing- ½ cup to a bowl.
- Add red food coloring- Until the color is brighter and more vibrant.
- Heat- In the microwave until frosting is runny.
- Combine frostings- Mix until the red color is evenly distributed.
- Cover and chill- For at least 3-5 days.
- Bring to room temperature- Pipe on cakes and cupcakes. Enjoy!
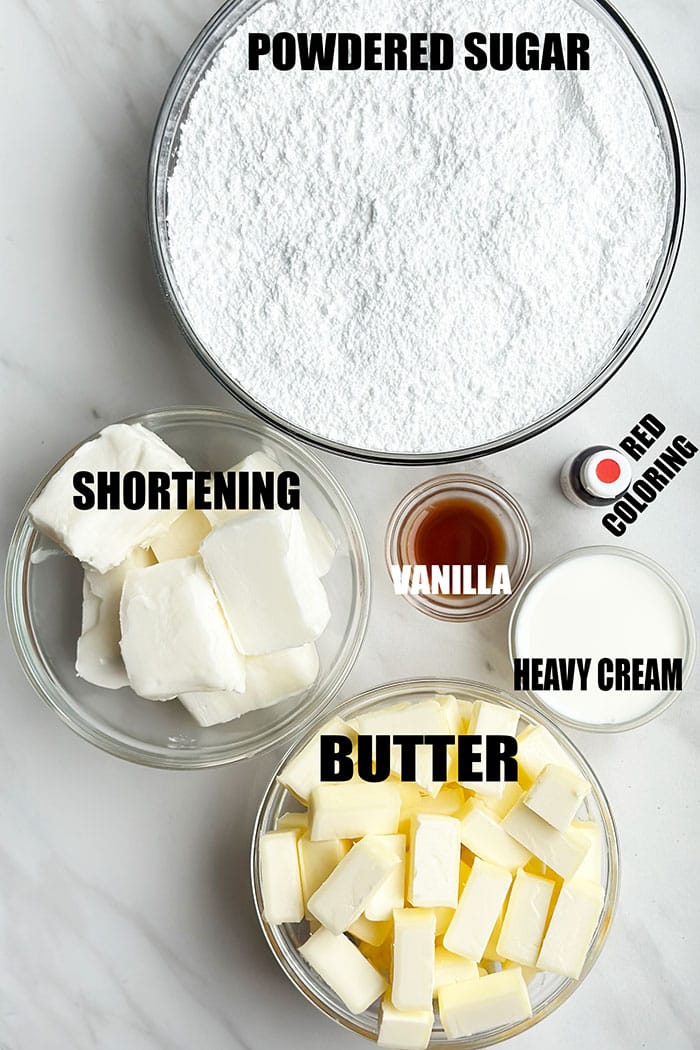
Key Ingredients For Easy Red Velvet Frosting
- Butter- Use room temperature and unsalted butter for best results.
- Shortening- For stability.
- Powdered sugar- This is where all of the sweetness is developed.
- Red gel coloring- To create a bright and vibrant red frosting.
- Heavy cream- This adds richness, creaminess and also thins out
Why Does My Frosting Taste Bad And Bitter? How to Fix This?
Red and black food colors are notoriously known to add a weird metallic after-taste . Some of the best ways to avoid that is to increase the amount of extract or to add some zest or use strong high quality extracts. Chefmaster brand has no taste red color that can be used as well. I still felt it had an after-taste but it was not as strong.
Bright And Vibrant Icing Food Coloring Options
- Strawberry powder- This adds a wonderful berry flavor.
- Beet powder- I didn't particularly like the subtle after-taste.
- Red powdered food coloring- You need a large quantity to get the correct shade.
- Liquid food coloring- I really don’t like this because it thins out the icing consistency, but it can work. You will just have to add some cornstarch or more powdered sugar to fix the consistency again.
- Red gel coloring- I prefer the Americolor brand over the Wilton one because it’s more intense.
- Natural food colorings- I can never get a true red color when I use these because they are made without artificial dyes.
- You can use a combination of these options- To get the right shade, if you like or just stick to 1 or 2 options. An awesome option is to use strawberry powder and red gel food coloring together. The strawberry powder will add some red color and obviously that fruity flavor will will mask the bitter taste of the gel food coloring.
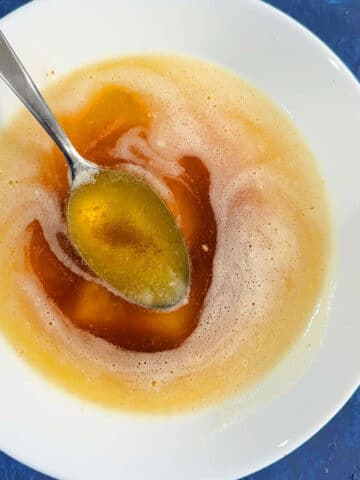
Microwave Method
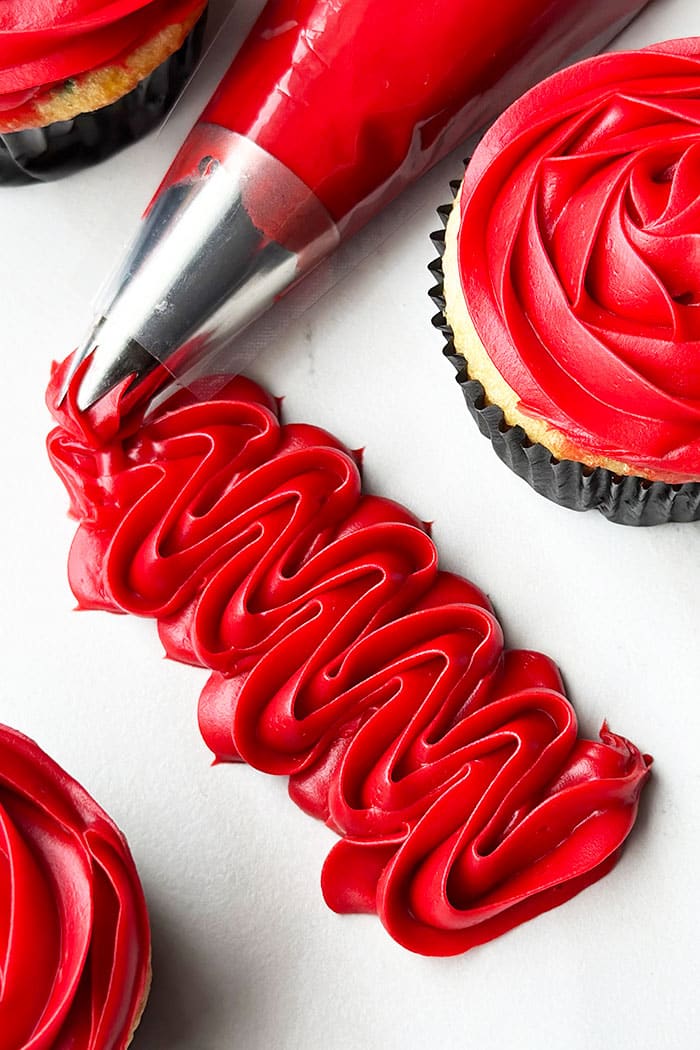
Spoon out ½ cup icing and transfer it to a bowl. Add 1 more squirt of red coloring until the color is even brighter and more vibrant. Heat it in the microwave for about 15 seconds or until the frosting is runny. Mix it with a spoon and you will notice this runny icing is bright red now. Add this runny frosting into the original bowl of icing and mix until the red color is evenly distributed. It’s so weird but it works. Something about the heat brightens the red color and really intensifies it, but it does thin out the icing. You need to chill the icing to make it pipe-able again.
Black Gel Coloring Method
Add a very small amount of black food coloring and somehow, it makes the red color deeper. Be very careful. Using more than a tiny quantity can ruin the red shade altogether.
Why Is My Frosting Still Pink?
Check the icing on day 2 and 3. See if it the color is getting deeper. Take pictures along the way so you can see the difference. If it’s not getting deeper, remove from fridge and mix in more gel coloring because perhaps there was not enough added to begin with or the brand you used was not as strong. Make sure you didn’t skip the microwave step.
Tips And Techniques For Red Buttercream Icing
This icing needs to be made 3-5 days in advance- Because this allows the color to develop. Do not skip this step.
Use unsalted butter- To prevent the icing from becoming too salty.
Use both, shortening and butter- Because butter adds flavor and richness and shortening adds stability.
Why is my icing soft and runny? How to fix it? This usually means you have too much liquid in the icing. Make sure to only add heavy cream 1 tablespoon at a time. You can also add more powdered sugar to thicken the icing. A third option is chilling the icing if it is just too warm, and that is causing the runny texture. Make sure to work in a cool kitchen to help prevent this.
Why is my icing thick and hard to pipe? How to fix it?
The icing is either too cold and needs to be brought to room temperature again to be pipeable, or it may need more liquid. Mix in 1 tablespoon of heavy cream and stir to see if this makes it a little more workable.
Use high quality vanilla extract- High quality ingredients always produce a better flavor. It will also help to mask the red dye taste so it's extra important in this recipe.
Butter must be room temperature- Because if it is too warm and melted, the icing will separate, be grainy, and too liquidy to pipe. If it is too cold, it will not blend properly with the other ingredients. It will be chunky instead of smooth, and no one wants icing with chunks in it.
Add powdered sugar ½ cup at a time- Because this helps to keep the powdered sugar from "exploding" powder all over your kitchen when too much is added at one time, and it also allows you to control the sweetness and texture of the icing.
How much icing does this recipe make? It makes enough icing for 24 cupcakes or one 8x2 inch round cake.

Storage
Refrigerate- In a sealed container for up to 2 weeks.
Freeze- In a freezer safe container for up to 1 month. Thaw to room temperature and whip once more to make it fluffy again.
More Cake Decorating Tips
- How to Color Fondant
- How to Make a Naked Cake
- How to Make Marshmallow Fondant (Fondant Recipe for Cakes)
- How to Make Homemade Sprinkles
- How to Make Ombre Cake {Blue}
Recipe
Easy Homemade Red Frosting (Red Velvet)
Want to Save This Recipe?
Enter your email & I'll send it to your inbox. Plus, get great new recipes from me every week!
By submitting this form, you consent to receive emails from CakeWhiz
Ingredients
- ½ cup Butter Unsalted, Room temperature
- ½ cup Shortening
- 1 teaspoon Vanilla extract
- 4 cups Powdered sugar
- 3-4 tablespoon Heavy cream Or milk, More or less depending on the consistency you want
- Red gel coloring I prefer the Americolor brand over the Wilton one
Instructions
- Add butter and shortening in a large mixing bowl and mix until smooth.
- Add vanilla extract and mix until just combined.
- Add milk (1 tablespoon at a time), while continuing to mix until you reach the desired consistency.
- Add a generous amount of red food coloring (about 3 deep squirts) and mix until evenly distributed. The frosting will mostly likely be looking like a dark shade of pink.
- Spoon out ½ cup icing and transfer to a bowl.
- Add a 1 more squirt of red coloring until the color is even brighter and more vibrant.
- Heat in microwave for about 15 seconds or until frosting is runny.
- Mix with a spoon and you will notice this runny icing is bright red now.
- Add this runny frosting into the original bowl of icing and mix until the red color is evenly distributed.
- Cover and chill in fridge for at least 3 days but preferably 5 days to allow the shade to truly deepen and develop further. This is a crucial step and cannot be skipped.
- When you are ready to use this icing, remove bowl of icing from fridge and let it come to room temperature.
- Then, fill a piping bag and start piping your cake and cupcakes.
Notes
- Read all my tips above.
- Leftovers can be stored in a sealed container in the fridge for up to 2 weeks.
- This icing is enough to frost 24 cupcakes (simple design) and one 8x2 round cake.
Nutrition
An automated tool is used to calculate the nutritional information. As such, I cannot guarantee the accuracy of the nutritional information provided for any recipe on this site.

Cathy
Can I use butter flavored shortening?
Abeer Rizvi
Yes, you can.
Cathy
My icing is still not red, I’ve used almost the entire red gel coloring, I’m on day 4 any advice
Lynn
When you use strawberry powder is that like Nesquick strawberry milk powder?
Abeer Rizvi
No, I would recommend the freeze-dried strawberry powder. You can even buy freeze-dried strawberries and make a powder yourself.
Georgianne
Can you use this on conversation heart cheesecakes for the messages on the cheesecakes?
Abeer Rizvi
Yes, you can use this icing to pipe messages on top of your cheesecakes once they have fully set.
Julia
This is the most amazing frosting I have ever tried! Our cupcakes turned out so extra!
jess
this is such a simple post and makes my red velvet cupcakes the best they have ever been! thank you for sharing this recipe
Abby
Love the way this turned out! Tasted so good and had a great smooth texture. Was the perfect color for my sons birthday cake.