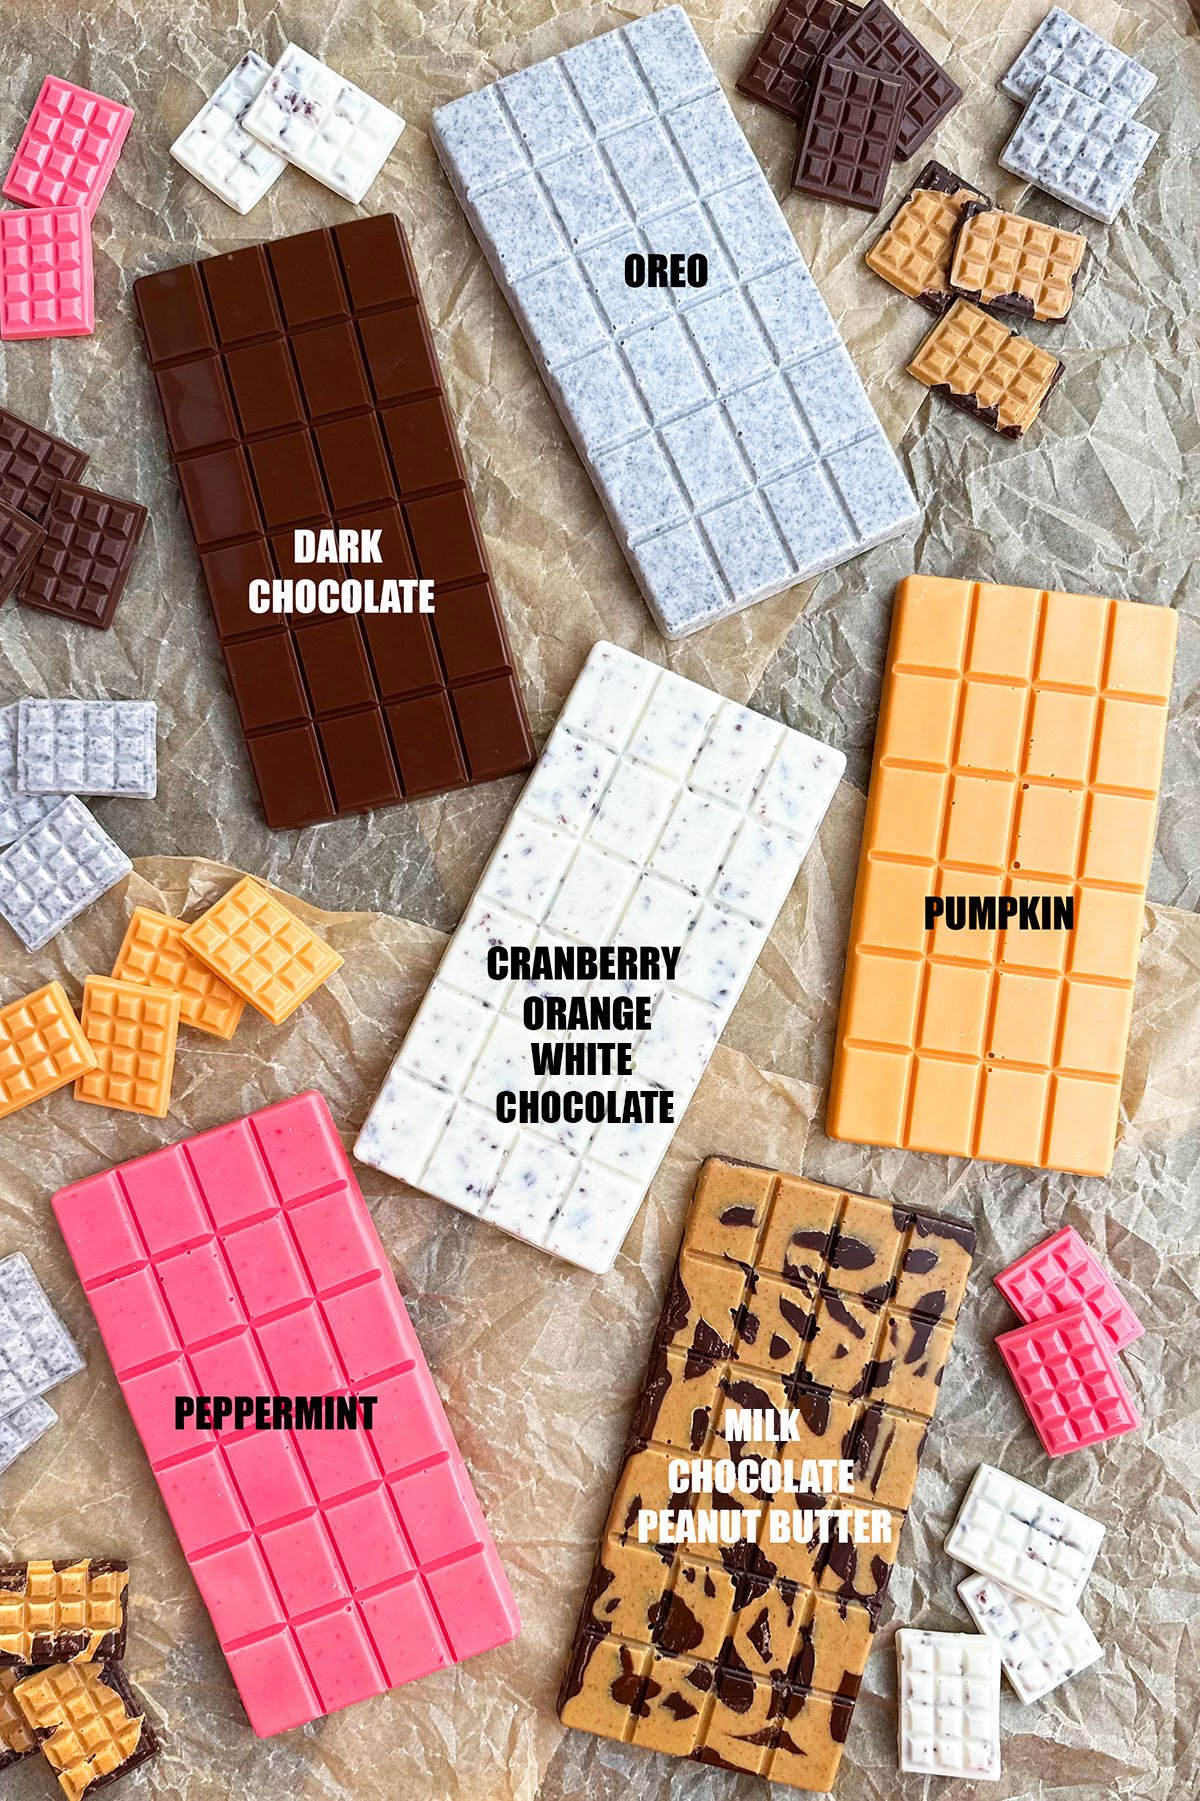
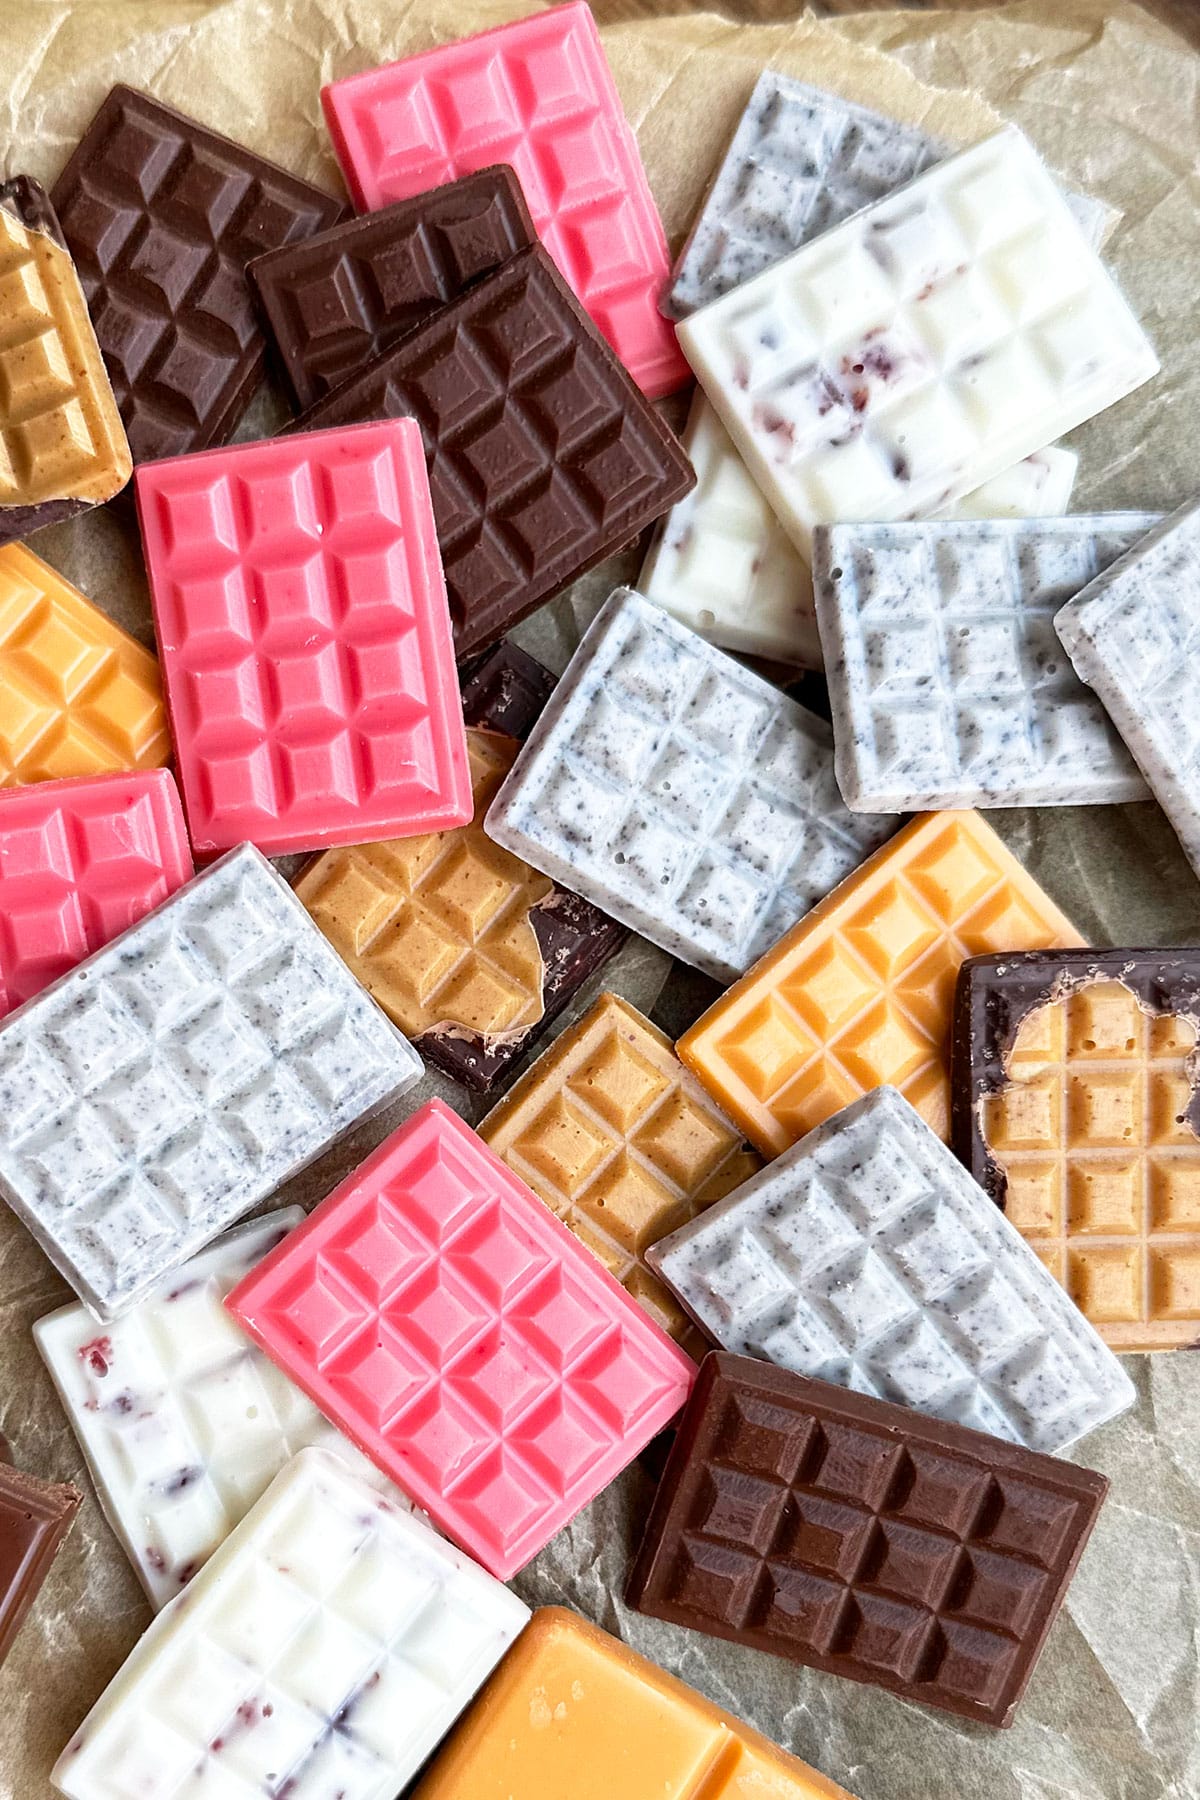
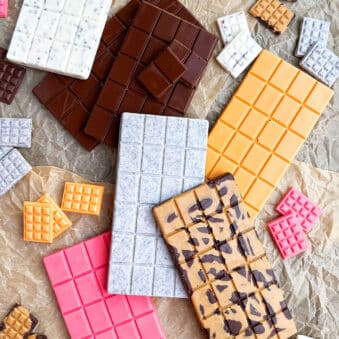
Learn how to make homemade chocolate bars recipe from scratch with 4 simple ingredients: cocoa powder, cacao butter, powdered sugar, milk powder. You can make dark, milk, semisweet flavors and even white chocolate. Lots of creative add-in options included.
Want to Save This Recipe?
Enter your email & I'll send it to your inbox. Plus, get great new recipes from me every week!
By submitting this form, you consent to receive emails from CakeWhiz
These rich and creamy candies would make a great addition to this collection of Easy Homemade Christmas Gift Ideas. You can even add them to these Christmas Cookie Boxes to fill up any empty space. I genuinely feel that you can never go wrong with handmade gifts. If you are still looking for more candy inspiration, be sure to check out these Chocolate Truffles (3 Ingredients) and these Chocolate Chip Cookie Dough Bars.
Table of contents
Key ingredients for best homemade chocolate bars
- Cocoa powder- The main ingredient for the chocolatey goodness. You will omit this ingredient for white chocolate.
- Milk powder- Be sure to use the whole milk kind and not the low fat.
- Powdered sugar- The quantity can be adjusted to your personal liking.
- Cacao butter- This should be food grade and melted.
Variations
- Use different molds- There are so many different silicone molds online now days from Lego molds to flower molds and everything in between.
- Try new add-ins- It may take some trial and error, but you can add all kinds of different nuts, candies, sprinkles, and more. Look below for more ideas.
- Use different press discs- To make new shapes for different occasions.
- Make cookie sandwiches- By putting different frosting and fillings between two cookies, like Chocolate Whipped Cream, Whipped Cream, Raspberry Pie Filling, or Crockpot Apple Butter.
- Consider adding a filling- Such as thick Caramel Sauce or thick Chocolate Ganache.
- Add zests- Such as orange, lemon, or lime.
- Use as a topping or decoration- Use it to decorate cakes similar to my Chocolate Bark Cake or Kit Kat Cake. You can also use them on top of cupcakes like toppers, even the mini ones. Some good options include my Chocolate Strawberry Cupcakes, Lemon Raspberry Cupcakes, Red Velvet Cupcakes, or Gingerbread Cupcakes.
- Use in other layered bars recipes- Like as a replacement for the Hershey bars in these Cookie Bars (5 Layers).
How to make easy homemade chocolate recipe from scratch in molds?
- Make a very fine powder mixture- With the cocoa powder, milk powder, and powdered sugar using a coffee grinder.
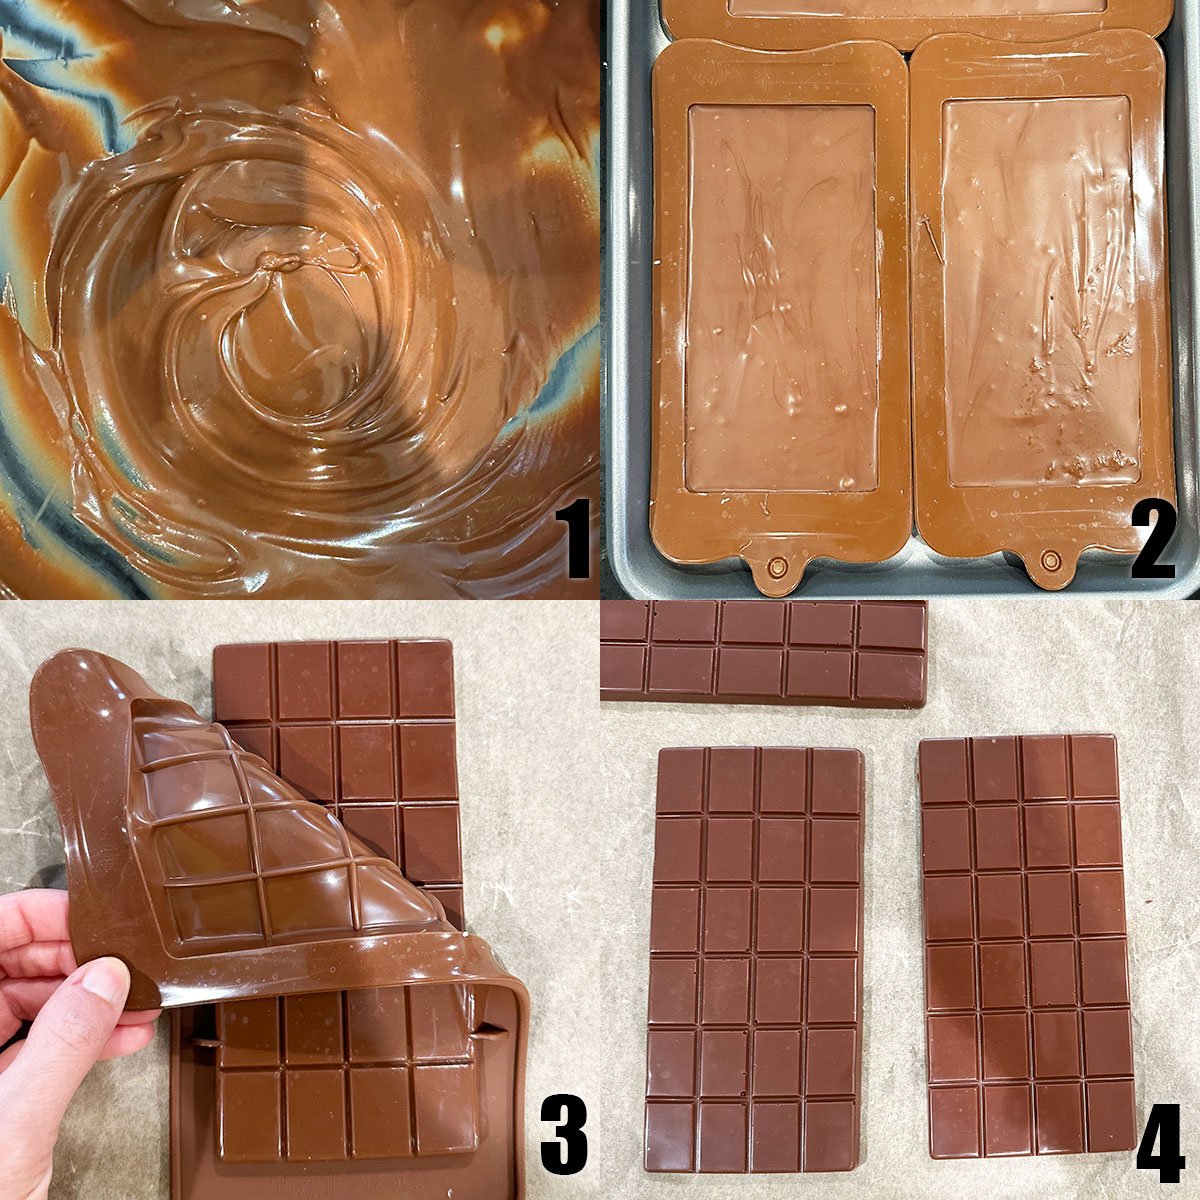
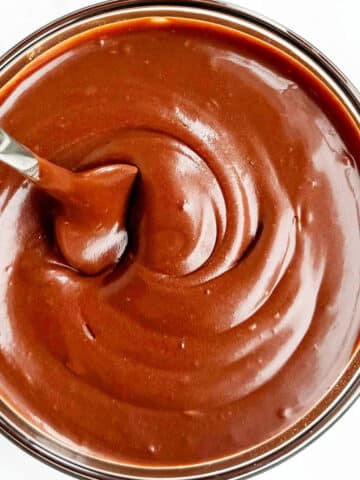
- In a mixing bowl, pour melted cacao butter- And gradually add the dry mixture a little at a time while stirring. (1)
- Include your add-ins now- Such as extracts, spices, nut butters, sprinkles, candy pieces, and more.
- Pour this mixture- Into chosen shaped silicon molds. (2)
- Keep aside and let it set- At room temperature for 20 minutes.
- Transfer to the fridge- To chill for another 20-30 minutes until firm.
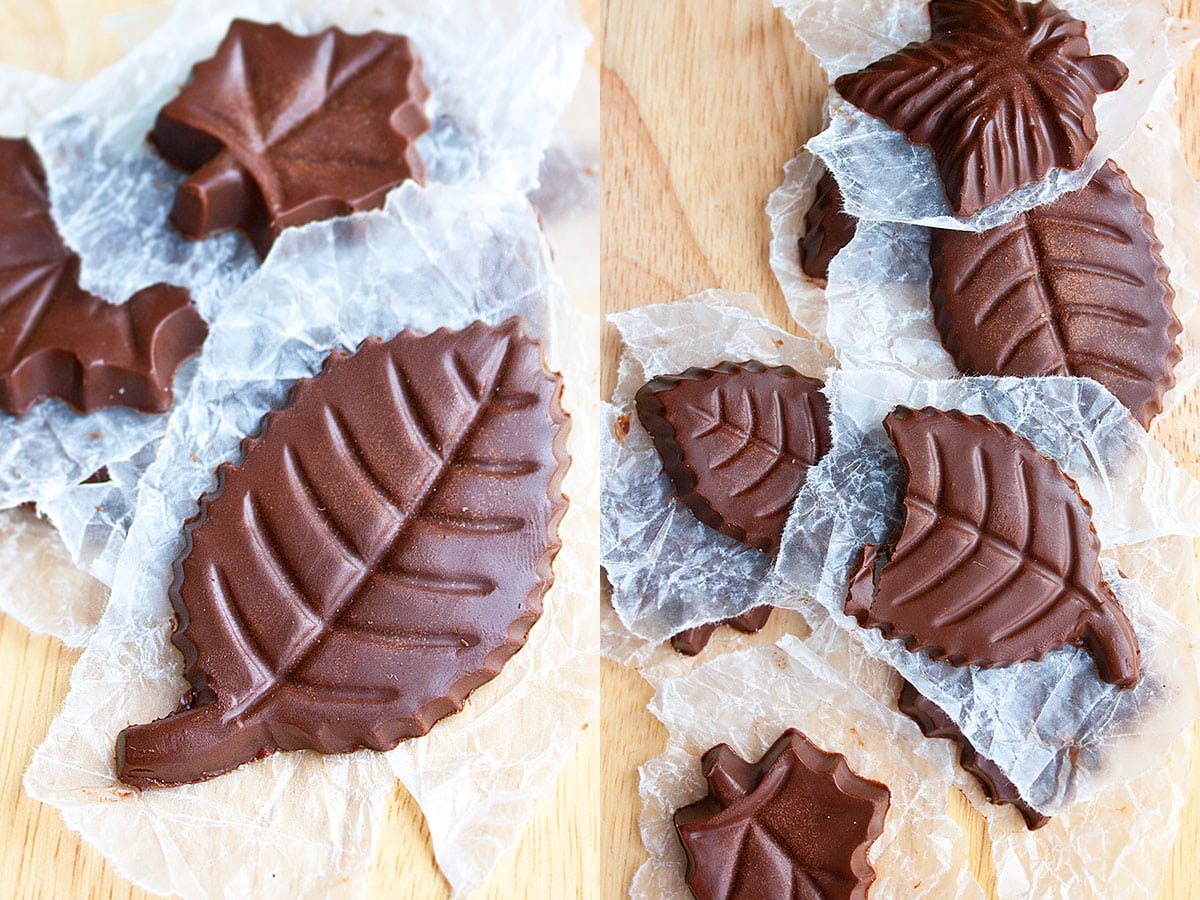
- Turn the mold onto a sheet of wax paper- And remove the mold gently. Enjoy! (3,4)
Toppings and Add-ins
- Nuts- Such as peanuts, almonds, pistachios, macadamias, cashews. Roughly chopped. Preferably toasted
- Shredded coconut- Use finely shredded, unsweetened.
- Zest- Try finely chopped orange, lemon, or lime zest.
- Sea salt- Scatter on top of the chocolates.
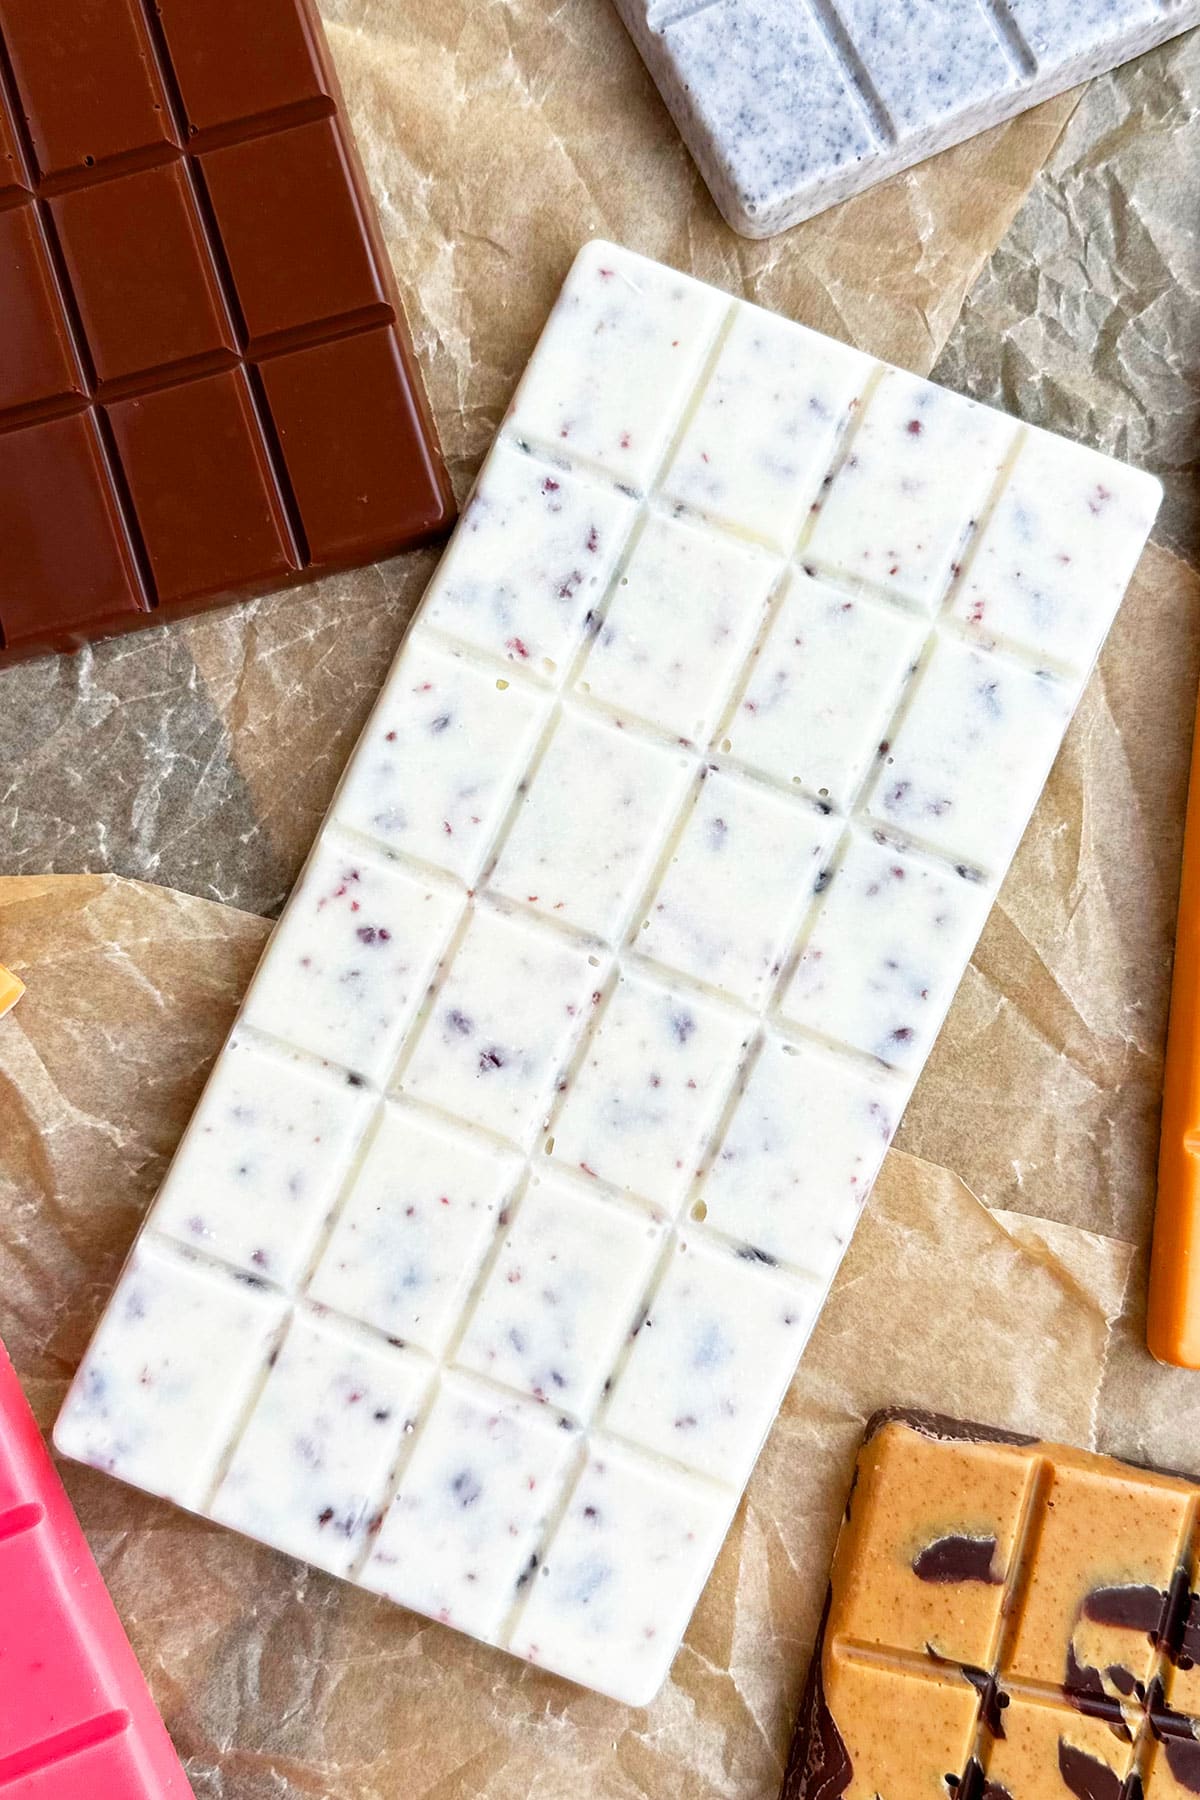
- Dried cranberries- Be sure they are finely chopped and not whole.
- Oreos- Crush or roughly chop them.
- Mini marshmallows- Or you can buy freeze dried mini marshmallow candies.
- Peanut butter- Used to swirl into the chocolate mixture. You can also use almond butter, sunflower seed butter, cashew butter, and others.
- Dried fruits or freeze dried fruits- Such as strawberries, blueberries, and raspberries.
- Puffed quinoa or rice krispie cereal- Add a nice crunch and texture.
- Spices- Such as pumpkin pie spice, ground cinnamon, cardamom, nutmeg, clove, or allspice.
- Extracts- Be sure to use oil-based flavors. Try mint, peppermint, vanilla, coconut, caramel.
- Oil-based food coloring- This will ensure it meshes and combines correctly with the choclate.
Tips and techniques
- Coconut oil can be used instead of cacao butter- But it has a distinct fragrance and flavor plus it's not as stable and doesn't solidify as well.
- Make sure to oil based food coloring and flavor- If using or else the chocolate will seize.
- Where to buy candy molds? Amazon, Michaels, Walmart, Hobby Lobby. You can buy the classic bar style or try other shapes like the leaves I made.
- You can do all the mixing of ingredients in a double boiler- In order to get the smoothest consistency possible.
- Recipe can easily be doubled or tripled- When making for a large crowd, party, or event.
- I have another tutorial- For thinner Chocolate Leaves that uses mint leaves, which is also a fun way to enjoy chocolate.
- If the cocoa mixture is too thick- And difficult to combine together, heat in the microwave for 10 seconds at a time to allow the the cacao butter to melt again.
- Instead of powdered sugar- You can use 2-3 tablespoon maple syrup or honey, but that causes the bars to not be as firm and slightly softer, especially at room temperature. It is much smoother in taste though.
- You must use whole milk powder- Do not use low fat or fat free powder.
- Use the best quality cocoa powder you can find- Because your chocolate will only taste as good as the ingredients you use.
- You can use unsweetened or special dark cocoa powder- I noticed the special dark one made the chocolate very bitter and my family did not like it.
- Grinding and sifting the dry ingredients is very important- Because that's what gives this chocolate its smooth texture.
- You cannot use liquid milk- Or else the mixture will seize. Only milk powder can be used.
- Regular butter cannot be used- Only cacao butter for its flavor and texture.
- Avoid porous wooden spoons for mixing- Because they hold on to flavors from your other recipes and can alter the flavor of your chocolate. They can also hold on to moisture and that cause the chocolate to seize.
- Don’t put the molds in the fridge right away- Because if it chills too quickly sometimes that can cause the cocoa butter solids to separate and produces a chalky streaked appearance.
- For dark and semisweet chocolate- Simply use less sugar.
- For unsweetened chocolate- Just omit the sugar altogether.
Recipe FAQs
This can happen if you use regular butter, liquid milk, or even a porous wooden spoon to mix. Also, it can seize if you must don't use oil-based colorings and extracts.
It's called bloomed chocolate. They look like white streaks and patches and overall dullness. You can still eat it because it still tastes great but it doesn't have the best appearance. This happens when the chocolate cools too quickly.
Although often used interchangeably, they are slightly different. The term cacao refers to a more raw, unprocessed form of the cocoa bean that is higher quality, whereas cocoa butter consists of a more processed, roasted bean.
It is very important to grind your ingredients and sift them thoroughly to make the smoothest chocolate. Next time try to make sure you have really fine powder before adding in the cocao butter.
It is likely to hot in your kitchen, you've used hot utensils to handle them, or it could also be because you used honey instead of powdered sugar which makes them more likely to melt at a lower temperature.
Storage
- Make ahead- You can make these ahead before a party or event and kept in a sealed container or bag. In the fridge they will last up to 2 weeks and at room temperature (not too warm) they can be left out up to 1 week.
- Room temperature- These will last at room temperature (70-72 degrees F), but won't stay super firm since they are not tempered. They will still hold their shape very well though and can be out for up to 1 week.
- Refrigerate- I recommend storing them in the refrigerator, wrapped in wax paper or fancy candy foil for up to 2 weeks.
- Freeze- These can also be frozen in a sealed bag or container for up to 1 month.
More Chocolate Desserts
- Best Chocolate Chip Cookies (Soft and Chewy)
- Chocolate Pudding
- Easy Chocolate Oreo Cake
- Easy Chocolate Fondue Recipe
- Chocolate Blueberry Truffles
- Coconut Cream Chocolate Frosting
- Sugar Free Chocolate Cupcakes
- Chocolate Muffins
- Chocolate Banana Ice Cream
Recipe
Easy Homemade Chocolate Bars (Dark, Milk, White)
Want to Save This Recipe?
Enter your email & I'll send it to your inbox. Plus, get great new recipes from me every week!
By submitting this form, you consent to receive emails from CakeWhiz
Ingredients
Dark, milk, semisweet and unsweetened chocolate
- ⅓ cup Cocoa powder
- 2 tablespoon Whole milk powder Don't use the fat free or low fat version
- ¾ cups Powdered sugar Adjust quantity according to your preference
- ½ cup Cacao butter Melted, Food grade
White chocolate
- ½ cup Whole milk powder Don't use the fat free or low fat version
- ½ cup Powdered sugar
- ½ cup Cacao butter Melted, Food grade
Optional Add-ins
- 1-2 tablespoon Nuts Such as peanuts, almonds, pistachios, macadamias, cashews. Roughly chopped. Preferably toasted
- 1-2 tablespoon Shredded coconut
- 1 teaspoon Orange zest Finely chopped
- 1 teaspoon Sea salt Scattered on top of the chocolates
- 1-2 tablespoon Dried cranberries Finely chopped
- 1-2 tablespoon Oreos Roughy chopped
- 1 tablespoon Mini marshmallows
- 1 tablespoon Peanut butter For swirling into the chocolate mixture. Can replace with other types of nut butters too.
- 1-2 tablespoon Dried fruits or freeze dried fruits Such as strawberries, blueberries, raspberries
- 2 tablespoon Puffed quinoa or rice krispie cereal
- ½-1 teaspoon Pumpkin pie spice Or ground cinnamon, cardamom, nutmeg, clove, allspice.
- 1 teaspoon Extracts Use oil-based flavors. Try mint, peppermint, vanilla, coconut, caramel.
- Oil-based food coloring
Instructions
Dark, milk, semisweet and unsweetened chocolate
- Add cocoa powder, whole milk powder, powdered sugar in a coffee grinder and grind until you have a very fine powder mixture.
- Sift this dry mixture to remove any lumps.
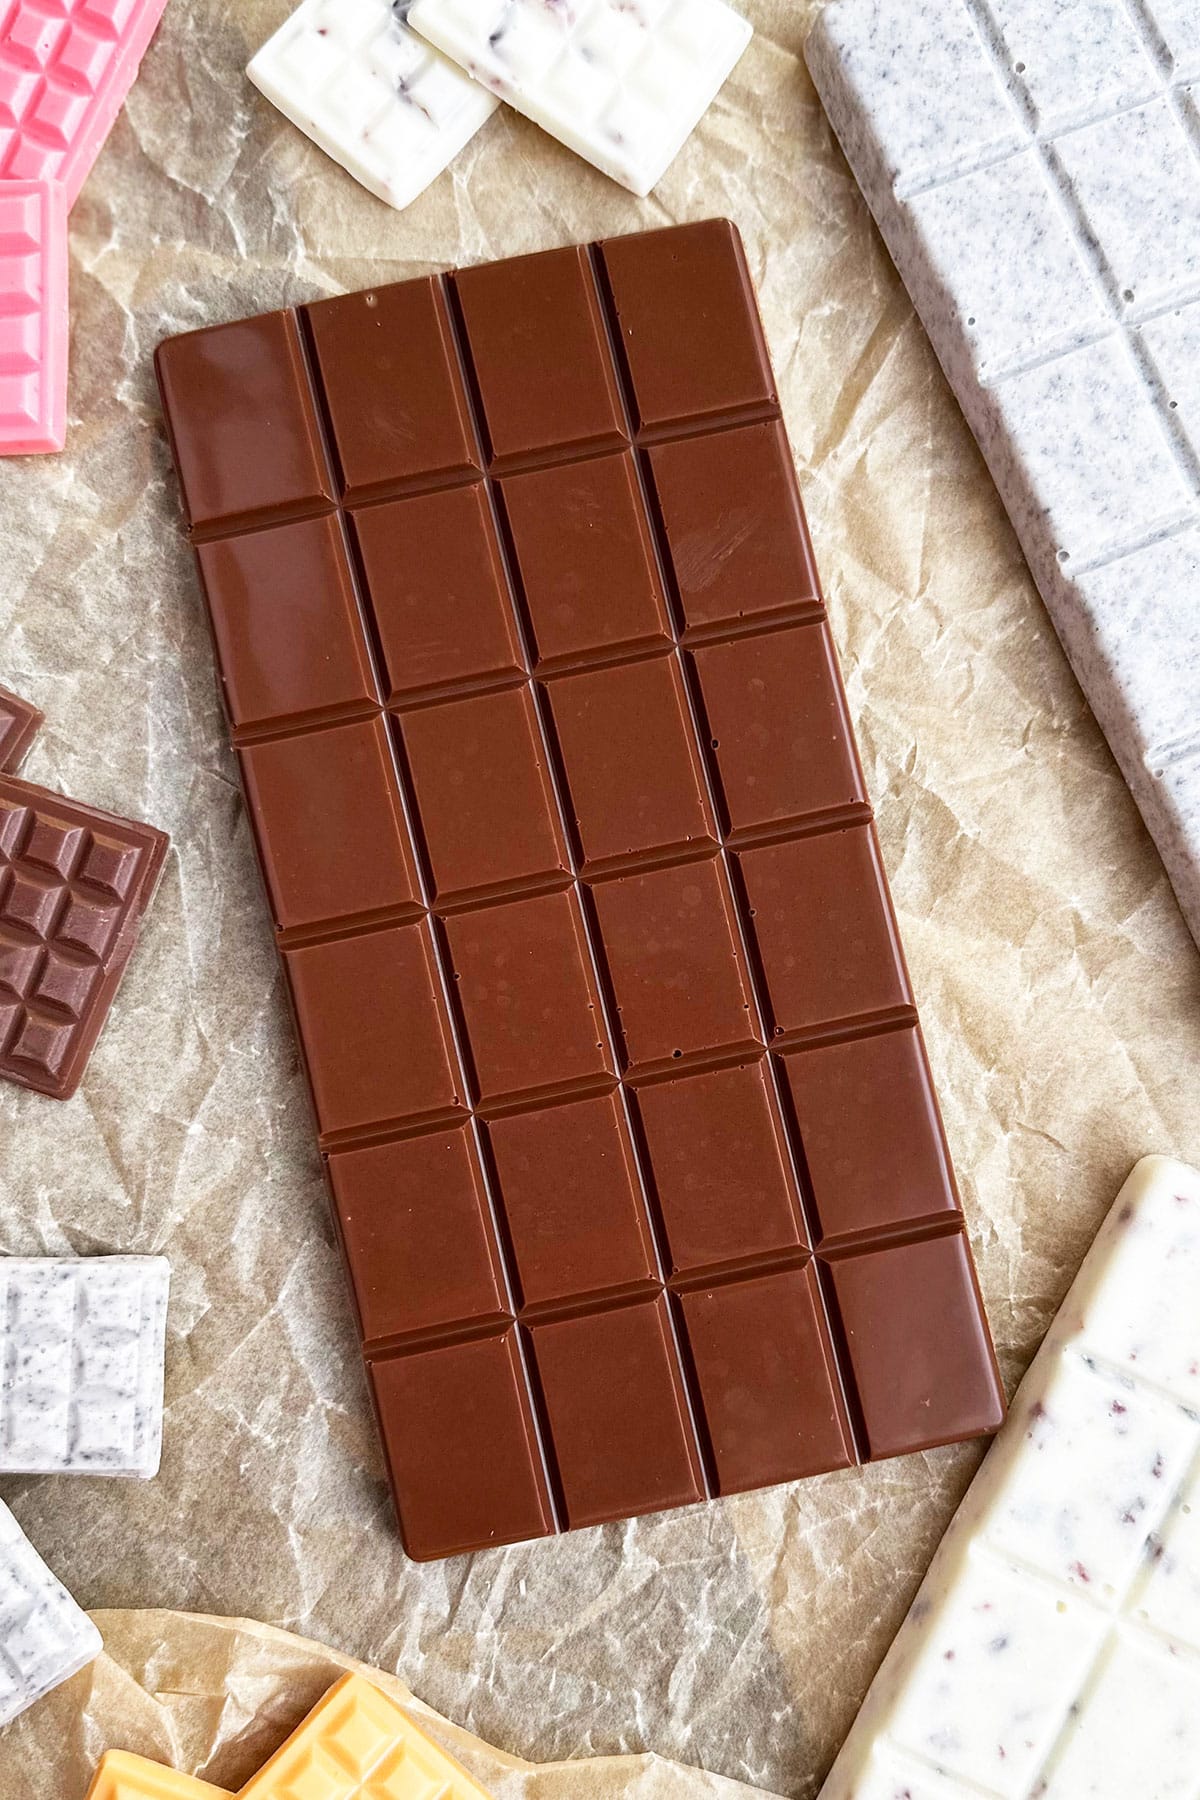
- In a mixing bowl, add melted cacao butter and gradually add the dry mixture (1 tablespoon at a time), while continuing to stir until there are no lumps and the mixture is silky smooth. This will be the base of a delicious milk chocolate.
- For dark and semisweet chocolate, use less sugar.
- For unsweetened chocolate, omit sugar altogether.
- You are ready to include your add-ins now. Please note these important tips: You can either toss the add-ins into this mixture OR pour the mixture in molds and sprinkle your toppings on top and let it set. Also, remember that extracts, colors and dry spices or spice blends must be mixed into the mixture, if using. For nut butters, it's best to swirl some of that in the mold first and then pour the chocolate mixture on top and let it set.
- Use a spoon to pour this mixture in candy bar silicon molds.
- Keep aside and let it set at room temperature for 20 minutes.
- Then, transfer to the fridge to chill for another 20-30 minutes until firm.
- Turn the mold onto a sheet of wax paper and remove the mold gently. Enjoy!
White chocolate
- Add whole milk powder and powdered sugar in a coffee grinder and grind until you have a very fine powder mixture.
- In a food processor, add the fine powder mixture and melted cacao butter. Blend for about 30-40 seconds until mixture is very smooth.
- Use a spoon to pour this mixture in candy bar silicon molds.
- Keep aside and let it set at room temperature for 20 minutes.
- Then, transfer to the fridge to chill for another 20-30 minutes until firm.
- Turn the mold onto a sheet of wax paper and remove the mold gently. Enjoy!
Notes
- Get creative with your add-ins and make fun new flavors.
- Use mini candy molds to make smaller chocolates. These are great as cake and cupcake decorations.
- Use a silicon mold rather than the firm plastic ones because removal is easier with the silicon ones.
- Coconut oil can be used instead of cacao butter but it is not as stable and the candy bar doesn't hold its shape well.
- This chocolate has a subtle texture to it because of the use of powdered sugar. It's not as smooth as the store-bought bars because we don't have the specialized equipment that the big companies use to make them super smooth.
- These will last at room temperature (70-72 degrees F) but won't stay super firm since they are not tempered. They will still hold their shape very well though. I recommend storing them in the refrigerator, wrapped in wax paper or fancy candy foil for up to 2 weeks. These can also be frozen in a sealed bag or container for up to 1 month.
- Read additional tips and variations above.
Nutrition
An automated tool is used to calculate the nutritional information. As such, I cannot guarantee the accuracy of the nutritional information provided for any recipe on this site.


Leave a Reply