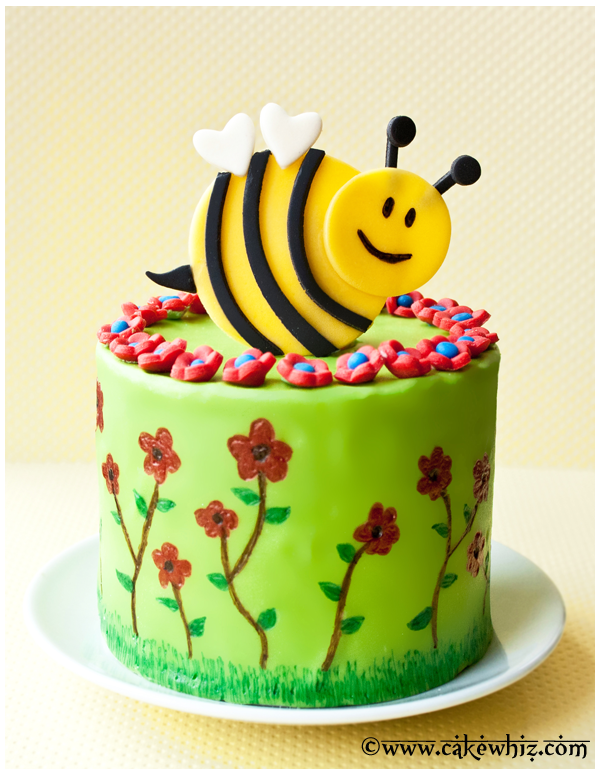
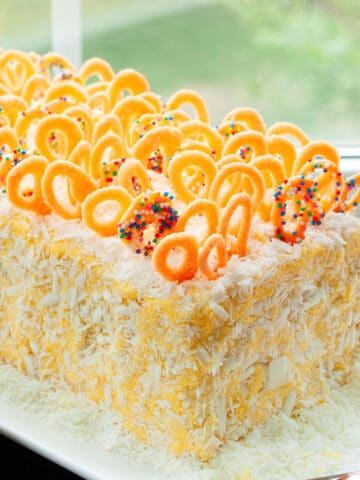
Use this cake decorating tutorial to make easy bumblebee cake. This Spring cake is homemade with simple ingredients. Great for birthday parties and picnics. Additional decorations with edible markers and fondant flowers also included.
Want to Save This Recipe?
Enter your email & I'll send it to your inbox. Plus, get great new recipes from me every week!
By submitting this form, you consent to receive emails from CakeWhiz
This cake is heavily inspired by the Fondant Bumblebee Cupcakes. You can use that topper for cupcakes or mini cakes, like I did below. Best of all, it can be made in advance and stored in a cardboard box at room temperature for months without going bad. This cake is perfect for beginners. The best tip I can give you is to use edible markers to draw and color all the details instead of piping. It's quick and easy and you don't need a super steady hand. Trust me, if you can draw and color on paper, you can do the same on fondant.
Jump to:
How to make bumblebee cake (Spring cake) from scratch?
- Bake cakes- An orange cake was perfect for this season.
- Let it cool- Until it’s room temperature.
- Make icing- And color it orange, if you like.
- Assemble– Place one cake on cake stand, ice the top, then, place the other cake on top and then, ice the whole cake.
- Spread green fondant- And let it dry.
- Decorate– With edible markers, fondant flowers and bumblebee cake topper.
Variations
- Consider adding a different critter- I used a bumblebee topper but you can also try a ladybug topper. Check out these Ladybug Cupcakes for a tutorial.
- Make a single large cake (8 or 9 inches)- But make sure that you make a larger sized topper to match the size of the cake.
- Try different color combinations- I used a green, red and yellow theme but you can use any colors you like. Just make sure they are bright and vibrant to suit the Spring theme.
- Try other cake flavors- Such as Lemon Cake or Pineapple Cake.
- Pair with other frosting flavors- Such as Mango Frosting or Lemon Frosting.
- Make a larger tiered cake- The cake you are seeing today is small. It’s only 4 inches. but you can add another larger 8 inch cake tier below it.
- Make a taller layer cake- This cake only has 2 layers but you can make it as high as you want. Just remember to use dowels for support.

Tips and techniques
- Don’t frost or decorate warm cakes- Because the warmth will cause the icing and fondant to melt and make a sticky mess.
- Use fine tip edible markers- Because they are great for adding fine details and they also dent into the fondant as easily as the wide tips. The Americolor brand is great.
- Allow fondant-covered cake to sit uncovered for a while- Because this allows the fondant to dry up and firm up sightly, which prevents the the tip of the markers from digging into your cake plus it prevents the color from spreading/leeching everywhere.
- Remember that a mistake cannot be undone- So, if you smudge something or accidentally dig into the fondant, you will have to make that error a part of your overall design.
- Practice on scrap fondant pieces- This is a great way to get used to the markers and figure out how much pressure to apply before moving onto the cake.
- Sit at eye level- This makes cake decorating so much easier, in general.
- Homemade fondant vs. Marshmallow fondant- Either can be used. I prefer homemade fondant because it tastes really good and also smells amazing. Also, you can buy pre-colored fondant, which means less work for you.
- Homemade fondant flowers vs. Store-bought flowers- Either can be used. Wilton has some beautiful ones that will save you time. Check out my tutorial for super easy red flowers in this 4th of July Cake post. You can also make Easy Wafer Paper Flowers or Royal Icing Flowers (Sugar Flowers) or these Easy Fondant Roses (Ribbon Roses).
Storage
- Refrigerate- Leftovers can be stored in a sealed container in the fridge for up to 3 days. However the fondant decorations will become slightly sticky and tacky from the moisture in the fridge.
- Freeze- Unfrosted cakes can be stored in a sealed container for up to 1 month. When you are ready to enjoy it, let it thaw in the fridge overnight and then, decorate as per instructions below.
- Make ahead instructions- This cake can be baked and decorated 1 day in advance and stored at room temperature until you are ready to serve.
More decorated cakes
- Watermelon Cake
- Butterfly Cake
- Tie Dye Shirt Cake
- Fondant Flower Cake
- Peacock Cake
- Crying Baby Cake
- Mini Sushi Cake
- Modern Abstract Cake
Recipe
Easy Bumblebee Cake (Spring Cake)
Want to Save This Recipe?
Enter your email & I'll send it to your inbox. Plus, get great new recipes from me every week!
By submitting this form, you consent to receive emails from CakeWhiz
Ingredients
- 2 Orange cake Baked in 4 round cake pans, Dimensions: 4x2
- 2 cups Orange frosting
- 2 cups Marshmallow fondant Green
- 1 Fondant bumblebee topper
Instructions
- Bake the cakes and prepare the frosting.
- When the cakes cool completely, trim the domes (if any) to make the cakes flat.
- Place one cake on a serving dish and spread frosting on top.
- Place the other cake on top of the icing and press gently to secure into place.
- Spread icing smoothly all over the cake.
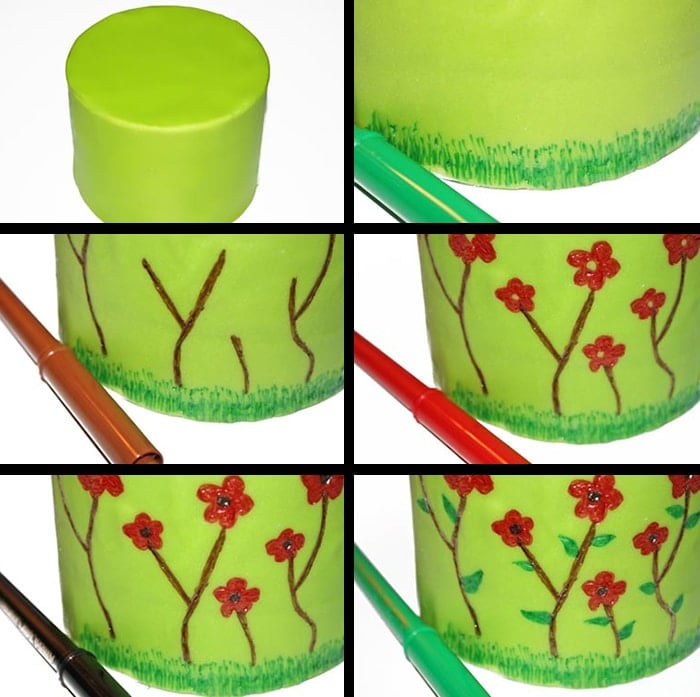
- Roll out green fondant and spread it over the cake.
- Smooth it out and then cut off excess fondant with a pizza cutter.
- Allow this cake to sit uncovered at room temperature for 1-2 hours because this allows the fondant to harden slightly and makes it easier to use edible markers.
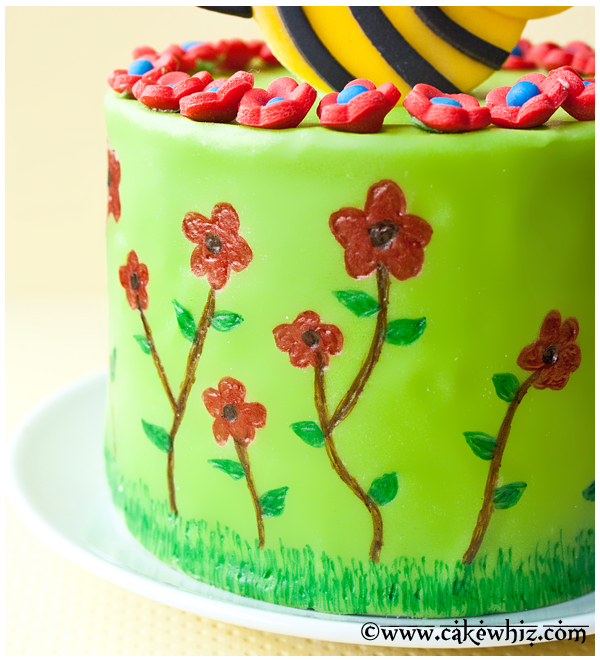
- Use a green marker to drawn grass all around the base of the cake.
- Use a brown marker to draw branches and stems around the cake.
- Use a red marker to draw flowers.
- Fill the centers of the flowers with a black marker or you can even stick black edible pearls here.
- Use a green marker again to draw leaves.
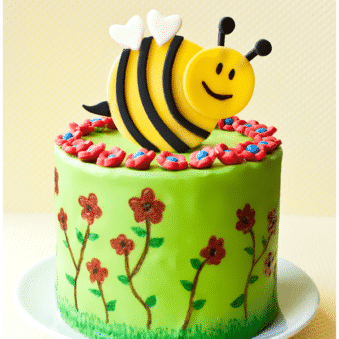
- Stick a popsicle stick behind the fondant bumblebee topper with melted chocolate.
- Then, push it into the top of the cake.
- Stick store-bought red fondant flowers around the top of the cake with corn syrup or melted chocolate.
- Follow the same steps with remaining two cakes. Enjoy!
Notes
- Read all my tips above.
- Leftovers can be stored in a sealed container in the fridge for up to 3 days.
Nutrition
An automated tool is used to calculate the nutritional information. As such, I cannot guarantee the accuracy of the nutritional information provided for any recipe on this site.

Elizabeth
Aaaah, this is adorable! I can't stop smiling looking at that bee.
Mary Frances
I love the happy bee! So cute.
Belinda Chiu
That's simply too adorable. One cannot help but to smile!
ela
What a happy cake! Makes me happy looking at it!