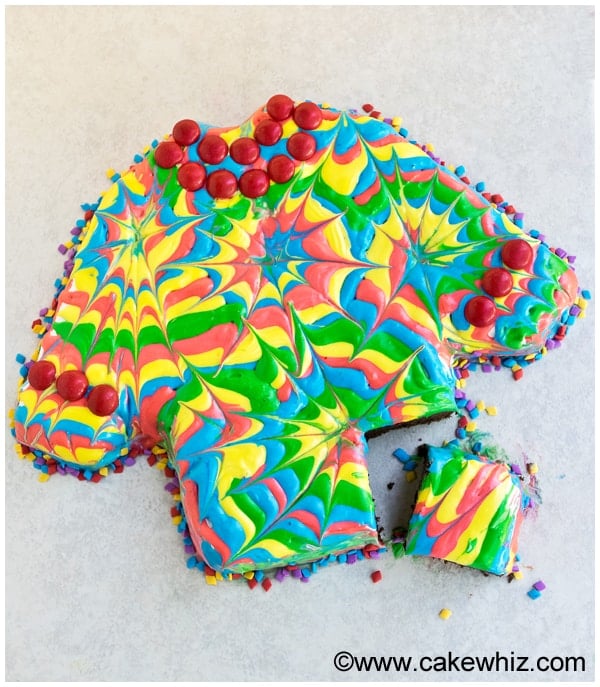
Learn how to make a tie dye cake (shirt cake), using this step-by-step tutorial. Easy to make with rainbow colored frosting and toothpicks! Great for Father's Day!
If you remember this Shirt Cake from a few years ago, today's version is just a different spin on it. It uses an ugly sweater cake pan instead of a round cake pan and the decorations are done with frosting instead of fondant.
You don't need any fancy tools or equipment to decorate this cake. All you need is rainbow colored buttercream icings and toothpicks.
Want to Save This Recipe?
Enter your email & I'll send it to your inbox. Plus, get great new recipes from me every week!
By submitting this form, you consent to receive emails from CakeWhiz
How to make tie dye cake with frosting?
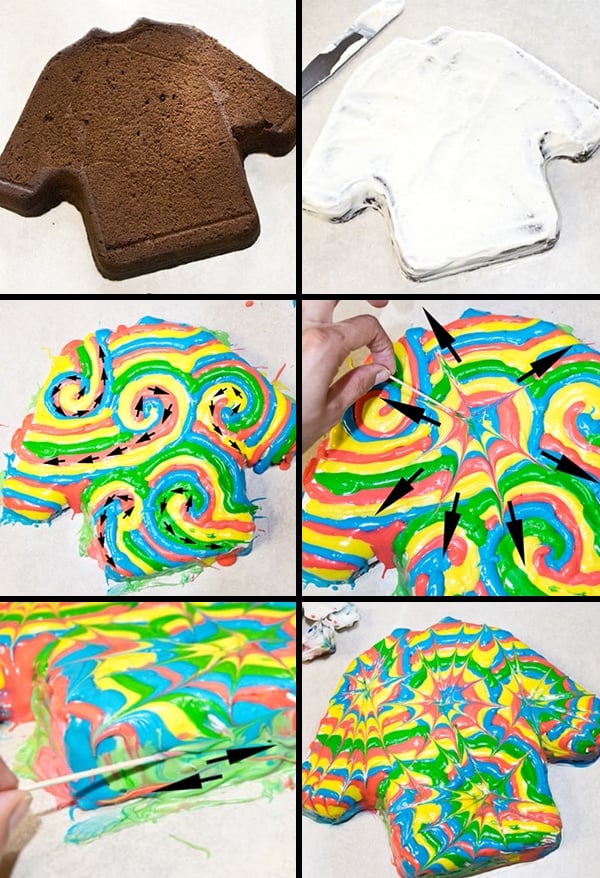
- Bake cake in ugly sweater pan- And let it cool.
- Make frostings- Color them white, pink, yellow, green, blue.
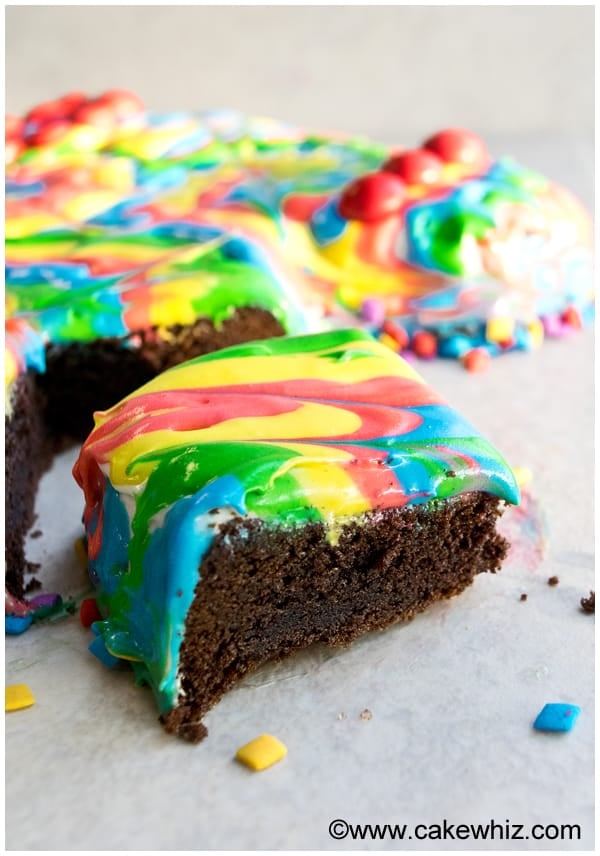
- Crumb coat cake- With thin layer of white icing.
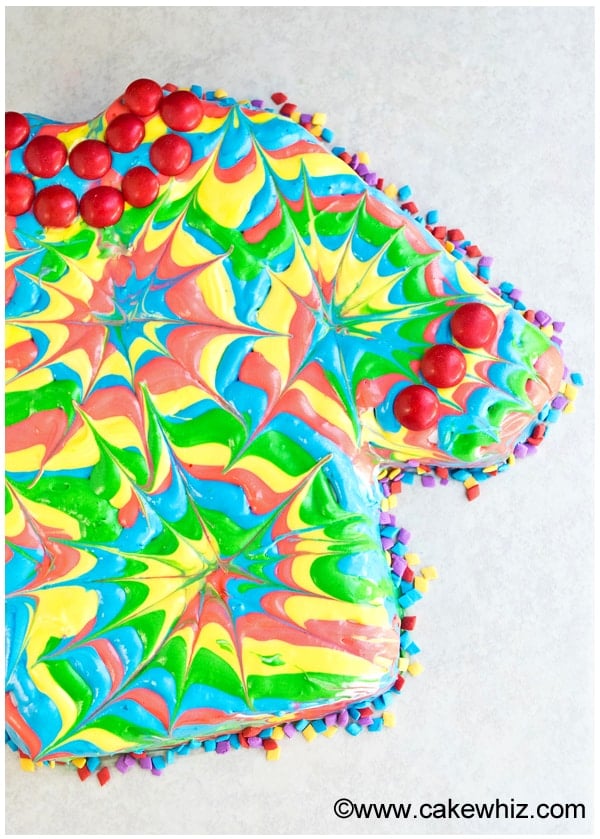
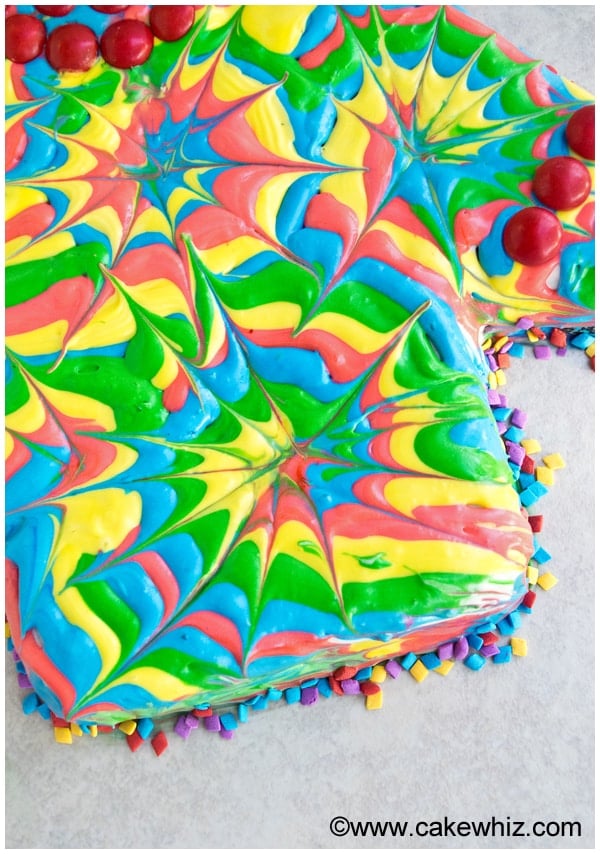
- Make tie dye design- Fill 4 piping bags with 4 different colored icings. Pipe inverted/upside down "6" all over the cake. Position a toothpick in the center of each "6" and drag it out.
- Clean up- Wipe off messy icing around the base of cake with moist paper towels and toss sprinkles here.
- Add final details- Like sleeves and neck line with m&m candies.
- Enjoy- Serve immediately or store in fridge for later.
Variations for tie dye shirt cake
Use other frosting colors- I used neon pink, yellow, green and blue frostings but use any colors you like. Try pastel shades.
Try other cake flavors- Such as Pineapple Cake (With Cake Mix) or this Depression Cake (Wacky Cake).
Use other frosting flavors- Such as Marshmallow Frosting or Cooked Flour Buttercream (Ermine Frosting). It needs to be a white frosting so that it can easily be tinted.
Fill cake- With Homemade Strawberry Jam, Homemade Caramel Sauce, Dulce De Leche or peanut butter or even Nutella and even fresh berries.
Tips and Techniques for tie dye birthday cake
Don't frost warm cake- Allow the cake to cool fully to room temperature and then ice it because if you frost a warm cake, the icing will melt into a sticky mess.
Don't have an ugly sweater cake pan? That's not a problem. Make a big rectangle cake and use a sharp knife to cut out a shirt shape. I suggest making a paper template of a shirt and using that to cut out the proper shape.
Icing consistency needs to fairly thin- It should not be so thin that it's dripping everywhere but thin enough that you can still pipe. It should spread a little when you are piping. If you use thick consistency icing, you will not be able to run the toothpick through it smoothly.
Gel colors vs. Liquid food colors- Either can be used.
Line pan with parchment paper- This makes it easier to remove cake from the pan.
How do you know when cake is done baking? An inserted toothpick in the center will come out clean.
Storage
Refrigerate- Leftovers can be stored in a sealed container in the fridge for up to 3 days.
Freeze- Unfrosted cake can be stored in a sealed container for up to 1 month. When you are ready to enjoy it, let it thaw in the fridge overnight and then, decorate it with frosting.
Make ahead instructions- This can be baked and decorated 1 day in advance and stored in the fridge until you are ready to serve.
More Father's Day Desserts
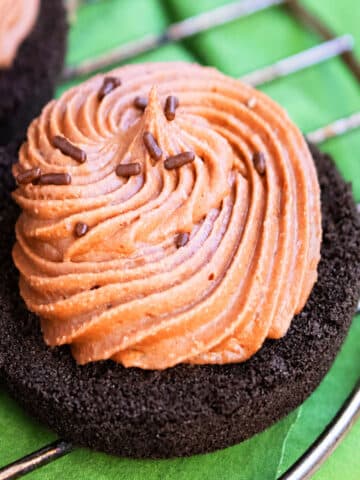
- Shirt Cupcakes
- Father's Day Cake (Tool Box Cake)
- Father's Day Cupcakes (Handyman Tools Cupcakes)
- Sports Cookies (Basketball, Baseball, Soccer)
Recipe

Tie Dye Cake (Shirt Cake)
Want to Save This Recipe?
Enter your email & I'll send it to your inbox. Plus, get great new recipes from me every week!
By submitting this form, you consent to receive emails from CakeWhiz
Ingredients
- 1 Chocolate cake
- 6 cups Buttercream frosting Colored white, neon pink, yellow, blue and green colors
- ½ cup Red m&m candies
Instructions
- Bake cake in the ugly sweater cake pan.Let it cool down and to room temperature.Then, place it on a large serving plate.
- Use a spatula to frost your cake in white buttercream icing. Don't worry about frosting it neatly. This needs to be a crumb coat.
- Fill 4 piping bags with 4 different colored icings and attach Tip#12.
- Start piping an inverted/upside down "6" all over the cake, as shown by the arrows.Fill all empty space by piping random lines or squiggles.
- For the sides, just randomly squeeze your piping bags in an angle and let the icing flow.It will look really messy but don't worry. It will get cleaned up at the end.
- Now, position your toothpick in the center of each "6" and drag it out, as shown by the arrows. Do this for all the "6" shapes you made.
- For the sides, drag your toothpick right and left randomly until you are happy with the design.
- Use moist paper towels to wipe off all that messy icing around your cake.
- Arrange some red m&m candies along the sleeves and the neck line.
- Toss some colorful sprinkles around the base of your tie dye shirt cake. Enjoy!
Notes
- Read all my tips above.
- Leftovers can be stored in a sealed container in the fridge for up to 3 days.
Nutrition
An automated tool is used to calculate the nutritional information. As such, I cannot guarantee the accuracy of the nutritional information provided for any recipe on this site.

Zan
Such an awesome idea! I had no idea they even sold those kinds of cake pans!
Abeer Rizvi
Omg! You should check out the cake decorating aisle at Michaels. There are so many cool cake pans there!
Rae
OMG this is just too darn cute to have to wait until I have a kid (or choose to borrow someones!). My husband is a big kid. This will work for him!
Abeer Rizvi
Oh man! HAHAHA. That was so funny! My hubby has this redicuulous tie dye shirt and I made this for him just for jokes
Samantha
WOW - that's so cool - saving this for future!!

Abeer Rizvi
It was wayyyyy easier to make than I expected!