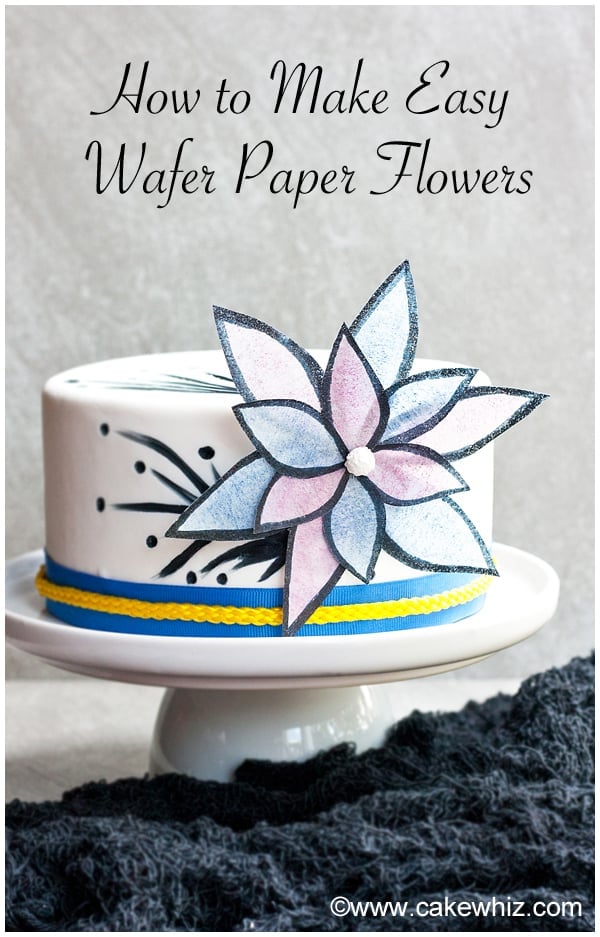
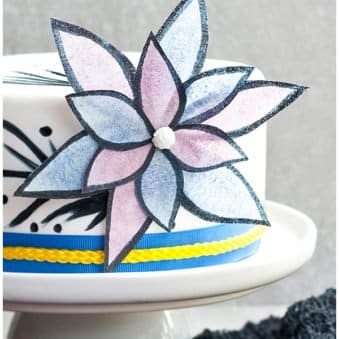
Use this step-by-step tutorial to make easy wafer paper flowers. Ready in just 5 minutes! Great for decorating cakes and cupcakes!
If you happen to be one of those people who hates making Fondant Flowers or Fondant Roses (Ribbon Roses) or even these Royal Icing Flowers (Sugar Flowers) because they are so hard to make and take forever to dry, then you should makes the ones I am sharing today. They are so easy to make. You can color them with petal dust or even buy pre-colored sheets online. You can also cut them easily with scissors and stick the pieces together with corn syrup or very little water. I have seen some cake decorators make gorgeous realistic paper flowers like peonies and ranunculus but those take some time. The one I am sharing with you today is fantasy-based so easy that it's ready in about 5 minutes!
Want to Save This Recipe?
Enter your email & I'll send it to your inbox. Plus, get great new recipes from me every week!
By submitting this form, you consent to receive emails from CakeWhiz
How to make wafer paper flowers?
- Bake cake– Coconut cranberry cake was the flavor today.
- Let it cool- Until room temperature.
- Make icing- White chocolate frosting was the best pairing.
- Assemble– Cut cake in half, place one half on cake board, ice it, place other half on top, ice entire cake smoothly, cover in fondant.
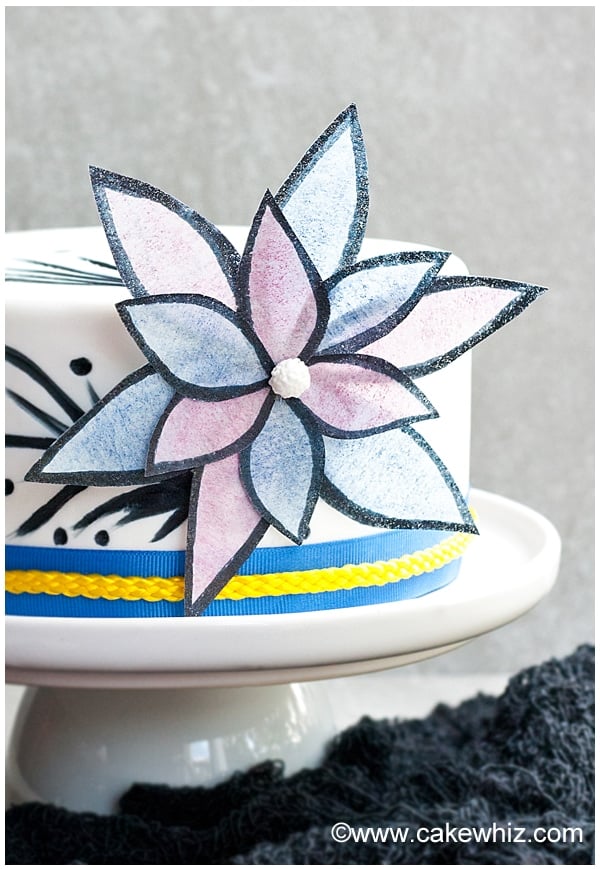
- Make large flower- And stick it to the side of the cake.
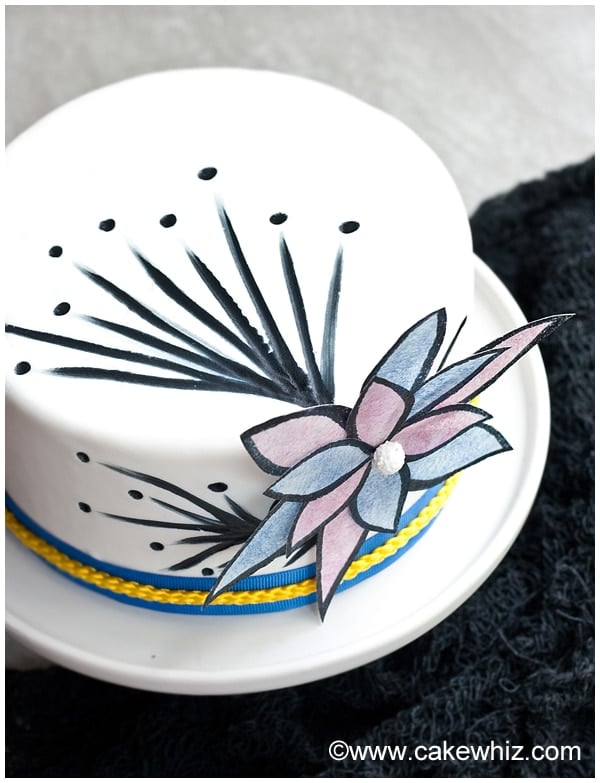
- Add final details- Draw an abstract pattern with an edible black marker and stick ribbons around base of cake.
Can you make wafer flowers ahead of time? Are they edible?
Yes, this is actually recommended because you will always have some in stock for a last minute pretty dessert. Yes, they are completely edible.
Variations
Try other color combinations– I kept it simple with white and pops of blue and pink but the color possibilities are endless.
Try other cake flavors- Such as Cherry Cake.
Try other frosting flavors- Such as Cooked Flour Buttercream (Ermine Frosting).
Fill cake- With jams and preserves, Homemade Caramel Sauce or Dulce De Leche or nut butters. You can also add fresh berries.
Flavor fondant- Use clear extracts so they don't discolor the white fondant.
Tips and techniques
Homemade marshmallow fondant vs. Store-bought fondant- Either can be used. Homemade version definitely tastes better but store-bought version is convenient since it can be bought pre-colored.
Don’t decorate warm cake- Because the heat will cause the icing and fondant to melt and become sticky.
Don’t use a lot of corn syrup- Corn syrup is being used as a glue to stick wafer paper pieces together. Adding too much will create puddles and disintegrate the paper.
Where to buy wafer paper? It can be ordered online from Amazon and it's very reasonably priced and not expensive at all.
How to cut wafer paper? Simple scissors work very well.
How to color wafer paper? Use edible markers and edible petal dust. You can also use an airbrush machine.
Storage
How to store wafer flowers? They should be stored in a dry area away from humidity and moisture. The humidity is a key factor because the starch in the paper will absorb moisture and that can change their shape. They don't need to be refrigerated.
Room temperature- Decorated cake can be left at room temperature for up to 24 hours as long as there is no perishable filling.
Refrigerate- Leftovers can be stored in a sealed container in the fridge for up to 3 days. However the fondant will become slightly sticky and tacky from the moisture in the fridge.
Freeze- Unfrosted cake and frosting can be stored separately in sealed containers for up to 1 month. When you are ready to enjoy this dessert, let them thaw in the fridge overnight and then, decorate as per instructions below.
Make ahead instructions- This cake can be baked and decorated 1 day in advance and stored at room temperature until you are ready to serve.
More Decorated Cakes
- Fondant Flower Cake
- Peacock Cake (And Cupcakes)
- Lord of The Rings Cake (Sauron Eye Cake)
- Erupting Volcano Cake (With Dry Ice Smoke)
- Easy Shoe Cake (Sneaker Cake)
Recipe
Easy Wafer Paper Flowers
Want to Save This Recipe?
Enter your email & I'll send it to your inbox. Plus, get great new recipes from me every week!
By submitting this form, you consent to receive emails from CakeWhiz
Ingredients
- 1 Coconut cranberry cake Dimensions: 8x3
- 4 cups White chocolate buttercream frosting
- 2 cups Marshmallow fondant White
- 2 sheets Wafer paper
- 1 tablespoon Corn syrup
Instructions
- Bake cake and allow it to cool completely.
- Cut the cake in half.
- Place one half of the cake on a cake board.
- Spread icing on top.
- Place the other half of the cake on top of the icing.
- Ice the entire cake smoothly.
- Roll out white fondant and spread it over the iced cake.
- Cut off excess along the base of the cake with a pizza cutter.
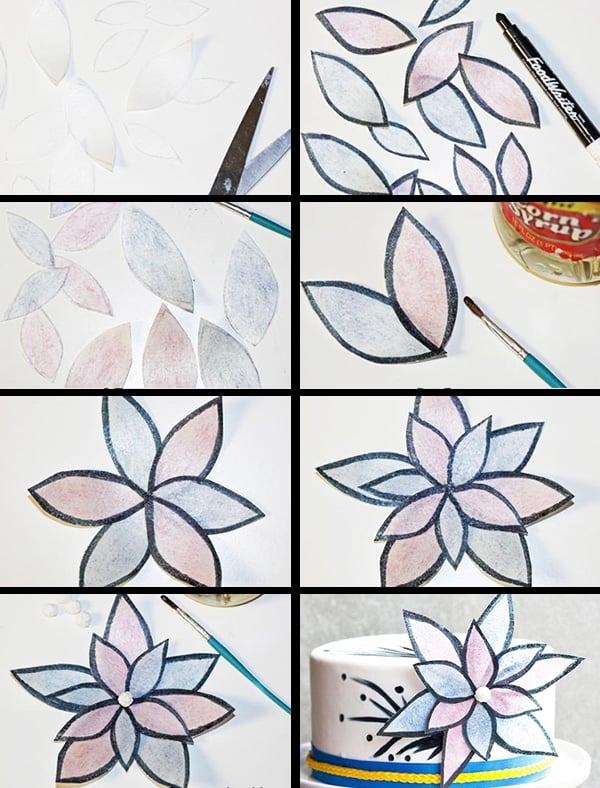
- Use a pencil to draw petal shapes on a sheet of wafer paper. Draw 6 big petals and 6 smaller petals.
- Use scissors to cut out all the petal shapes.
- Brush pink petal dust on 3 big and 3 small petals. Brush blue petal dust on 3 big and 3 smaller petals.
- Outline each petal with black edible marker.
- Use very little corn syrup to stick 1 big blue petal and 1 big pink petal together.
- Continue to stick the big petals together in alternating colors, using very little corn syrup. You will end up with a big flower.
- Now, stick the smaller petals in a similar flower formation on top of the big flower.
- Stick a big edible pearl in the center of the flower with very little corn syrup. Allow the syrup to dry.
- Then, stick the flower on the side of your prepared cake, using corn syrup.
- Use black edible marker to draw an abstract design around the flower on the white fondant.
- Wrap the base of the cake with ribbons. Enjoy!
Notes
- Read all my tips above.
- Leftovers can be stored in a sealed container in the fridge for up to 3 days.
Nutrition
An automated tool is used to calculate the nutritional information. As such, I cannot guarantee the accuracy of the nutritional information provided for any recipe on this site.

Leave a Reply