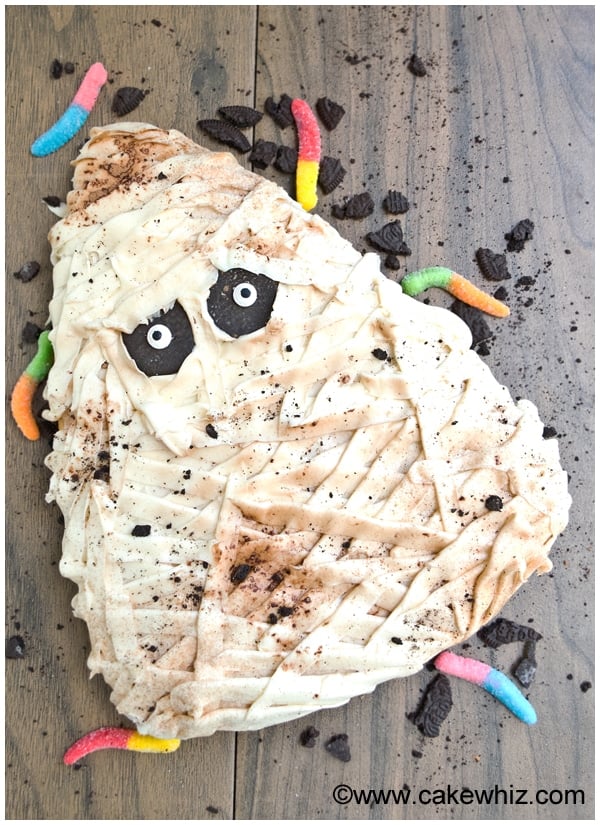
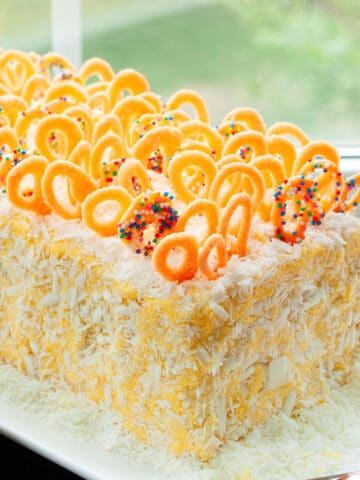
This easy mummy cake is homemade with simple ingredients. Decorated with buttercream icing and candies. Great Halloween cake for parties.
Want to Save This Recipe?
Enter your email & I'll send it to your inbox. Plus, get great new recipes from me every week!
By submitting this form, you consent to receive emails from CakeWhiz
I recently got a cool candy corn shaped cake pan. I had full intentions of decorating a cake that would look like a candy corn. But then, an Idea struck! I wanted to make a triangular shaped mummy cake. I love when you can use a cake mold for more than just its intended use. I also love when a cake is this easy to make and it turns out this adorable. In fact it would make an excellent addition to this curated Kids Halloween Party . Need more inspiration? This Monster Cake and Spider Web Cake are both whimsical cakes sure to make any child squeal with an EEEEK of joy!
Jump to:
How to make easy Halloween mummy cake recipe from scratch?
- Bake cake- Cool completely.
- Frost cake- In white icing.
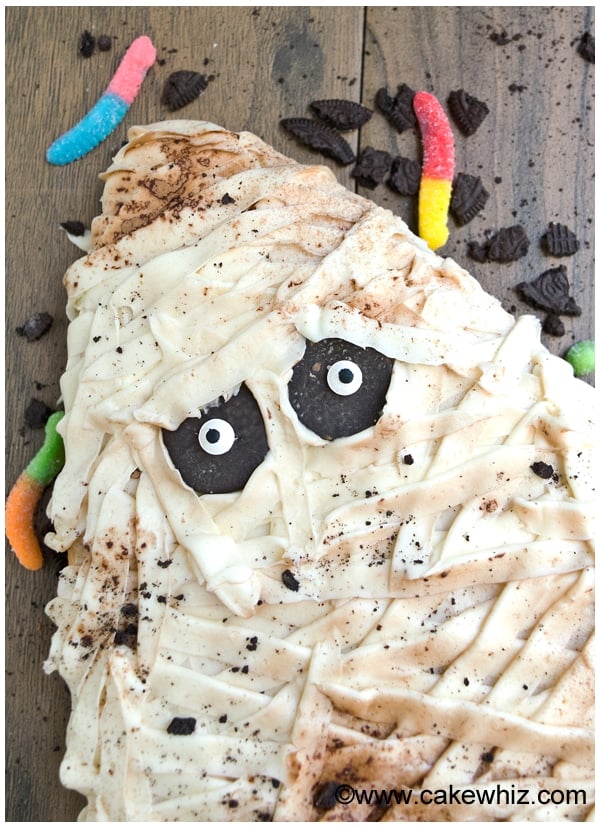
- Add mummy eyes- Stick two peppermint patties and eyeball candies near the top of the cake.
- Pipe strips- With white icing.
- Dust cake- With cocoa powder
- Add decor- Sprinkle some crushed Oreos and stick some gummy worm candies. Enjoy!
Variations for homemade Halloween cake
- Try other cake flavors- Such as Coca Cola Cake, Pistachio Cake {With Cake Mix}, or German Chocolate Cake.
- Try other white frostings- Such as Sugar Free Frosting, Marshmallow Frosting, Best Cream Cheese Frosting, or this White Chocolate Buttercream Frosting.
- Add a cake filling such as- Such as Strawberry Pie Filling, Blueberry Pie Filling, Cherry Pie Filling, Homemade Caramel Sauce, or Lemon Curd {4 Ingredients}.
- Try another decorating tip instead of Wilton's Tip #104- Use the round tip or the star tip. The final result will be cool but different.
- Make a multi-colored rainbow version- For rainbow parties or girls' parties.
- Use a different shaped pan- Use the same tutorial on different shaped pans like a circle, square, or rectangle.
Tips and techniques
- You can use cake mix and store bought frosting- Do this if you are short on time, but I prefer to use homemade buttercream when possible since it tastes so good.
- Consistency of icing is important– If it’s too thin, it will become messy and runny instead of defined strips. If it’s too firm, it would be too hard to squeeze out of the piping bag and not stick to the cake. It should be a medium consistency- Not too thick and not too thin!
- Cake must be cool before icing- You cannot ice or pipe a hot or even warm cake. It needs to cool down completely or else the buttercream will melt.
- Practice piping– If you have never piped before or you are a little rusty, just practice piping on a sheet of wax paper before piping on the cake. This is one of the easiest piping techniques, so I promise you can do this.
- Frost in a cool kitchen- A hot kitchen can soften the frosting making it impossible to pipe. Turn that A/C up when piping frosting.
- Don't pipe over the peppermint patties- Keep the eyes visible!
Storage of decorated cake
- Refrigerate- In a sealed container for up to 3 days.
- Freeze- I don't recommend freezing decorated cakes because sometimes, they don't thaw well. Freeze the cake and frosting separately and when you are ready to assemble, thaw to room temperature and follow the instructions in the recipe card.

More Halloween cake ideas
Recipe
Halloween Mummy Cake
Video
Want to Save This Recipe?
Enter your email & I'll send it to your inbox. Plus, get great new recipes from me every week!
By submitting this form, you consent to receive emails from CakeWhiz
Ingredients
- 1 batch Best Vanilla Cake Make in 9x13 rectangle pan instead of circle pans or use a candy corn shaped pan
- 3 cups Buttercream icing
- 2 Peppermint patty candies
- 2 Eyeball candies
- 1 tablespoon Cocoa powder
- ¼ cup Crushed Oreos
- 8-10 Gummy worm candies
Instructions
- Use a spatula to frost the entire cake in white buttercream icing.
- Stick two peppermint patties near the top of the cake for the mummy's eyes.
- Stick eyeball candies on the peppermint patties, using some icing.
- Fill a piping bag with frosting and attach Tip #104.
- Hold the piping bag at a 45 degree angle and randomly start piping strips of frosting all over the cake.
- Make sure not to frost the peppermint patty eyes.
- Fill a small fine mesh strainer with cocoa powder dust and do a light dusting of cocoa powder all over the cake.
Notes
- Read all my tips above.
- Leftovers can be stored in a sealed container in the fridge for up to 3 days.
Nutrition
An automated tool is used to calculate the nutritional information. As such, I cannot guarantee the accuracy of the nutritional information provided for any recipe on this site.

Sara R
My son wanted a spooky themed birthday party and this cake was a huge hit! Thank you for making it so easy!
Sharina
Made this mummy cake with the kids, they enjoyed making it! It was so adorable and delicious. Must-try!
Val
What a unique recipe! Thank you for sharing this yummy cake!
Phyllis Brandt
Will one recipe of your vanilla pound cake be enough for N 11 x 13 sheet cake? And how long would you bake that for at 325?
Abeer Rizvi
I haven't tried those changes to know how that would affect the recipe. Sorry.
T Austin
I love how you went with the flow and changed it up midstream! The mummy cake turned out awesome!
Abeer Rizvi
Sometimes, the best decisions are made spontaneously
Beth
I love Halloween foodie posts. That spider web cake looks great, I think I'm going to give it a go at making it this weekend.
Abeer Rizvi
That spider web cake is actually really easy to make and I even know some non-decorators who have made it in the past. Good luck!