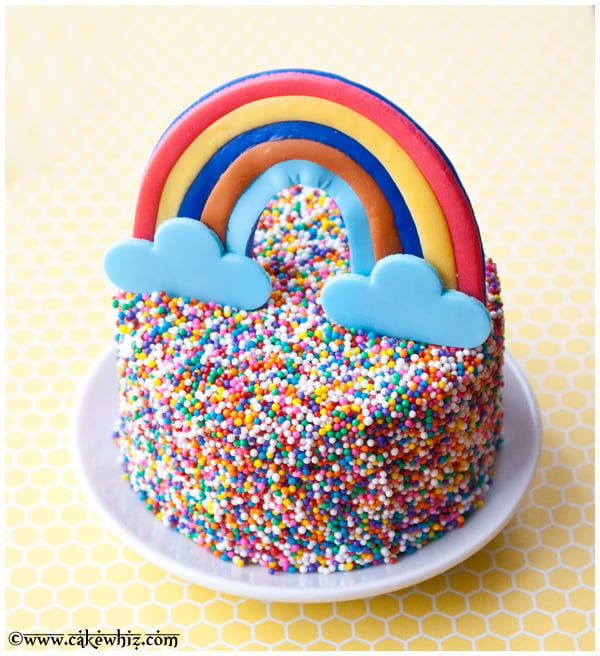
Use this cake decorating tutorial to make an easy rainbow sprinkle cake. Colorful vanilla cake is covered in white chocolate buttercream frosting, sprinkles and a fondant rainbow topper. Great for kids birthday parties or even St.Patrick's day!
When it comes to desserts, rainbows and sprinkles are still very popular, not only with kids but adults as well. Today's cake is just so fun and colorful and easy enough for beginners. For more inspiration, be sure to check out these Rainbow Desserts and if you are making this for St.Patrick's Day, there are lots of Green Desserts (St. Patrick's Day Desserts) for you to check out as well.
If you like making birthday cakes for family and friends, you really must scroll through these Easy Cake Decorating Ideas and these fantastic Birthday Cake Ideas.
Want to Save This Recipe?
Enter your email & I'll send it to your inbox. Plus, get great new recipes from me every week!
By submitting this form, you consent to receive emails from CakeWhiz
How to make rainbow sprinkle cake?
- Bake cakes- And let them cool.
- Make frosting- There is no need to color it.
- Assemble- Place one cake on stand, ice the top, place other cake on top, ice entire cake.
- Decorate- Cover entire cake with sprinkles and add a fondant topper.
Variations
Use pastel colors- This is with regards to sprinkles and the fondant colors for the rainbow topper. The colors won't be as vibrant but still very pretty.
Try other cake flavors- Such as Red Velvet Cake or Pistachio Cake.
Filling ideas- Try jams and preserves, peanut butter, Nutella, ganache, caramel sauce, dulce de leche, thick custard or pudding, fresh fruits, chopped up candy bars.
Try other frosting flavors- Such as Lemon Frosting or Maraschino Cherry Frosting.
Consider other decorations- Such as colorful candles or sparklers or store-bought toys or candies or even cardboard toppers.
Make a larger cake- This was a small cake but you can make an 8 inch or 9 inch cake.
Make layer cake- Make another set of 3 inch cakes and stack them on top of the 6 inch cakes. Use dowels for support.
Try a pinata cake- Follow the instructions for this Pinata Cake and fill the inside with lots of sprinkles and mini candies. It's an exciting surprise when you cut into the cake.
Tips and Techniques
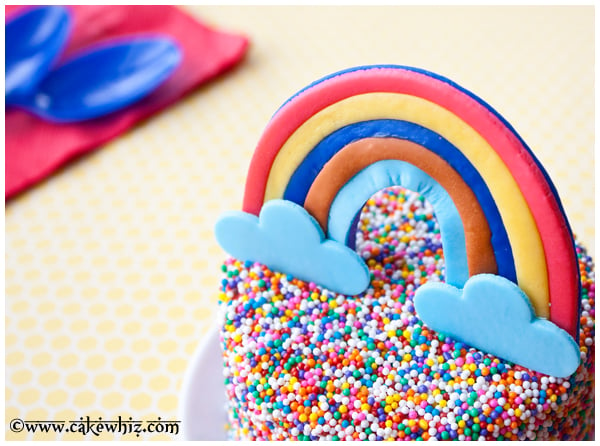
This wacky rainbow has 5 weird colors- Red, yellow, dark blue, brown and light blue. I was using up leftover fondants from old projects. Please feel free to use my tutorial to make a proper rainbow.
Don't frost or decorate warm cake- Because that will cause the icing to melt into a sticky mess.
For faster drying- Use gum paste or 50/50 (mixture of half fondant and half gum paste). You can also aim a small table fan at the rainbow overnight so that it dries quicker.
Be gentle when covering cake in sprinkles- Because if you press the sprinkles too hard, it will make dents in the frosting.
Line pans with parchment paper- Because that allows the cakes to be removed easily without breaking or sticking.
Place plate of iced cake in large, deep pan- This is very important because the large tray will catch all the sprinkles falling from the cake or else they will end up everywhere in your kitchen.
Keep decorated cake away from moisture- Because that will cause the fondant topper to become sticky and the sprinkles will start to bleed color.
The topper must be dry- If the rainbow is not completely dry, it will not hold its curved shape.
Drying time of topper will vary- This depends on where you live and the humidity in your area. Higher humidity= Slow dry time.
Storage
Refrigerate- Leftovers can be stored in a sealed container in the fridge for up to 3 days.
Freeze- Unfrosted cakes can be stored in a sealed container for up to 1 month. When you are ready to enjoy it, let it thaw in the fridge overnight and then, decorate as per instructions below.
Make ahead instructions- This cake can be baked and decorated 1 day in advance and stored at room temperature until you are ready to serve.
More Decorated Cakes
- Easy Cereal Cake
- Tie Dye Shirt Cake
- Blue Ombre Cake
- Butterfly Cake
- Easy Galaxy Cake
- Back to School Pencil Cake
Recipe
Rainbow Sprinkle Cake
Want to Save This Recipe?
Enter your email & I'll send it to your inbox. Plus, get great new recipes from me every week!
By submitting this form, you consent to receive emails from CakeWhiz
Ingredients
- 2 Rainbow cakes Round, 6 inch each
- 1 cup Marshmallow fondant In the colors of the rainbow, Can use gum paste instead for faster drying
- 4 cups Whit chocolate buttercream frosting
- 3 cups Sprinkles
Instructions
- Bake cakes and let them cool completely.
- While the cakes are cooling, prepare the frosting.
- Place one cake on a serving plate.
- Spread frosting on top.
- Place the other cake on top and gently press it to secure into place.
- Spread frosting all over the cake smoothly.
- Place this plate of iced cake in a large, deep baking dish.
- Cover the cake in sprinkles. Do the sides first and then, do the top. All the excess sprinkles will fall in the tray and can be reused.
- Keep decorated cake aside.
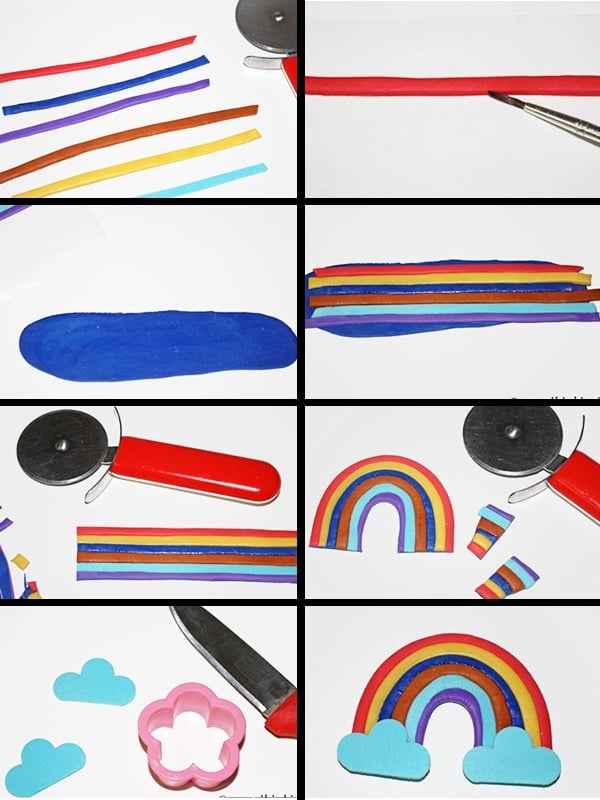
- Roll out marshmallow fondant in different colors.
- Use a pizza cutter to cut out thin, even strips of each color.
- Place your first fondant strip on a sheet of wax paper.
- Then, brush very little water at the edge of this strip.
- Stick the next strip on this damp edge.
- Brush water along the edge again and stick another strip.
- Keep doing this until all your strips are stuck together. Keep aside.
- Roll out some fondant in any color you want (I used dark blue).The length of this piece should be about the same as the length of your strips.
- Brush some water on top of this piece.
- Gently pick up your strips arrangement and place them on top of this dark blue piece until it sticks into place.
- Use a pizza cutter to cut out the irregular ends.
- Use both your hands to gently curve this entire rainbow strip until it looks like an upside down "u"
- Use a pizza cutter to cut the bottoms so they are straight.
- To make clouds, roll out some light blue fondant and use a flower cutter to cut out two flower shapes. Then, use a knife to cut these flowers in half.
- Brush some water on both ends of the rainbow strip and stick the clouds in place.
- Allow this rainbow to dry for 24 hours or until it gets hard.
- Once this rainbow is dry, flip it over and use some melted chocolate to stick toothpicks on both ends.
- Push the rainbow into your cake. Enjoy!
Notes
- Read all my tips above.
- Leftovers can be stored in a sealed container in the fridge for up to 3 days.
Nutrition
An automated tool is used to calculate the nutritional information. As such, I cannot guarantee the accuracy of the nutritional information provided for any recipe on this site.

Kayle
So many sprinkles! So pretty!
Acacia
It looks amazing, and I can hardly see any cracks in your rainbow!
Darlene
Proper rainbow or not, it's still very cute!
Vimitha
Gorgeous creation dear
Uru
You make it look easy but this is so so beautiful my friend
Kiran
The joy of motherhood -- and you do a great job on it.
Such pretty cake with decorations that I can never be able to pull off!
I Wilkerson
Great tutorial--actually looks doable even for someone who is all thumbs like me!
Jenni
Such a cute cake; I love it!
yummychunklet
Beautiful cake!
Daniela
You really made my day with this pretty,joyful cake, Abeer!
For sure it's not easy to dedicate time to blogging with a little one at home but let me tell you you are doing a great job and I always enjoy visiting.
Tiffany
This cake just makes me want to smile! (And to go searching for my pot of gold!)
Ella
Very beautiful, My daughter love it!
Raven
I cannot even tell you how excited I would have been to have gotten this cake as a child. I LOVED rainbow sprinkles. I would have eaten them on my hamburger if my parents let me haha
Suzie
You are so creative! I wish I had your imagination!
Pressia
amazing look cake..... rainbow color always makes cake look more attractive. thanks for the tips of how to make easy rainbow fondant topper.
Marta
o wow, thank you for sharing. This is so beautiful.