Learn how to make easy fondant bows with no cutters, using this step by step tutorial. Super cute for decorating cakes and cupcakes.
Today's tutorial is as easy as it gets and proves that cake decorating does not need to be difficult. Also, if you are fond of cake decorating, be sure to check out these Easy Cake Decorating Ideas and these Bundt Cake Decorating Ideas and even these Birthday Cake Ideas.
Want to Save This Recipe?
Enter your email & I'll send it to your inbox. Plus, get great new recipes from me every week!
By submitting this form, you consent to receive emails from CakeWhiz
Table of contents
How to make simple fondant bows for cakes and cupcakes?
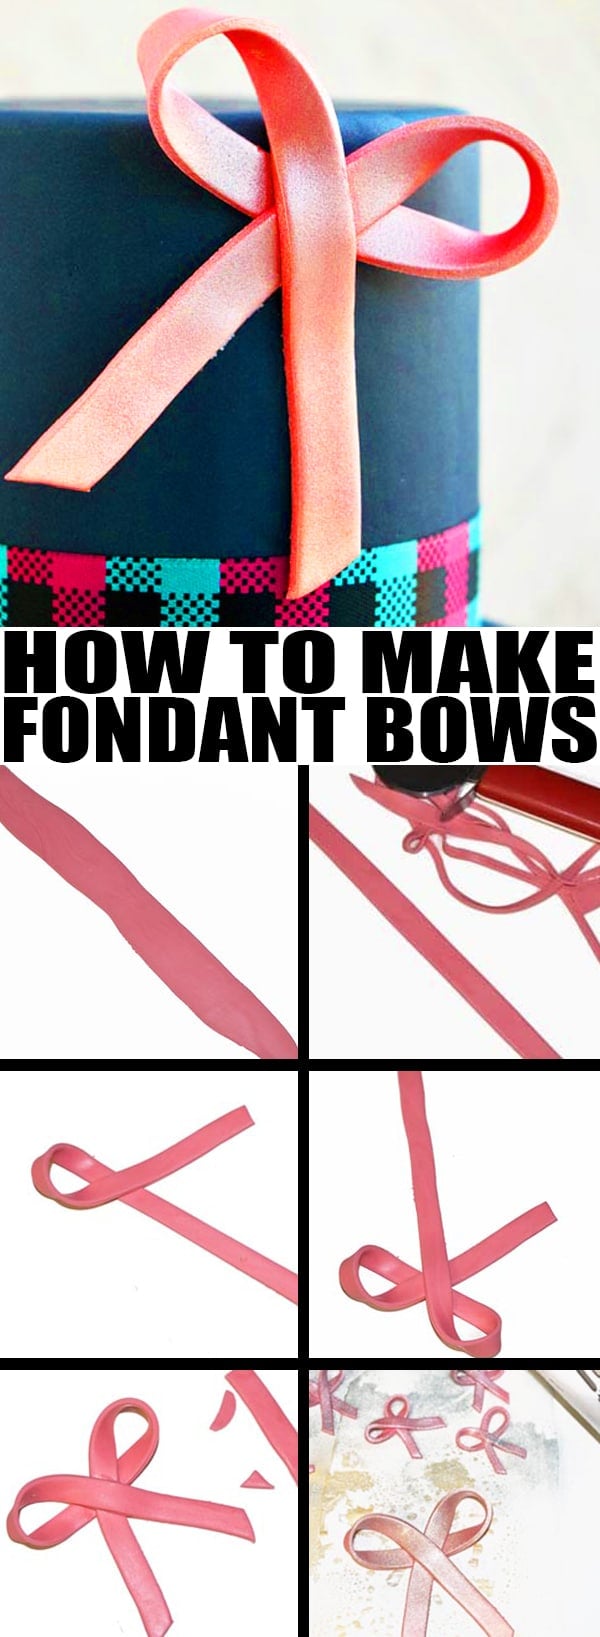
- Cut thin rectangular strips of fondant- Gum paste can be used instead.
- Fold over one side of the strip into a loop- Then, fold the other side of the strip into a loop.
- Press the center of the loop- This will secure the bow.
- Cut off excess fondant- Use a sharp knife or blade.
- Spray silver color- And let the bows dry until hard.
Variations for Cake Bow
Flavor fondant- Use extracts to add any flavor you like.
Try other colors- I chose a pink and gray color theme but you can use any colors you like. Use gel colors because they are thick and don't make the fondant sticky. You can also buy pre-colored fondant from stores.
Try other cake flavors- Such as Chocolate Coffee Cake or Best Vanilla Cake.
Try other frosting flavors- Such as Marshmallow Frosting or Caramel Frosting.
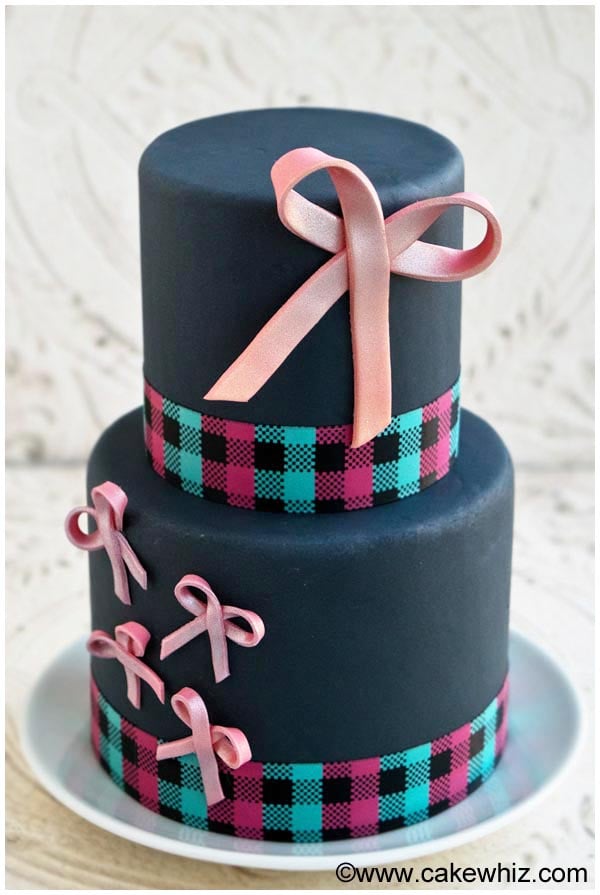
Make a larger tiered cake- The cake you are seeing today is small. The bottom tier is 6 inches and the top tier is 3 inches. Regardless of the size of the cake, the same steps can be applied.
Decorate cupcakes- Instead of adding these decorations to a cake, add them to cupcakes with a swirl of frosting.
Tips and Techniques for Cake with Bow
Homemade fondant vs. Marshmallow fondant- Either can be used. I prefer homemade fondant because it tastes really good.
Avoid soft cakes- When making tiered cakes, it's important to use cakes that are firmer and not supremely soft. That's because soft cakes cannot handle the weight of the decorations.
Don't decorate a warm cake- The cake must be completely cool before it's decorated with bows. If the cake is warm, the decorations will start melting and get sticky and messy.
Decorations must be dry- If the bow is not dry, it will not hold its shape.
Use gum paste or combination of half fondant and half gum paste- This allows the bows to dry quicker.
How long does fondant need to dry? Typically, it takes 24 hours. However, the drying time may vary. It depends on the thickness that you rolled out the fondant. The thinner it is, the faster it dries. The thicker it is, the slower it dries. Drying time is also quicker when you live in dry climates where there is little to no humidity.
How to stick bows? What do you use to attach fondant to fondant? Thick royal icing is the best for this purpose. Don't use a lot because it will spread out from the side and ruin the appearance of the pretty cake.
Storage
Room temperature- Store decorated cake in a covered box for 24 hours.
Refrigerate– Store in a covered box for 3-5 days.
Freeze– Fondant decorations cannot be frozen and have to be stored at room temperature for up to 1 month, once completely dry. Decorated cakes cannot be frozen because when they thaw, the fondant decorations become sticky due to condensation.
More Decorated Cakes
- Crying Baby Cake
- Father's Day Tool Box Cake
- Modern Abstract Cake
- Mini Sushi Cake
- Tie Dye Shirt Cake
- Back To School Pencil Cake
- Blue Ombre Cake
- Butterfly Cake
- Galaxy Cake
- Easy Monster Cake
Recipe

Fondant Bows
Want to Save This Recipe?
Enter your email & I'll send it to your inbox. Plus, get great new recipes from me every week!
By submitting this form, you consent to receive emails from CakeWhiz
Ingredients
- Marshmallow fondant Dark gray, Pink
- Edible spray Silver
- 2 Chocolate cakes Round 6 inch, Round 3 inch
- 4-5 cups Chocolate buttercream frosting
- 2 tablespoon Royal icing
Instructions
- Roll out a long thin strip of pink fondant. Tip: Use gum paste OR a combination of half fondant and half gum paste instead of fondant to make bows because they will dry quicker.
- Use a pizza cutter to cut off the sides so that you have a smooth and long rectangular strip.
- Fold over one side of the strip into a loop.
- Fold the other side of the strip into a loop.
- Press the center of the loop to secure the bow.
- Cut off excess fondant with a sharp knife.
- Place this bow on wax paper and spray it with edible silver spray. This is optional.
- Follow these same steps to make smaller bows too.
- Let these easy fondant bows dry and harden for about 24 hours.
- While they are drying, bake chocolate cakes and allow them to cool completely.
- Then, place the 6 inch cake on a cake stand and ice it completely.
- Roll out gray fondant and spread it over the cake and cut off excess near the bottom.
- Push wooden dowels in the center so that it can handle the weight of the top tier.
- Now, ice the 3 inch cake and cover it in gray fondant too.
- Place it on top of the 6 inch cake.
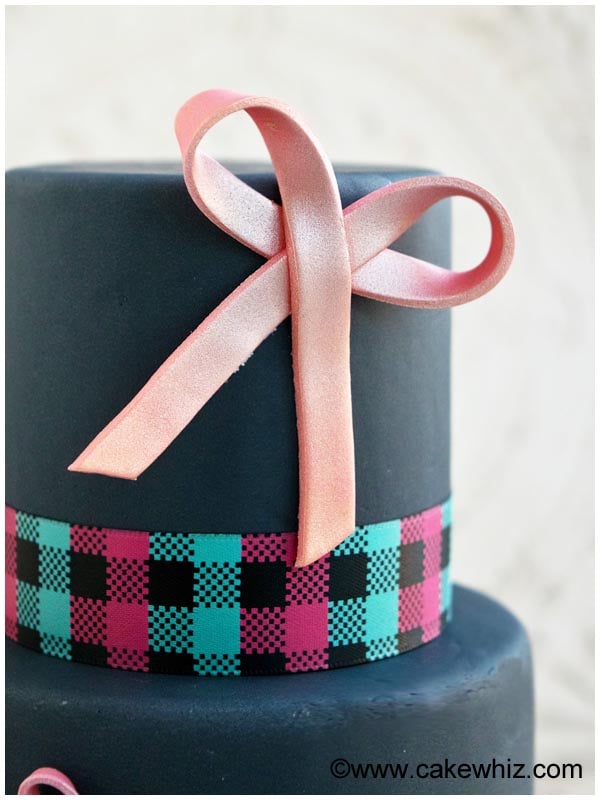
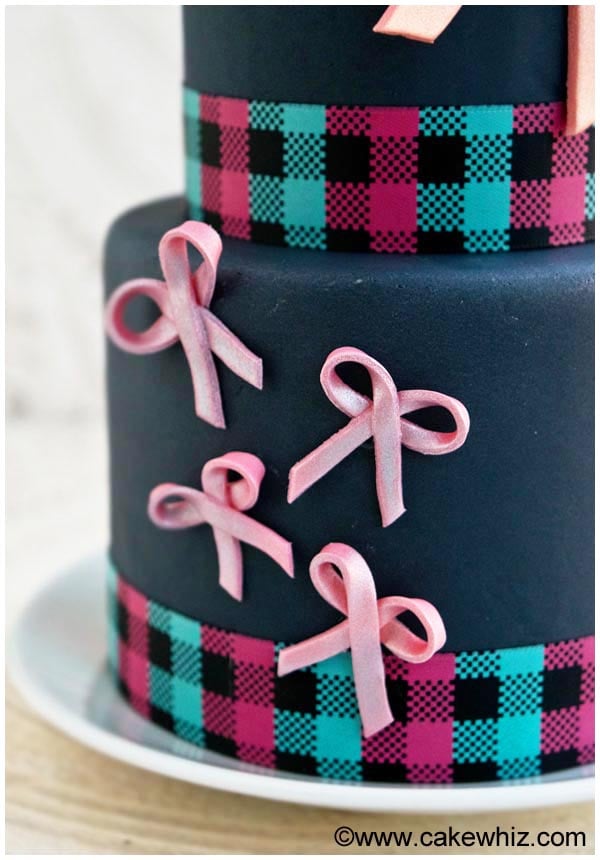
- Stick dried pink bows on this tiered cake with royal icing.
- Wrap ribbon around the base of each tier with royal icing or corn syrup. Enjoy.
Notes
- Read all my tips above.
- Leftovers can be stored in a sealed container in the fridge for up to 3 days.
Nutrition
An automated tool is used to calculate the nutritional information. As such, I cannot guarantee the accuracy of the nutritional information provided for any recipe on this site.
Leave a Reply