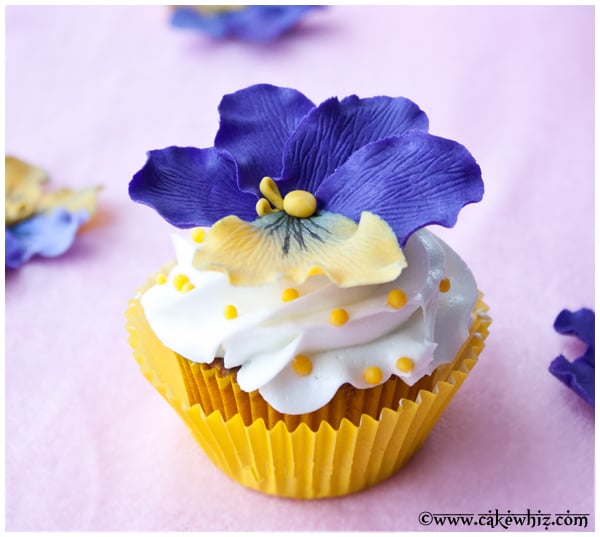
Use this cake decorating tutorial to make easy fondant flower cupcakes. These floral pansy cupcake toppers are homemade with simple ingredients. Great for Spring and Summer birthday parties!
Want to Save This Recipe?
Enter your email & I'll send it to your inbox. Plus, get great new recipes from me every week!
By submitting this form, you consent to receive emails from CakeWhiz
If you liked this tutorial on How to Make Flower Cupcake Bouquet, you will really like today's post too. These cupcakes are decorated with fondant instead of buttercream icing but still simple to put together. To make icing flowers, check out this post on How to Make Buttercream Flowers or this detailed post on How to Decorate Cupcakes.
Jump to:
How to make flower cupcakes from scratch?
- Bake cupcakes- And allow them to cool completely.
- Make icing- Color it if you like.
- Make fondant pansy flowers- Let them dry and harden.
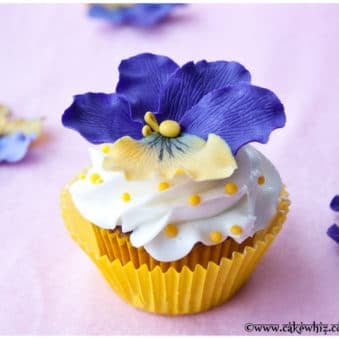
- Assemble- Pipe a swirl of icing on top of cupcakes and stick the pansy on top.
Variations for fondant flower toppers
- Make mini cupcakes- Using mini cupcake liners. The baking time will probably be shorter. Also, the fondant flower toppers will have to be smaller.
- Fill cupcakes- With Easy Homemade Strawberry Jam or Lemon Curd.
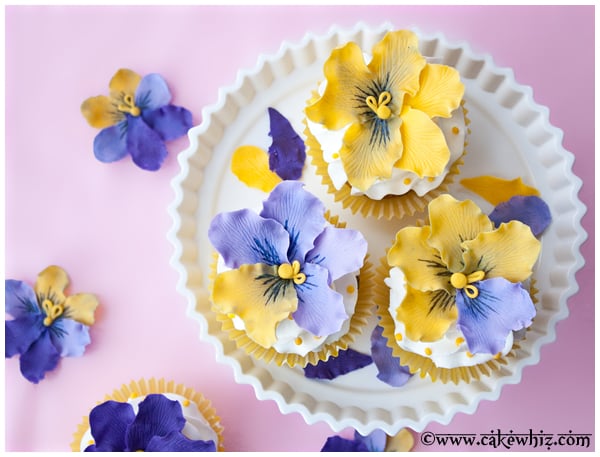
- Try different color combinations- You can make a rainbow version with all different colors of petals or choose colors to fit the them of the party.
- Consider different cupcake flavors- Such as these Easy Orange Cupcakes or these Lemon Cupcakes. Those flavors are ideal for Spring and Summer parties.
- Pair with other frosting flavors- Such as Mango Frosting or Lemon Frosting.
- Flower pot cupcakes- Place these cupcakes in mini ceramic pots for a beautiful presentation.
Tips and Techniques for Fondant Pansies
- Homemade marshmallow fondant vs. Store-bought fondant- Either can be used. Both have their pros and cons. Homemade fondant tastes really good and also smells amazing. Store-bought fondant, however, is quick and convenient and also comes pre-colored, which means less work for you.
- Gum paste vs. Fondant- Either can be used. You can also use a 50/50 combination (half gum paste and half fondant). Gum paste dries hard very quickly and fondant takes longer.
- Make sure cupcakes fully cool down before decorating- Because if you don’t do this, the heat will melt the icing and fondant decorations to create a sticky mess.
- Use gel colors instead of liquid food coloring to color icing– I kept it white but you can tint it. Gel colors are vibrant and more concentrated plus the consistency of icing does not change.
Storage for floral cupcakes
- Room temperature- Sore decorated cupcakes in a covered box for up to 2 days. They should not be in a sealed container because that will cause the fondant decorations to become sticky.
- Refrigerate- This is not recommended since the moisture from the fridge can make the fondant decorations sticky. However, you can store iced cupcakes in a covered box in the fridge and stick the fondant pansy on top before serving.
- Freeze– Decorated cupcakes cannot be frozen because when they thaw, the fondant decorations become sticky due to condensation.
More cupcake decorating tutorials
- Ladybug Cupcakes
- Pull Apart Watermelon Cupcakes
- Easy Poinsettia Cupcakes
- Snowflake Cupcakes (Winter Cupcakes)
- How to Make Fondant Daisies
Recipe
Easy Flower Cupcakes (Fondant Pansy)
Want to Save This Recipe?
Enter your email & I'll send it to your inbox. Plus, get great new recipes from me every week!
By submitting this form, you consent to receive emails from CakeWhiz
Ingredients
- 12 Strawberry Cupcakes
- 4 cups Buttercream icing
- 2 cups Marshmallow fondant Dark purple, light purple, yellow
Instructions
- Bake cupcakes and allow them to cool completely.
- Make icing and tint it with gel colors if you like.
- Pipe a swirl of frosting on top of each cupcake. Keep aside.
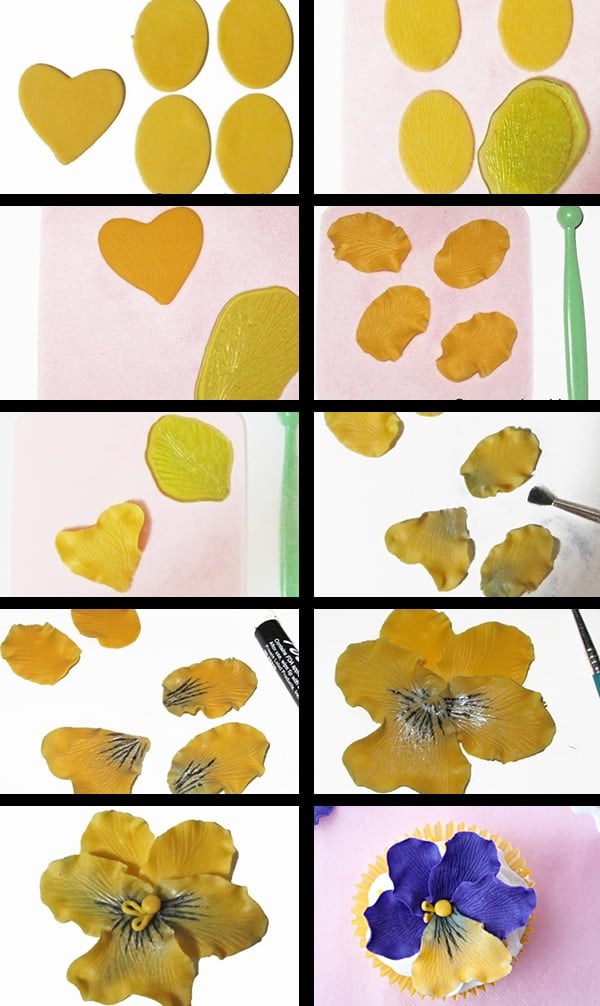
- Roll out yellow gum paste. Use an oval cutter to cut out 4 yellow pieces. Use a heart cutter to cut out 1 heart piece.
- Place the oval pieces on a foam pad. Press the leaf veiner on top of each piece until the leaf pattern transfers over.
- Place the heart piece on the foam pad.Press the leaf veiner on top of it until the leaf pattern transfers over.
- Use the balling tool to thin out the edges of the heart piece until it looks a little ruffled.
- Use the balling tool again to thin out the edges of all the oval pieces.
- Brush blue petal dust on the bottoms of 2 oval pieces and 1 heart piece.
- On the pieces that you just brushed with petal dust, use a black edible marker to draw lines only halfway.
- It's time to assemble all the pieces now: Arrange the petals in a circular formation. Stick the piece together by brushing some corn syrup in the center.
- Roll out a small ball of yellow fondant and stick it in the center of the flower.
- Also, make 2 small yellow gum paste loops and stick them around the center of the flower.
- Now, place this flower on a flower forming cup and let it dry overnight or until it hardens.
- Make more of these flowers and then, stick them on top of your iced cupcakes. Enjoy!
Notes
- Read all my tips above.
- Leftovers can be stored in a covered box at room temperature for up to 2 days.
Nutrition
An automated tool is used to calculate the nutritional information. As such, I cannot guarantee the accuracy of the nutritional information provided for any recipe on this site.
Divya
Thanks a ton for the tutorial !!
Abeer Rizvi
You're welcome! I hope it helped.
Anna
Thank you so much for your reply. I was planning on trying fondant for the first time with my Christmas baking this year but alas I ran out of time. I hope to try it soon. Your site has really inspired me and your work is amazing. Thank you for sharing.
cakewhiz
@ Anna... here are the answers:
- I have made these flowers with fondant, gumpaste and even 50/50. Fondant takes the longest to dry (a few days) and we can't roll it as thin as gumpaste. Use whatever you are comfortable with and whatever you think you can control the best.
- I use Wilton's store-bought gumpaste. So, I am sorry I don't have a homemade recipe. I do have a recipe for homemade marshmallow fondant though: https://cakewhiz.com/post/How-to-make-marshmallow-fondant.aspx
- As for whether gumpaste is edible or not, some people say yes and some people say no...lol. I use it for decoration purposes on cakes and inform the guests that the flowers are made with gumpaste. Some people choose to eat eat them and some people don't. I haven't had anyone get sick from eating gumpaste... hehe
Hope I helped
Anna
Absolutely stunning! I will definitely be attempting these. A couple of questions though, the title is for fondant pansies but the instructions are to use gum paste? Is gum paste edible and is there a recipe for home made?
Kumar
first of all thanks a lot for sharing such dainties, we really loved every single creation in your blog.
Rosie
These look absolutely gorgeous!
Medeja
I wouldn't even dare to touch such cupcakes, would keep them as decoration