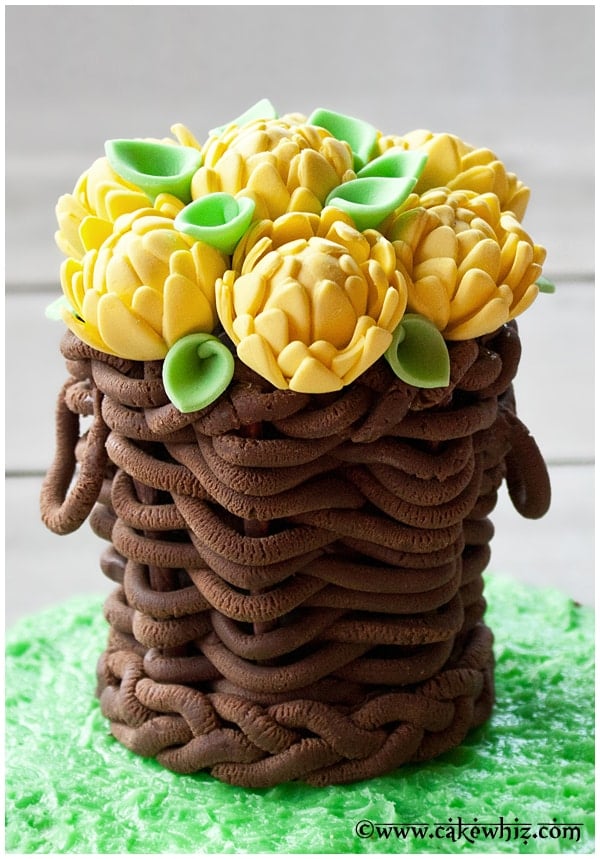
Learn how to make easy fondant basket cake. Filled with circular cakes, frosting and topped with fondant flowers. Use as cake topper or enjoy as is. This dessert is completely edible! No piping tip or nozzle necessary.
Want to Save This Recipe?
Enter your email & I'll send it to your inbox. Plus, get great new recipes from me every week!
By submitting this form, you consent to receive emails from CakeWhiz
It's so much fun to make edible bowls or containers like these Cookie Bowls or these Brownie Bowls. Today's basketweave is another way to serve desserts. You can make a mini version for small cakes/ cupcakes or make a larger version for cakes. I think these are just as beautiful as my Marshmallow Cupcakes (Flower Pot).
Jump to:
How to make easy fondant basket cake with flowers from scratch?
- Bake cake- Pineapple cake was the flavor of choice this time.
- Let it cool- Until room temperature.
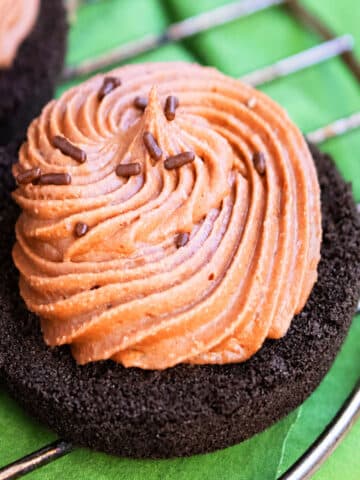
- Make icing- American buttercream was the classic pairing with that pineapple cake flavor.
- Make basket- Using modeling chocolate or fondant and interweaving ropes.
- Fill it- With layers of cake and frosting.
- Add toppings- This can be flowers or fresh berries.
Variations
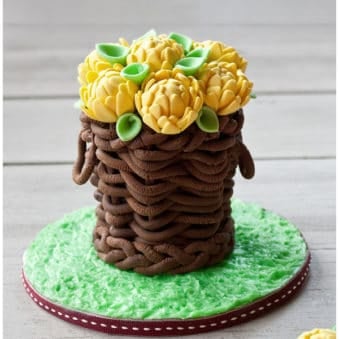
- Make larger cake- I made a mini cake but you can follow the same instructions to make a larger 6 inch or 8 inch cake.
- Try other cake flavors- Such as Vegan Chocolate Cake (Eggless Cake) or Chocolate Marshmallow Cake.
- Try other frosting flavors- Such as Easy Maple Frosting or Sugar Free Frosting.
- Flavor fondant or modeling chocolate- Use extracts or your choice.
- Make a square version- I chose to make a classic round shape but square version would be just as nice. The same instructions will be applied.
- Flavor modeling chocolate- With extracts of your choice.
- Try a different color- I used chocolate/brown Candy Melts but you can try other colors and make baskets in any shades you like.
- Fill cake- Add a layer of jam, preserves, fresh fruits.
- Decorate with fresh berries- If you don't have fondant flowers, just decorate the top with fresh strawberries, raspberries, blueberries, cherries. It would look like a fruit basket.
- Arrange Peeps marshmallows inside the basket to look like a sunflower- I did something similar with this Easy Sunflower Cake that can provide you with some inspiration.

Tips and techniques
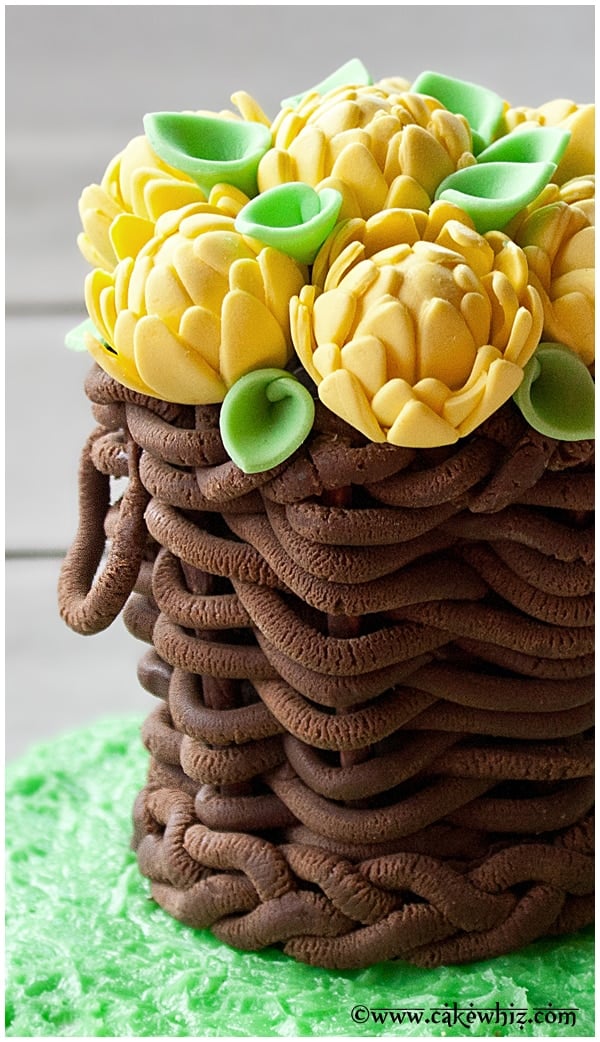
- Fondant vs. Modeling chocolate- Either can be used. Ropes made with modeling chocolate seem to have more texture when pushed through an extruder, giving it a realistic appearance. I used modeling chocolate since it was already brown in color and I didn't have to color it.
- Homemade flowers vs. Store-bought flowers- Either can be used. Consider trying some of these tutorials to make them at home: Fondant Flowers, Buttercream Flowers (Russian Piping Tips), Flower Cupcakes (Fondant Pansy), Royal Icing Flowers (Sugar Flowers), Fondant Flower Cake, Wafer Paper Flowers, Fondant Daisies, Easy Fondant Roses (Ribbon Roses). Fresh edible flowers can be used as well.
- Don't use gum paste- Because it dries very hard and adds an odd texture to this dessert.
- How to soften modeling chocolate? Mold it in your hands for a couple of minutes and the warmth of your fingers will make it soft and pliable again.
- Use a clay extruder- This is very important because it allows all the ropes to be the same thickness. Rolling ropes freehandedly would lead to a messy looking basket.
- Don't fill basket with warm cake- Because that will cause the chocolate to melt and become sticky.

Storage
- Room temperature- Decorated cakes can be left at room temperature for up to 24 hours as long as there is no perishable filling.
- Refrigerate- Leftovers can be stored in a sealed container in the fridge for up to 3 days. However the fondant decorations may become slightly sticky and tacky from the moisture in the fridge.
- Freeze- Unfrosted cakes and frostings can be stored separately in a sealed containers for up to 1 month. When you are ready to enjoy this dessert, let them thaw in the fridge overnight and then, decorate as per instructions below.
- Make ahead instructions- This cake can be baked and decorated 1 day in advance and stored at room temperature until you are ready to serve.
More Decorated Cakes
- Fondant Flower Cake
- Butterfly Cake
- Bumblebee Cake (Spring Cake)
- Easy Fondant Bows Cake
- Modern Abstract Cake
- Blue Ombre Cake
Recipe
Fondant Basket Cake (Basketweave)
Want to Save This Recipe?
Enter your email & I'll send it to your inbox. Plus, get great new recipes from me every week!
By submitting this form, you consent to receive emails from CakeWhiz
Ingredients
- 1 Pineapple cake
- 2 cups American buttercream frosting
- 1 cup Melted chocolate
- 2 cups Modeling chocolate Or brown fondant
Instructions
- Bake cake and allow it to cool completely.
- While the cake is baking and cooling, prepare frosting.
- Keep cake and frosting aside as you prepare the basket.
- Rub shortening inside a glass cup. Cut out strips of wax paper and stick it on the inside. The shortening works like glue.
- Pour melted chocolate into the glass. This layer of chocolate should be approximately 1 inch thick.
- Cut brown lollipop sticks or pretzel rods about the same height as your glass. You will need an even number of sticks.
- Stick these lollipop sticks into your glass of melted chocolate. Make sure to keep them evenly spaced. Place this glass in the freezer for about 15 minutes so the chocolate hardens quickly.
- Take the cup out of the freezer. Gently remove the whole chocolate structure from the glass.
- Peel the wax paper. Make sure this whole chocolate structure is sitting on a sheet of wax paper.
- Optional step: I did this to make the basket more secure. Roll out modeling chocolate and keep it about a quarter of an inch thick.Use a circle cutter to cut out a piece.Make sure that the size of this circle is the same size as the base of your chocolate structure. Brush some corn syrup or melted chocolate on top of this piece. Place your whole chocolate structure on top of this circle piece and gently press it so that everything sticks together. Wait 15- 20 minutes until everything is dry and secure and then move on to the next steps.
- Use a clay extruder with the circle attachment to make many long rope pieces.
- Start running your ropes through the sticks carefully. You go in though one stick and come out the other. Keep doing this until you have one row. Cut off excess with a sharp knife. Use the warmth of your fingers to pinch and stick the joints together.
- Now, take another rope and start going through the sticks again but this time, go in the opposite direction.Instead of going "in and out," you will be running your ropes "out and in.Cut off excess with a knife and stick the joint together with the warmth of your fingers again.
- Keep running your ropes through the sticks until you get to the top. Make sure to leave some space on the top.
- Use a clay extruder to make three long ropes and braid them.
- Stick this braid piece around the top of your basket, using some melted chocolate.
- Make another braid and stick it around the base of the basket, using some melted chocolate.
- Cut out two modeling chocolate loops and stick them on the sides of the basket, using some melted chocolate.
- Let this basket firm up overnight.
- Use a circle cutter to cut out cakes. Place a round cake inside basket, top it with icing. Then, place another round cake and top it with icing smoothly. Stick a few fondant flowers and leaves to cover the top. Enjoy!
Notes
- Read all my tips above.
- Leftovers can be stored in a sealed container in the fridge for up to 3 days.
Nutrition
An automated tool is used to calculate the nutritional information. As such, I cannot guarantee the accuracy of the nutritional information provided for any recipe on this site.

CCU
That is cake art at its finest