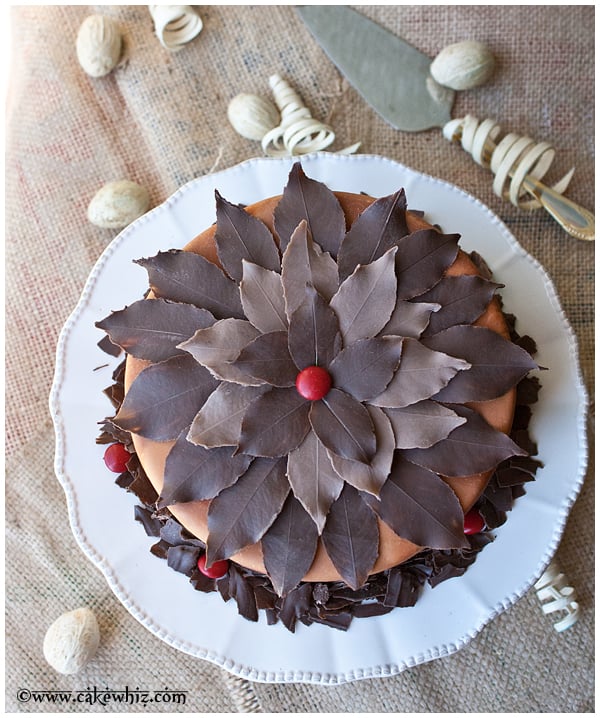
Use this cake decorating tutorial to learn how to make chocolate leaves with melted chocolate and edible mint leaves. Easy way to decorate Fall cakes and Thanksgiving cakes.
When I was little, my Mom taught me how to make these edible leaves. I would try to make them with her but since my hands were so small and warm, the chocolate would melt and I would end up with big blobs. I have learned a lot since then and even though these may look complicated to make, they are actually very simple! These chocolate decorations are perfect for Fall/Autumn and even Thanksgiving or Christmas parties. Add these Easy Fall Cookies {Leaf Cookies} along with this cake to your next rustic dessert table.
Want to Save This Recipe?
Enter your email & I'll send it to your inbox. Plus, get great new recipes from me every week!
By submitting this form, you consent to receive emails from CakeWhiz
Table of contents
How To Make Easy Homemade Chocolate Leaves From Scratch?
- Rub shortening on non toxic leaves- Like mint leaves.
- Brush melted chocolate- On top.
- Chill them- Until the chocolate sets.
- Peel the leaves- Do this very gently.
Variations For Chocolate Mint Leaves
Use these leaves to decorate cupcakes- Such as Best Red Velvet Cupcakes {With Cream Cheese Frosting}, Best Vanilla Cupcake Recipe, or these Mocha Cupcakes (Coffee Cupcakes).
Use colored chocolate/candy melts- Like red, yellow, and orange to create more of a Fall/Autumn theme. If you are using white chocolate, you would have to use oil-based food coloring to tint melted white chocolate to your desired shades.
Add extracts to the chocolate- Such as mint, vanilla, almond, or maple. Remember to use a flavor that compliments the flavor profile of the overall dessert.
Make some white ones- Using melted white chocolate.
Use other candies for the center of the cake- I placed a red M&M candy in the center, but you can use a cinnamon candy ball, red gum ball.
Adjust the brown shade - You can lighten dark chocolate by mixing in some white chocolate until you have the shade you like. The darkest brown shade would come from using dark chocolate. Milk chocolate is usually the lightest.

Tips And Techniques For Chocolate Leaves Cake
What size cake to make? This is an 8 inch round cake covered in frosting and marbled fondant. However, you can make whatever size cake you like. You may just need more or less leaves based on your design and vision.
What is the cake covered in? I covered the cake in homemade fondant and did the Marbled Fondant Technique.
Omit the marbled fondant- Simply roll out brown fondant to use instead.
How to attach to cake? I glued them on top of the cake with frosting but you can use melted chocolate or even Chocolate Ganache.
What side of the leaf to use? A leaf has a smooth top side and a more textured underside with lots of veins. You will be working on this textured area of the leaf, not the top smooth side!
Avoid touching the leaves too much- Because the warmth of your fingers will cause them to melt.
Make sure you use a thick coating of chocolate- To ensure less to no breakage during the peeling process.
Always remember to make extras- Because some are bound to break while you are peeling them away from the actual leaves.
What to do with extra leaves? I sprinkled some chocolate shreds all around the base of the cake and dropped some red M&M candies to give it a pop of color. However, you can break up the extra leaves to put around the bottom of the cake as well.
Try to keep leaves about the same size- For a better overall presentation.
Cool cakes completely before icing– Otherwise the icing will melt and slip right off the cake.
Level cakes– Cut off the dome of the cakes to make them as even and flat as possible. This makes covering the cake in fondant much easier.
How to trim excess fondant? Cut off the excess from the base with a pizza cutter or very sharp knife.
Storage Of Decorated Cake
Refrigerate- In a sealed container for up to 3 days.
Freeze- I do not recommend freezing this cake, because the fondant will become very sticky upon thawing. However, if you didn't use fondant, then you can freeze this cake in a freezer safe container for up to 1 month. Thaw to room temperature to eat. Note that the leaves will be extra fragile and breakable while frozen.
More Fall Cakes and Thanksgiving Cakes
- Apple Pie Cake
- Spice Cake (Chai Tea Cake)
- Tiered Rustic Cake
- Turkey Cake {Thanksgiving Cake}
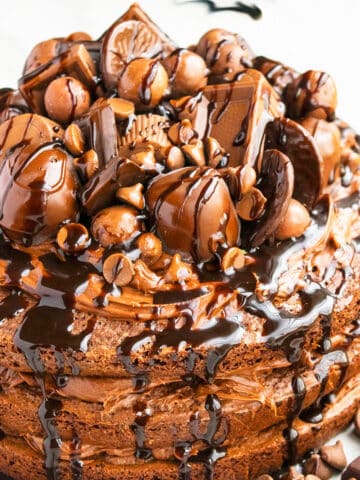
- Chocolate Tree Cake
Recipe
Homemade Chocolate Leaves Cake
Want to Save This Recipe?
Enter your email & I'll send it to your inbox. Plus, get great new recipes from me every week!
By submitting this form, you consent to receive emails from CakeWhiz
Ingredients
- 2 Chocolate cakes Round, Dimensions: 8x2 each
- 3 cups Chocolate cream cheese frosting
- 2 cups Marshmallow fondant Brown
- 1 tablespoon Shortening
- 30-40 Mint leaves
- ⅓ cup Dark chocolate Melted
- ⅓ cup Milk chocolate Melted
Instructions
- Bake cakes and allow them to cool completely.
- While the cakes are baking and cooling, prepare the frosting.
- Place one cake on a serving dish.
- Spread icing on top.
- Place the other cake on top of the icing.
- Ice the entire cake smoothly.
- Roll out brown fondant and spread it over the iced cake and use a pizza cutter to cut out excess fondant around the base.
- Rub a very thin layer of shortening on your leaves. For mint leaves, coat the heavily veined and textured side.
- Use a paintbrush to paint some leaves with dark chocolate and some leaves with milk chocolate.
- Tip: Make sure you have a thick coating of chocolate to ensure the leaves don't break when you peel them.
- Place these chocolate covered leaves on a cookie tray, lined with wax paper and chill in freezer for 5 minutes or until the chocolate firms up.
- Remove from freezer and gently peel the leaf away from the chocolate.
- Spread a thin layer of icing on top of the cake.
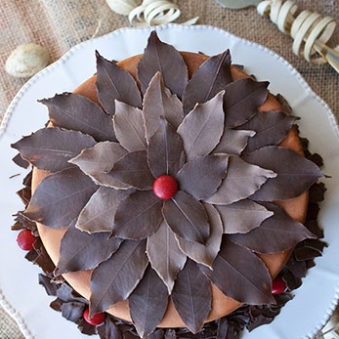
- Stick the chocolate leaves in an alternating dark and light pattern in a flower formation.
- Place a little red candy in the center.
- Spread some shredded chocolate around the base of the cake. Enjoy.
Notes
- Read all my tips above.
- Leftovers can be stored in a sealed container in the fridge for up to 3 days.
Nutrition
An automated tool is used to calculate the nutritional information. As such, I cannot guarantee the accuracy of the nutritional information provided for any recipe on this site.
Leave a Reply