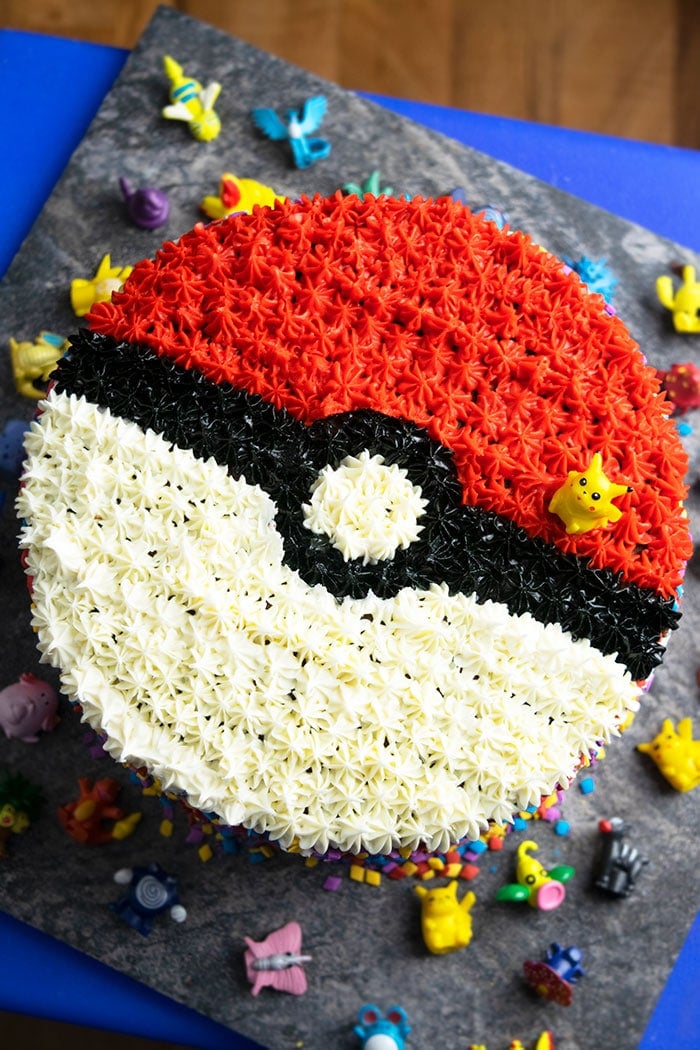
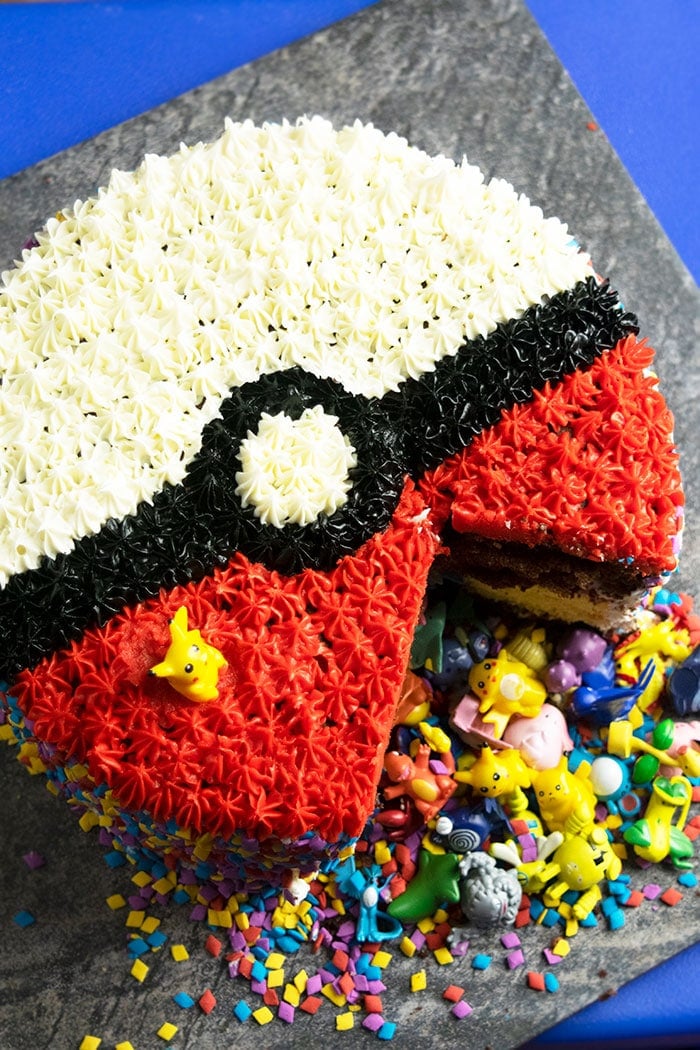
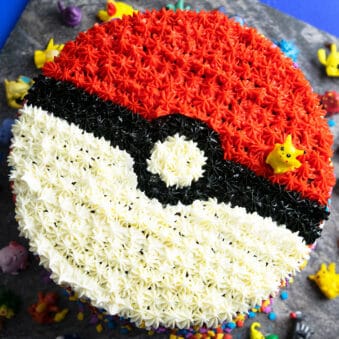
Learn how to make easy Pokemon cake from scratch with simple ingredients. This homemade pinata Pokeball cake is decorated with buttercream icing and filled with toys and sprinkles.
This Best Birthday Cake still continues to be my family's favorite. However, here are many other Birthday Cake Ideas to inspire you and today's cake will be added to that list too. There are many complicated designs out there for Pokemon but this is as simple as it gets. Make it for kids or adults and it's sure to be a hit, just like these Pikachu Donuts (Pokemon Donuts).
Want to Save This Recipe?
Enter your email & I'll send it to your inbox. Plus, get great new recipes from me every week!
By submitting this form, you consent to receive emails from CakeWhiz
How to make Pokemon cake? How to make Pokeball cake?
- Bake cakes- And allow them to cool completely.
- Make frosting- Or buy frosting in red, black and white colors.
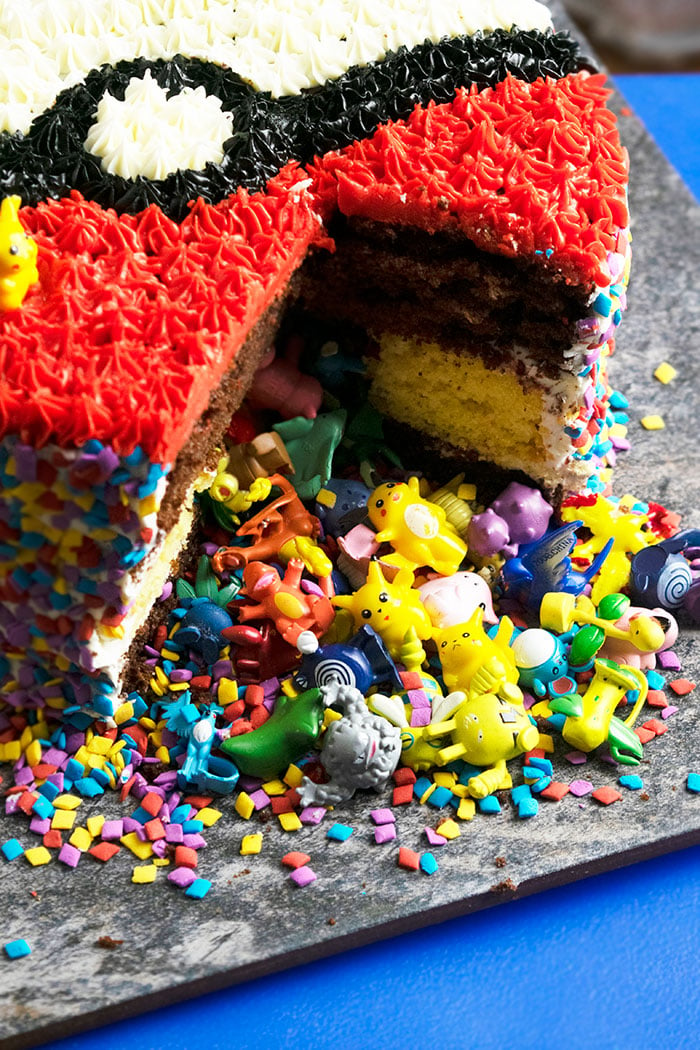
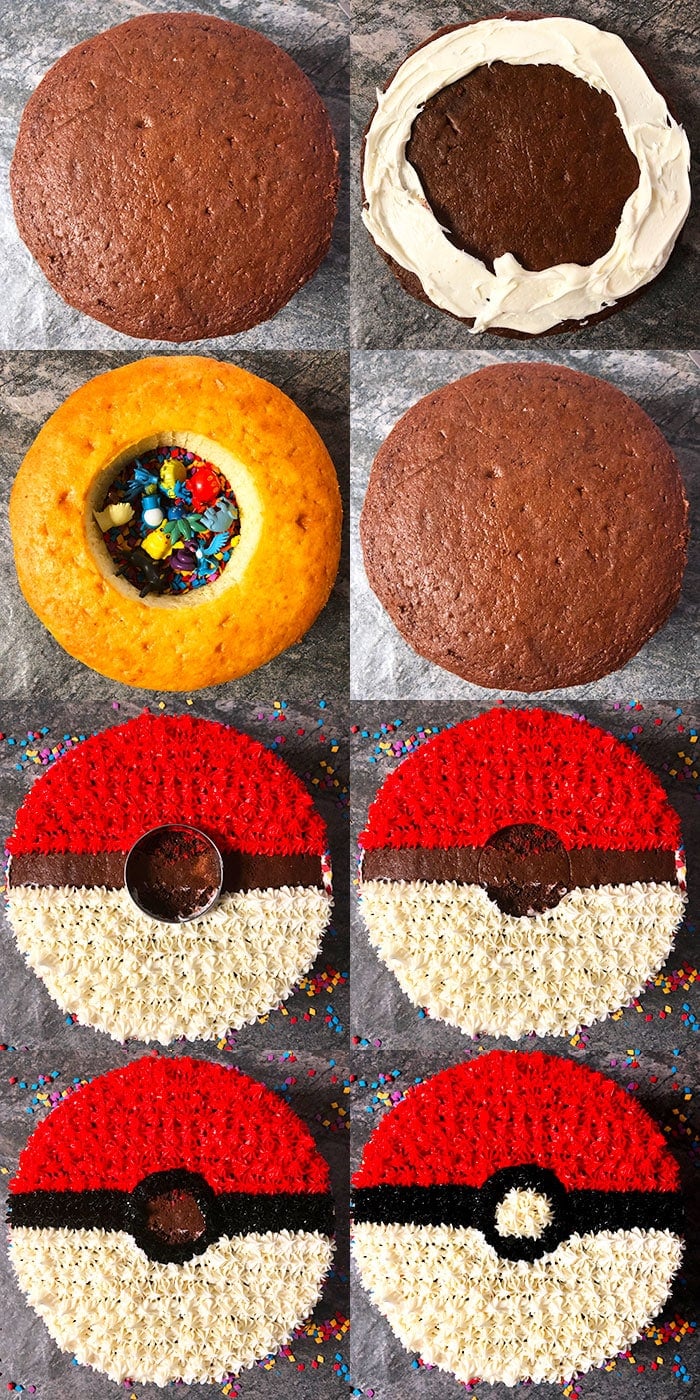
- Assemble pinata cake- Place a chocolate cake on a serving dish. Spread white icing on the outer edges. Place a hollow vanilla cake on top. Fill the center with toys and sprinkles. Spread white icing on the outer edges. Place other chocolate cake on top.
- Ice the side of the cake- And cover in sprinkles.
- Create rough template on top- With a toothpick.
- Decorate- With red, white and black frosting and a small star tip.
Variations for pokemon birthday cake
Decorate with Homemade Marshmallow fondant- Store-bought fondant can also be used. You can apply the same design concept.
Try other cake flavors- Such as Easy Rainbow Cake (With Cake Mix) or Easy Chocolate Oreo Cake.
Try other frosting flavors- Such asCaramel Frosting or even Peanut Butter Frosting.
Don't make a pinata cake- I filled the cake with a surprise but you don't have to do that and simple stack 2 cakes on top of each other and decorate.
Ice the side of the cake smoothly- I chose to cover the sides of the cake with sprinkles but you can simply leave it smooth.
Add a cake topper- You can make or buy a fondant topper of perhaps one of the characters and place that on top of the cake or on the cake board.

Tips and Techniques
Don't decorate a warm cake- It must completely cool first because the warmth will cause the icing to melt and lead to a sticky mess.
Buy red icing- It's very hard to make homemade pure red icing and it takes a few days for the color to truly develop. Buying it will save you so much time.
Buy black icing- The same applies to black frosting. It takes quite a few days for the color to develop into a deep black color. Buying it is convenient and a time-saver.
Practice first- Before you start piping stars on top of the cake, practice on a sheet of wax paper or parchment paper first because this will allow you to get used to holding the piping bag and figure out how much pressure to apply. It allows you to get the hang of piping.
Storage
Room temperature- Once the cake is ready, store it at room temperature away from humidity, moisture, sunlight for up to 24 hours until you are ready to serve. These would also be my “make ahead” instructions.
Refrigerate– Decorated cake can be stored in a cake box for up to 2 days.
Freeze– Unfrosted cakes and frostings can be stored in sealed containers or bags for up to 1 month. When you are ready to make this dessert, thaw everything in fridge overnight and then, decorate as per instructions below.
More Decorated Cakes (Birthday Cakes)
- Star Wars Cake (Death Star Cake)
- Easy Monster Cake
- Peacock Cake
- Butterfly Cake
- Galaxy Cake
- Tie Dye Shirt Cake
- Crying Baby Cake
- Easy Sushi Cake
Recipe
Easy Pokemon Cake (Pokeball Cake)
Want to Save This Recipe?
Enter your email & I'll send it to your inbox. Plus, get great new recipes from me every week!
By submitting this form, you consent to receive emails from CakeWhiz
Ingredients
- 2 Chocolate cakes 8 inch round cakes
- 1 Vanilla cake 8 inch round cake
- 4 cups Buttercream frosting Red, black, white
- ¾ cup Sprinkles For covering the side of the cake, Optional
Instructions
- Bake the chocolate cakes and vanilla cake and allow them to cool completely.
- Prepare frosting and color them with gel colors. I recommend buying red and black frosting because it is time-consuming to develop those colors at home.
- Place a chocolate cake on a serving dish.
- Use a spatula to spread white icing on the outer edges, leaving the center empty.
- Cut out a circle from the middle of the vanilla cake to make it hollow.
- Place this hollow cake on top of the chocolate cake.
- Press gently to secure it properly.
- Fill the hollow center with small Pokemon toys and sprinkles.
- Use a spatula to spread white icing on the outer edges of the vanilla cake.
- Place the other chocolate cake on top.
- Press gently to secure it properly.
- Ice the side of the cake in white icing. You can ice the top too but I decided to skip frosting the top.
- Cover the sides with sprinkles.
- Use a toothpick to create a rough template on top of the cake.
- Place a circle cutter in the center.
- Leave a thin (about 2 inch wide) panel in the center empty without icing.
- Fill a piping bag with red icing and attach a small star tip (Wilton's tip # 21). Pipe red stars on the top half of the cake.
- Fill a piping bag with white icing and and attach a small star tip (Wilton's tip # 21). Pipe white stars on the top half of the cake.
- Remove the circle cutter.
- Fill a piping bag with black icing and and attach a small star tip (Wilton's tip # 21). Pipe black stars on the panel, leaving a small circular space in the middle empty.
- Fill the empty space by piping white stars.
- Stick a small Pikachu character on top of the cake, if you like and enjoy!
Notes
- Read all my tips above.
- Leftovers can be stored in a sealed container in the fridge for up to 3 days.
Nutrition
An automated tool is used to calculate the nutritional information. As such, I cannot guarantee the accuracy of the nutritional information provided for any recipe on this site.

Leave a Reply