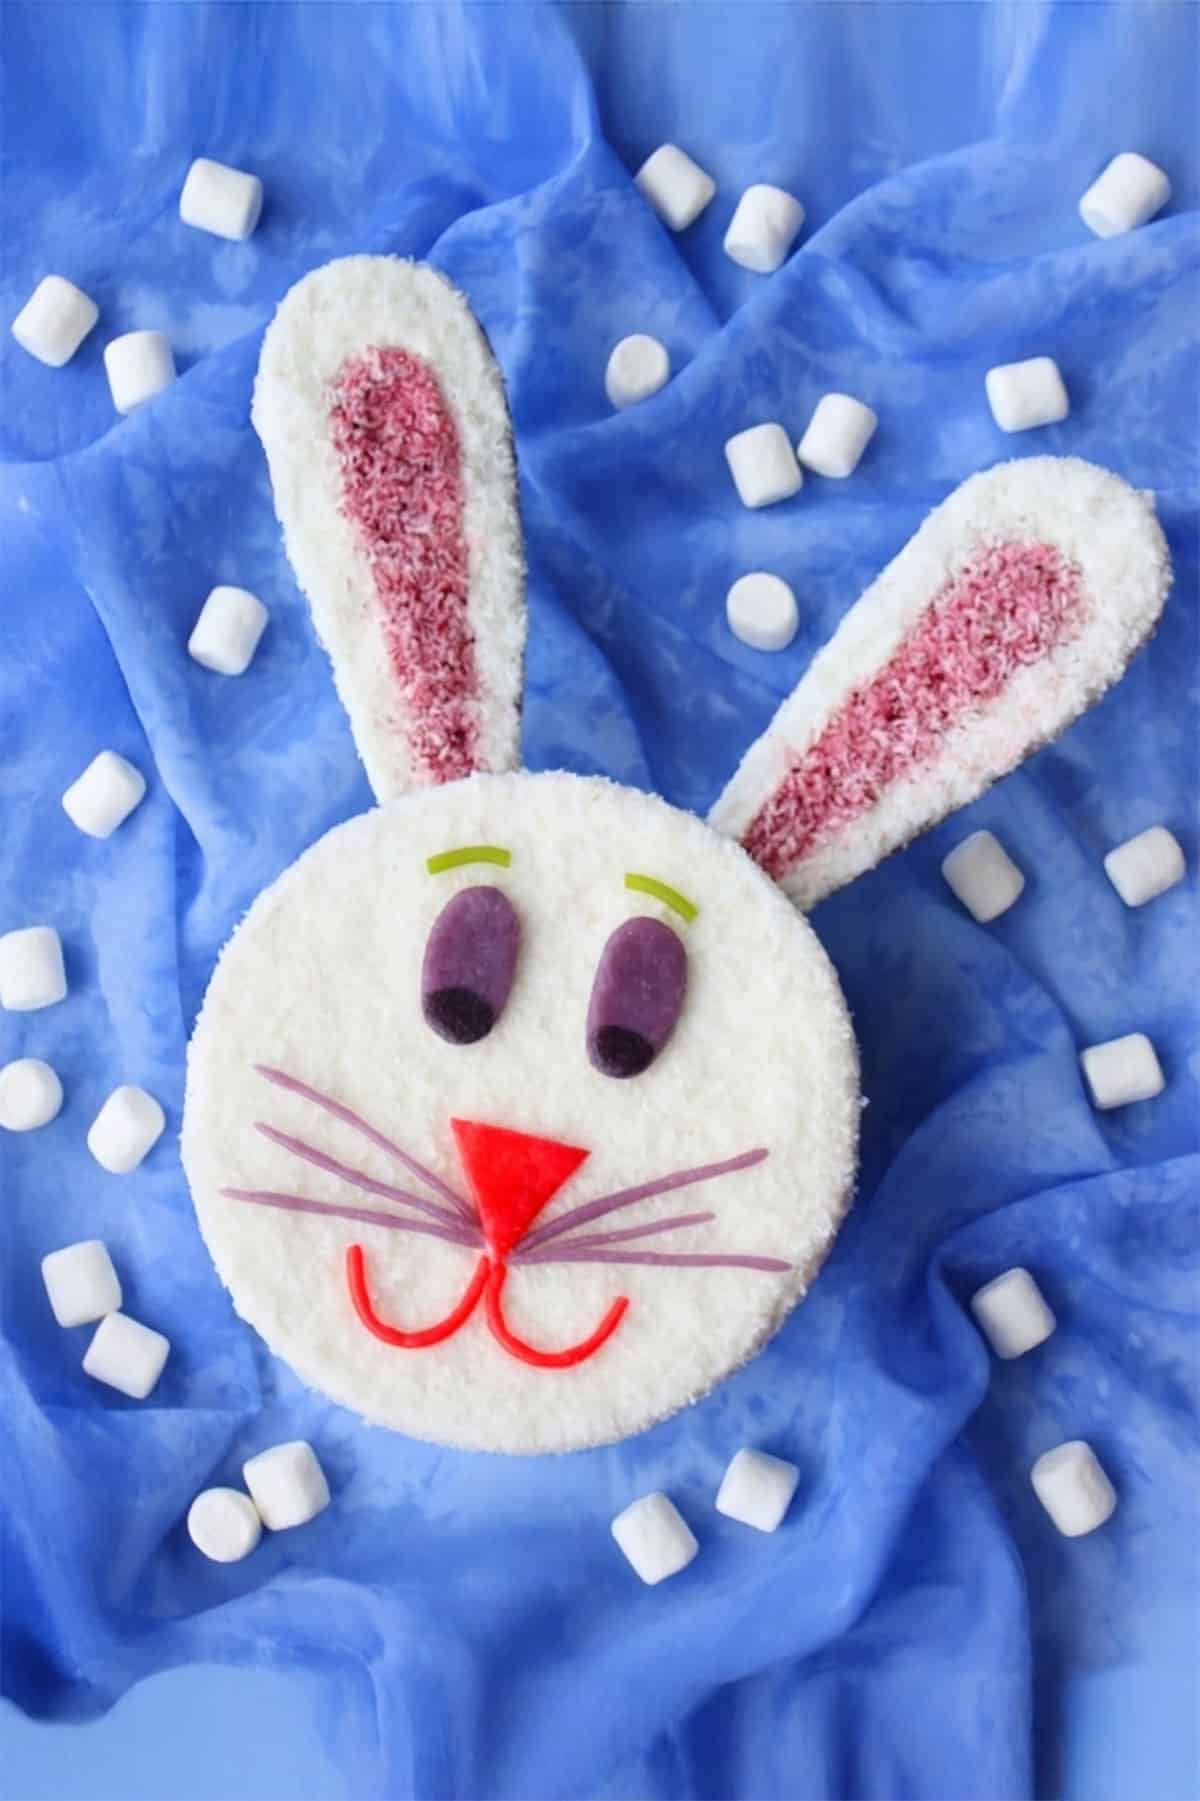
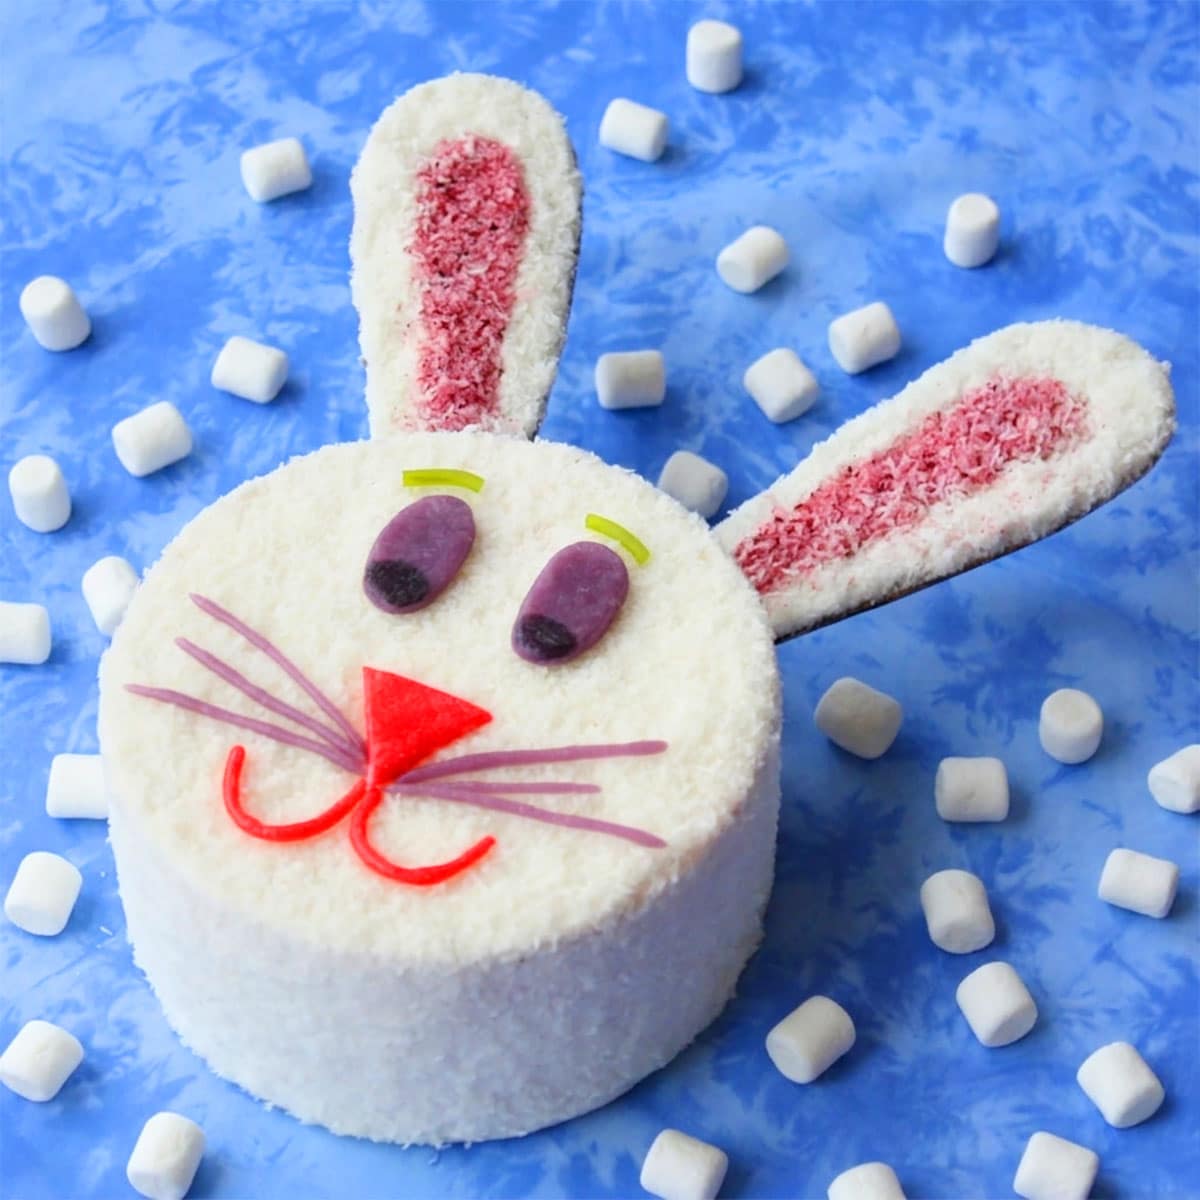
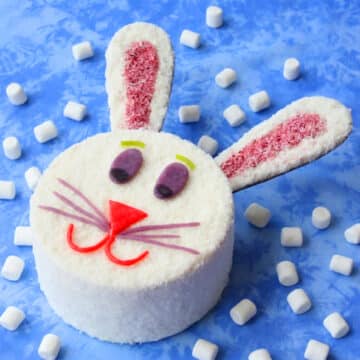
Use this cake decorating tutorial to make a quick, easy, cute, classic and traditional Easter bunny cake. All the details are created with white cream cheese frosting, gum drop candies and shredded coconut. No special tools or fondant needed. I will also share another simple design that uses Lindt chocolate bunnies as toppers.
Want to Save This Recipe?
Enter your email & I'll send it to your inbox. Plus, get great new recipes from me every week!
By submitting this form, you consent to receive emails from CakeWhiz
I first saw this cake in a Country Living magazine years ago and ever since, I have been telling myself that I am going to make it some day. Well, I finally made it! This was surprisingly easy to make and simple enough that even kids can help out. It is great for anyone who does not like fondant because all the details are made with cream cheese icing, coconut and candies! You don't even need a template or pattern or even a special mold, which is awesome. This is perfect for Easter parties. If you need more party inspiration, then try this Easy Lamb Cake or this Easter Egg Cake.
Jump to:
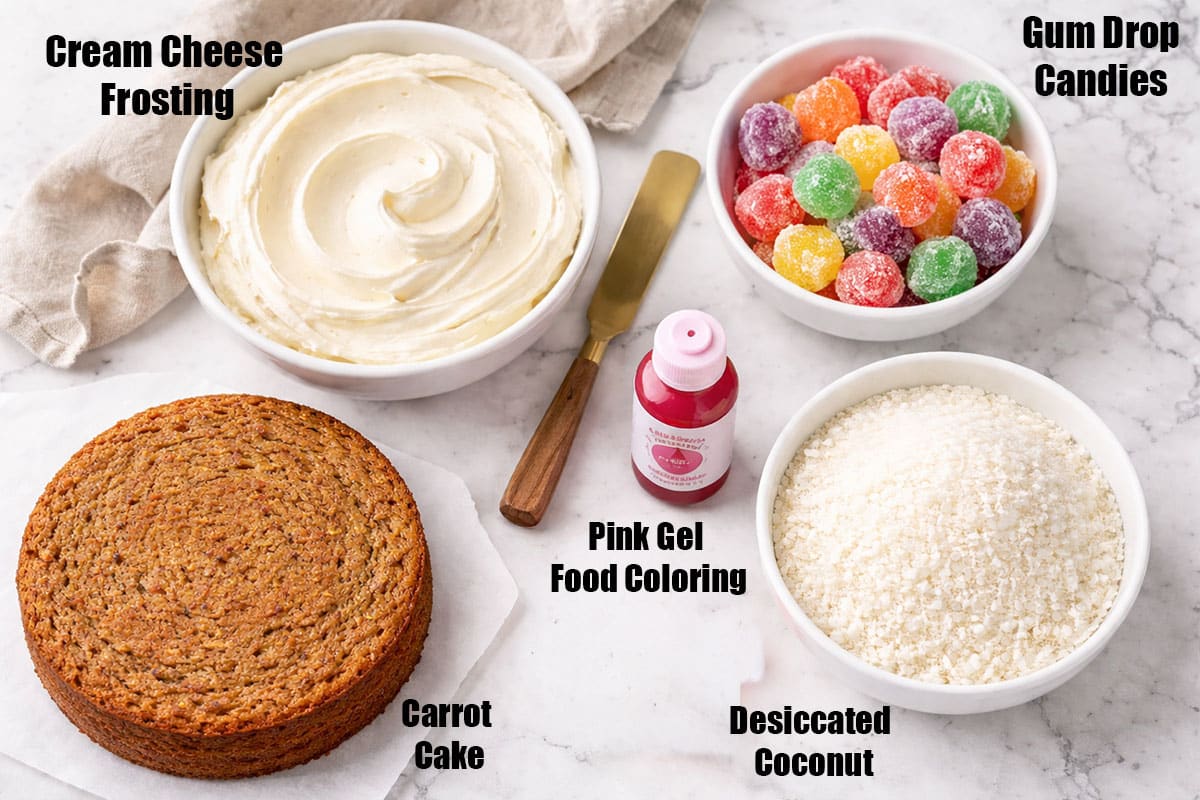
Key ingredients
- Cake- I made carrot cake but you can pick any other flavor.
- Frosting- I used white cream cheese icing but you can use whatever flavor you like.
- Coconut- This should be shredded, white and not toasted.
- Candies-I used gum drop candies in various colors. They can easily be rolled out and shaped. Another option would be Tootsie Rolls or even Starbursts but you would need to heat them in the microwave for a few seconds before rolling.
- Gel food coloring- This is great for coloring coconut.
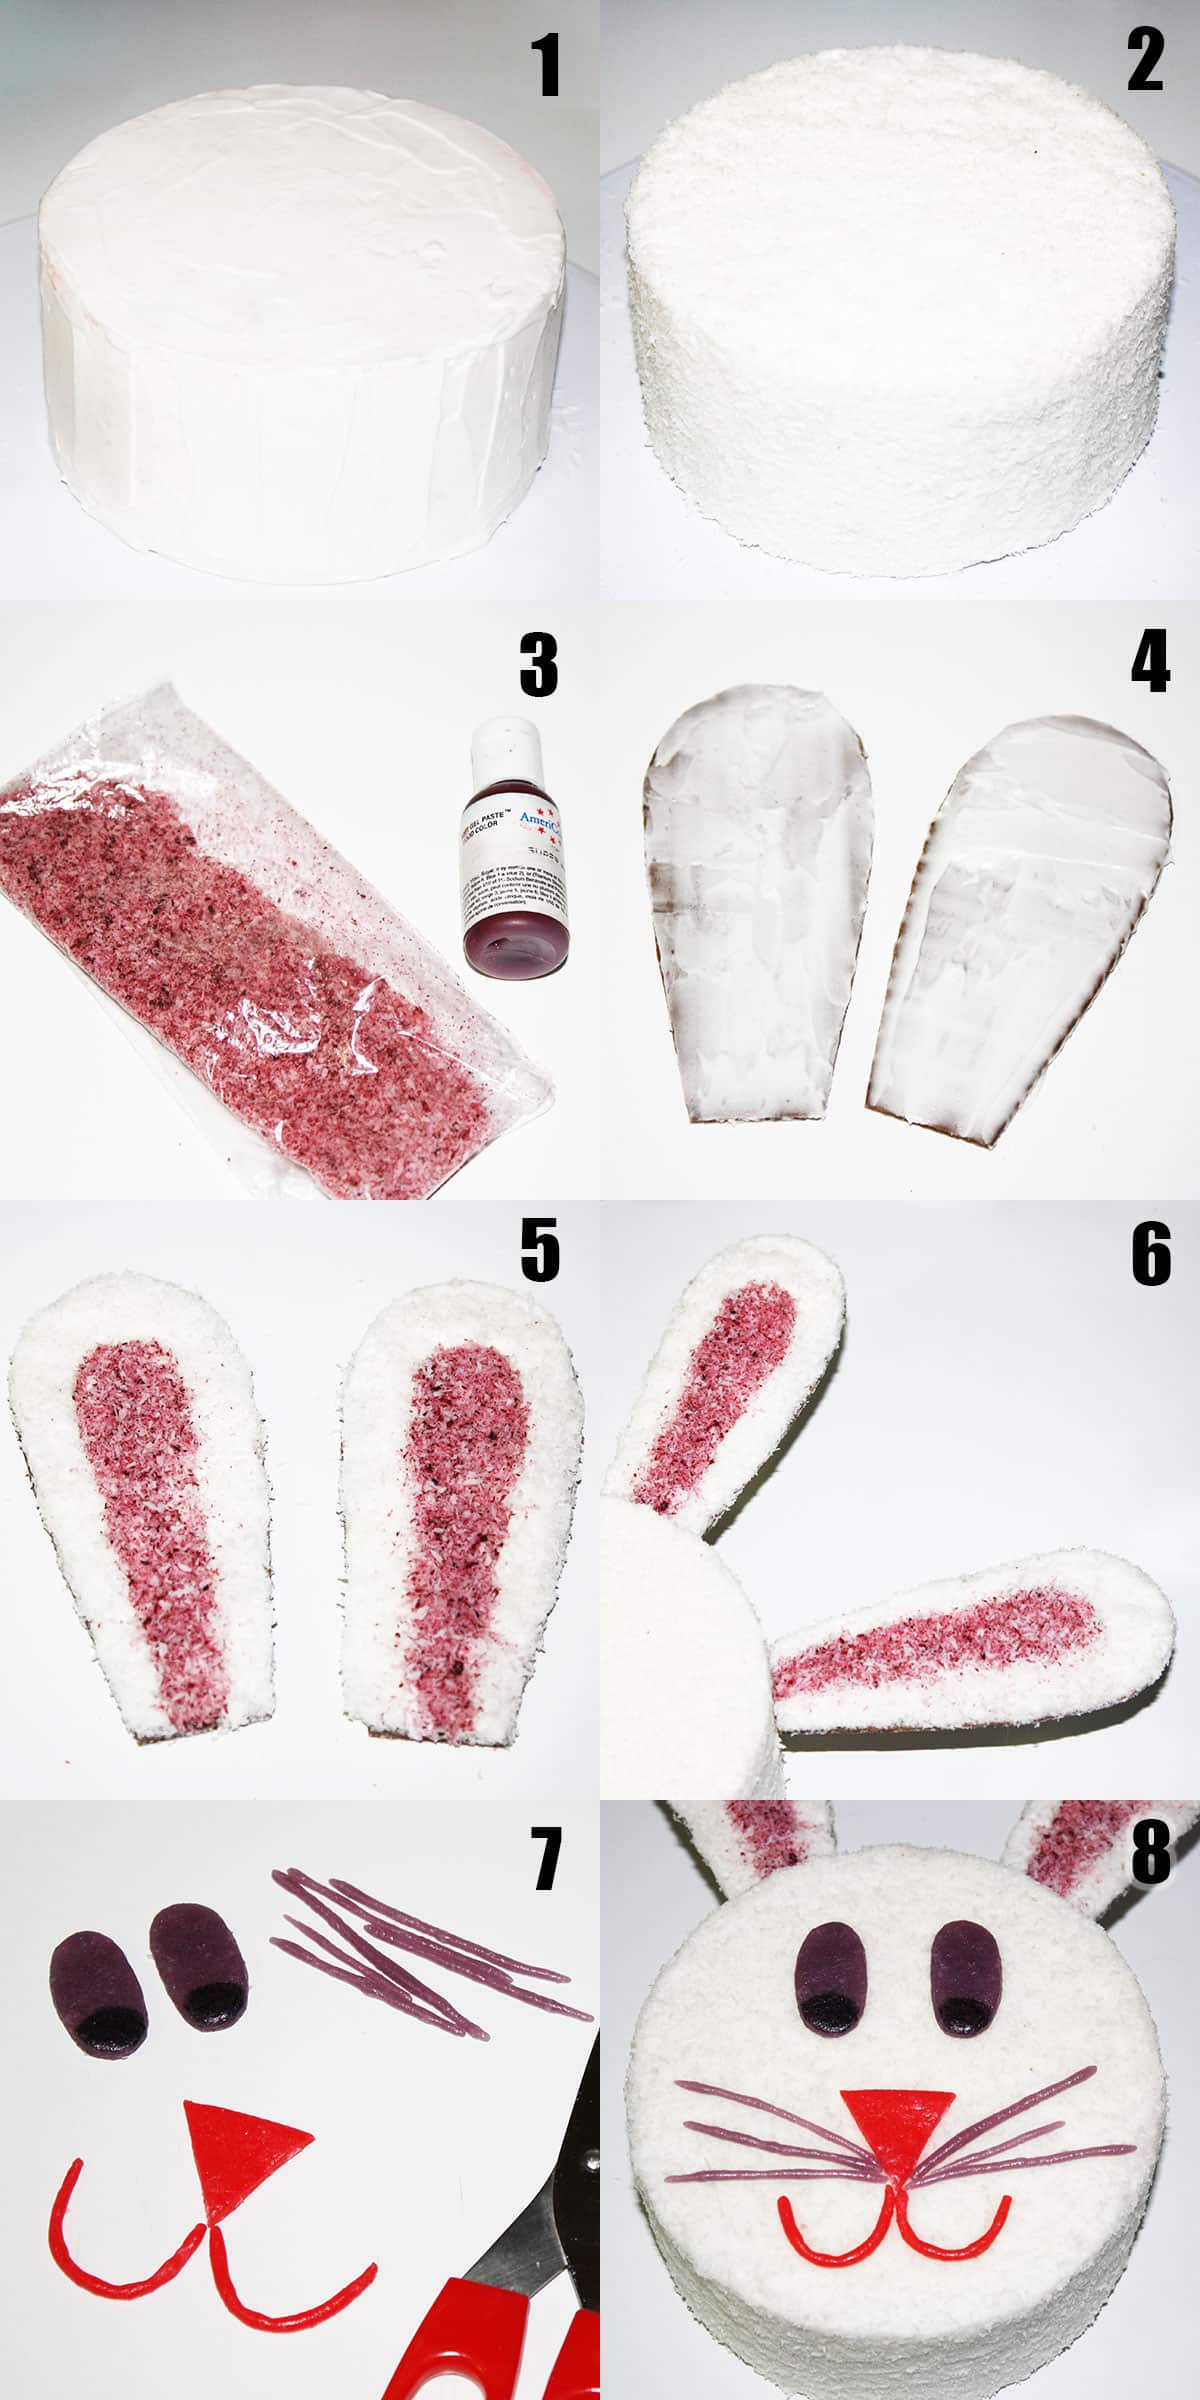
How to make easy Easter bunny cake?
- Bake cake- Let it cool to room temperature.
- Fill and frost cake- It does not need to be perfect (Image 1).
- Cover cake- In shredded or desiccated coconut (Image 2)
- Color some coconut pink- With gel food coloring (Image 3).
- Make ears- Using cardboard paper, popsicle sticks, pink and white coconut (Image 4 and 5).
- Attach ears- On top of the cake (Image 6).
- Make facial details- With gumdrop candies (Image 7).
- Stick eyes, nose, mouth, whiskers- With frosting (Image 8).
Variations
- Use fondant or modeling chocolate- You can easily replace all the coconut and candy details with fondant. This can be homemade or store bought. This is my favorite Marshmallow Fondant recipe and here is my Modeling Chocolate (Candy Clay) recipe.
- Use an Easter bunny cake topper instead- This topper is made out of fondant. It's just another spin on this cute concept.
- Make mini cakes- You can also follow the same steps on small cakes and make mini bunny rabbit cakes for kids.
- Make it chocolate- Since it's Easter, I used classic carrot cake and cream cheese frosting but you can use Moist Triple Chocolate Cake and Chocolate Buttercream Frosting to make a delicious chocolate cake. You can also color the coconut brown to make a brown rabbit.
- Use a different cake flavor- Like this Funfetti Cake/Confetti Cake {From Scratch}, Easy Rainbow Cake, or Chocolate Raspberry Cake {With Cake Mix}.
- Make pinata cake- This would be great for birthdays Hollow out the center of the cake and fill it with egg candies or colorful sprinkles for a fun surprise.
Tips and techniques
- Cool cake completely before frosting- Because the icing will melt and it will become very messy.
- I used cardboard cut outs for the ears- But you can make them out of melted white chocolate too.
- What kind of coconut to use? You can either use shredded coconut or desiccated coconut. Desiccated coconut creates a more fur-like texture.
- How to make a 3D cake? That involves either carving cake or using a 3D cake pan and it requires more time and more experience with cake decorating.
- How to make a bunny with round cake pans? You can layer multiple round cakes with frosting on top of one another and then carve the cake into the shape of a rabbit's face and add the details with fondant or frosting.
- How to prevent cakes from sticking to pans? Line pans with parchment paper and grease/flour pans very well.
- How to make ears? Cut out two ear shaped cardboard pieces and stick a popsicle stick or wooden skewer behind each ear. Both ears should be the same size. Spread a thin layer of frosting on each ear. Cover the center of the ears with pink shredded coconut and cover the edges of the ears with regular white coconut.
- How to make eyes, nose, whiskers, and mouth? Use gum drop candies and cut them with scissors, or use a rolling pin to flatten pieces. You can also use an edible marker to draw facial features.
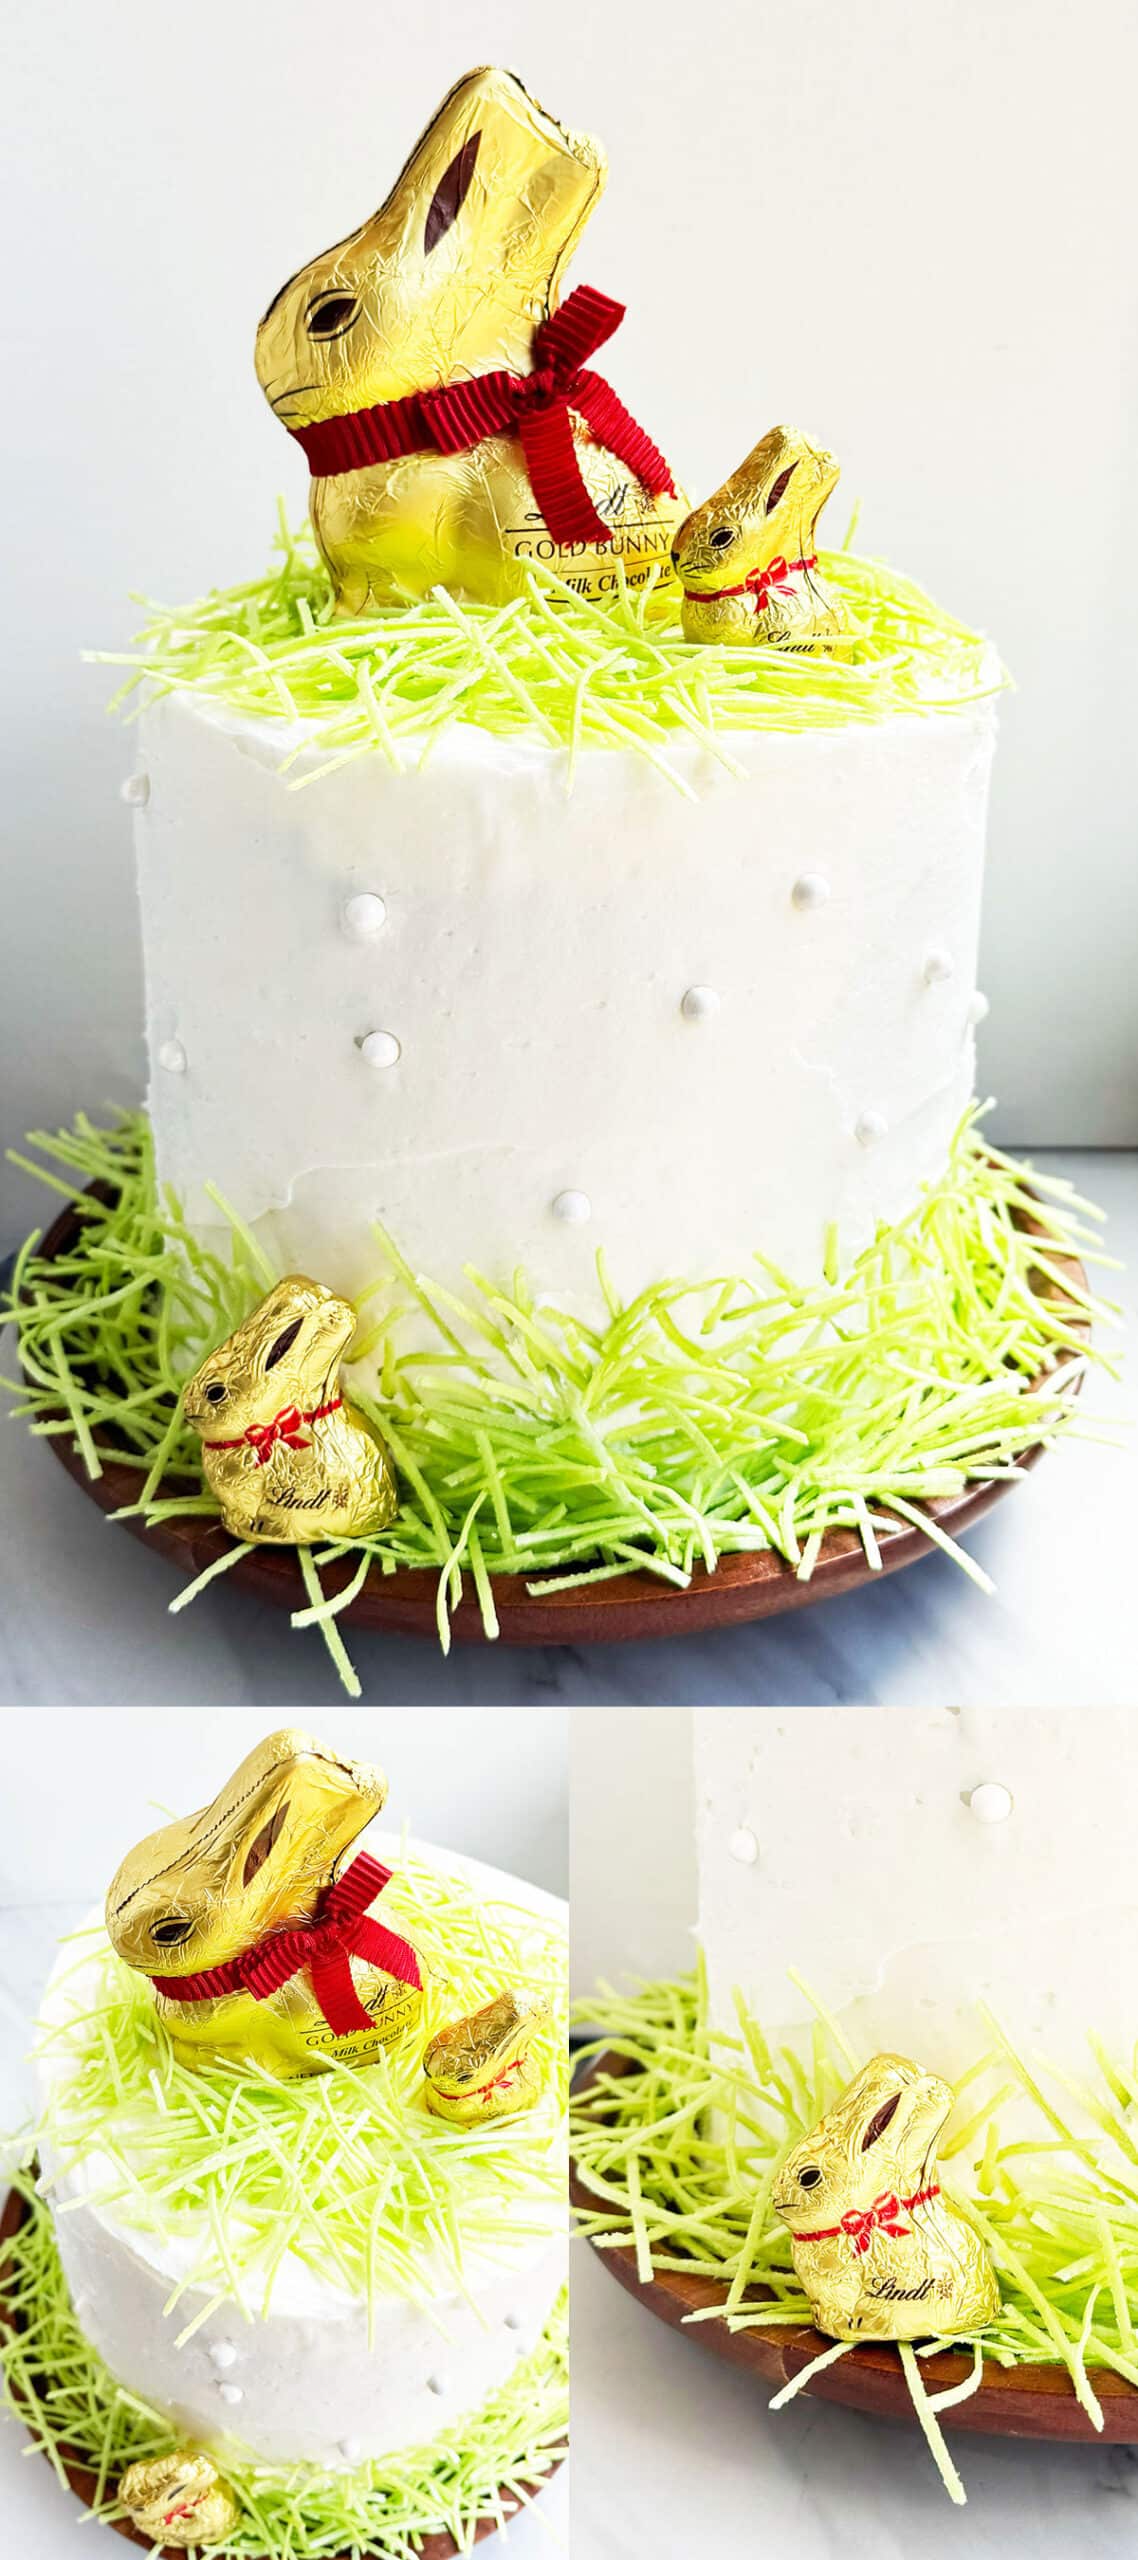
Another idea- Use Lindt chocolate bunnies
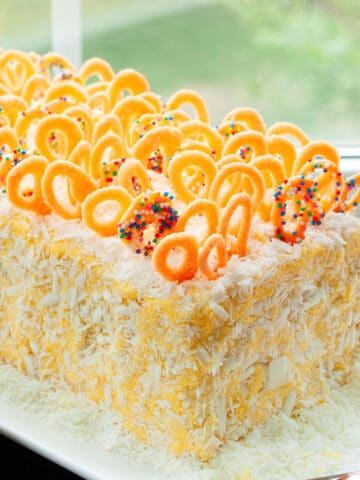
If you are super short on time, I highly recommending making this version where you top off a white frosted cake with white sprinkles or edible pears, edible grass candy and Lindt chocolate bunnies in various sizes.
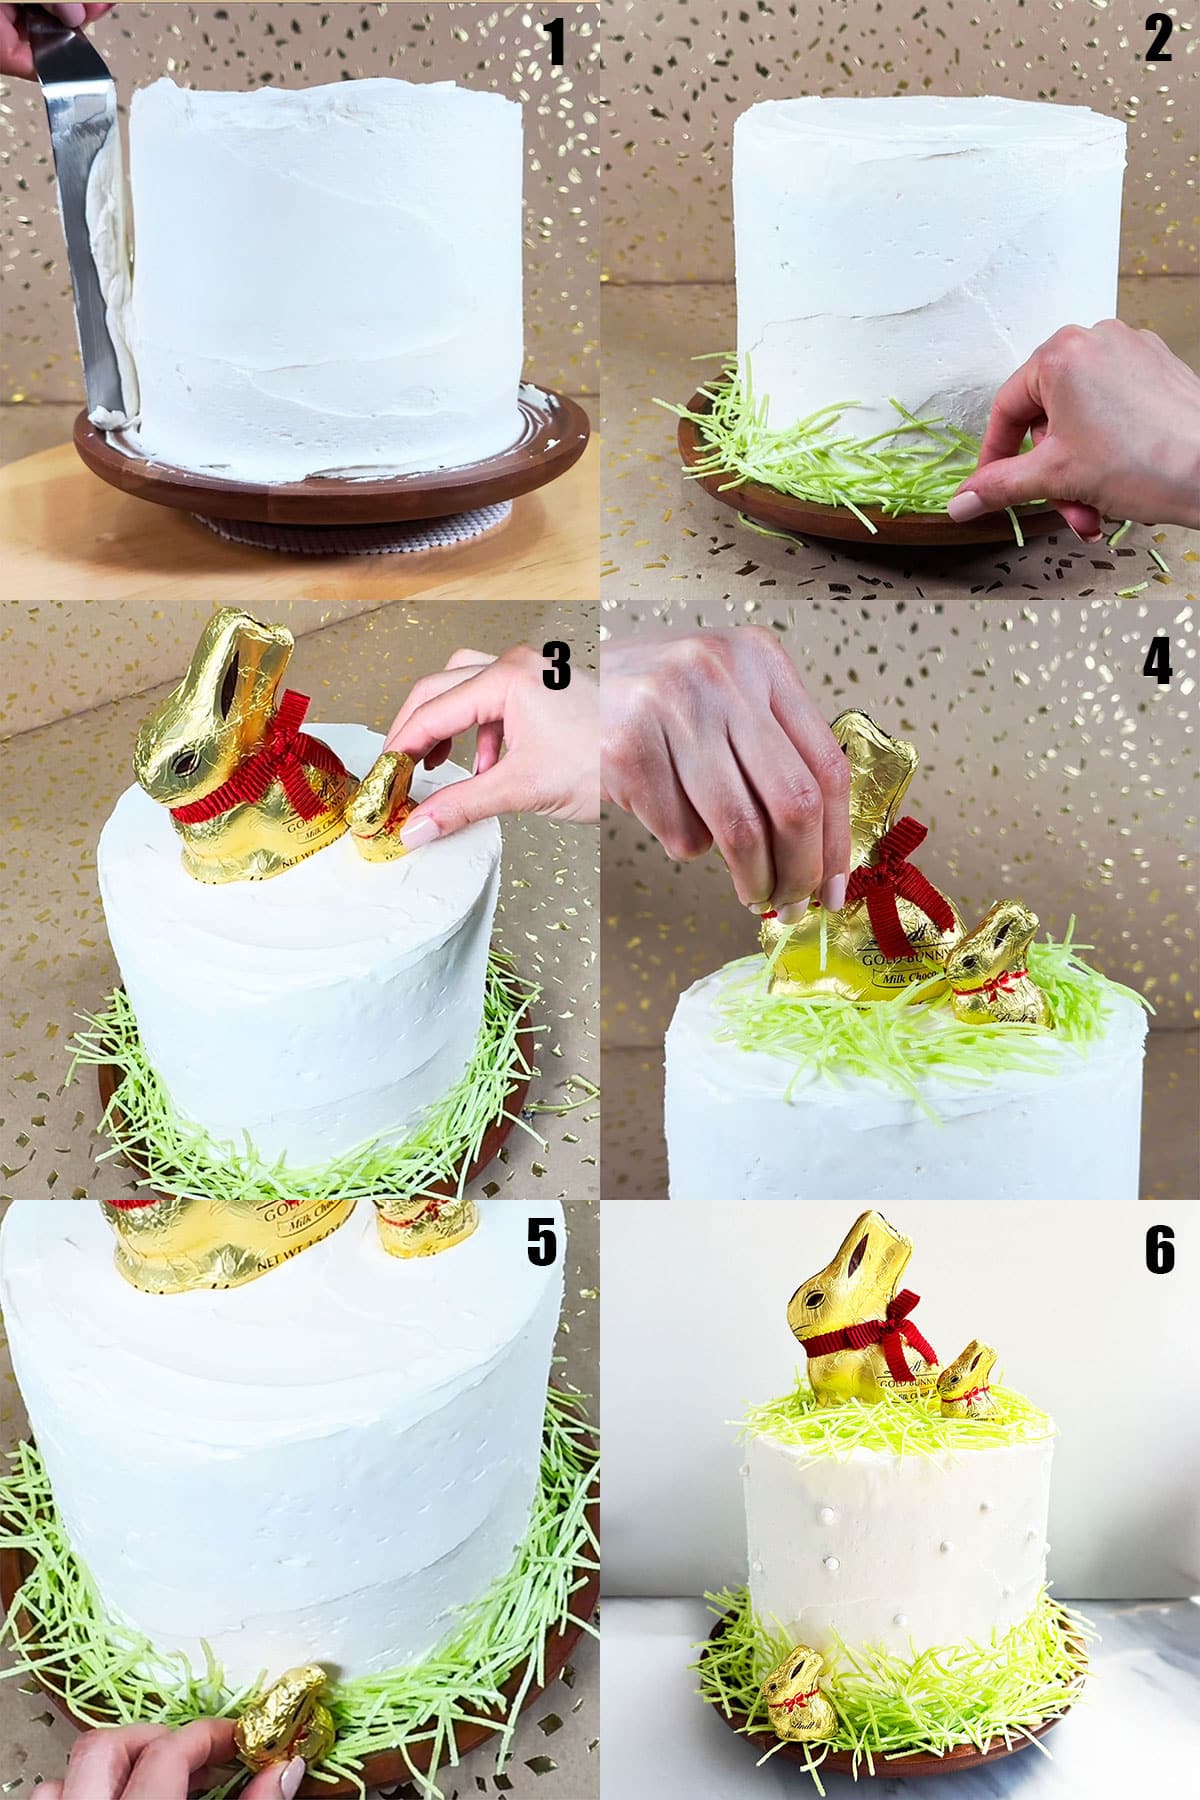
- Fill and frost a tall cake- With Almond Buttercream Frosting (Image 1).
- Break up grass candy- Stick them along the base of the cake (Image 2).
- Place chocolate bunny toppers- On top. I like to use a big and a small one (Image 3).
- Add more grass candy- Around the toppers (Image 4).
- Place small chocolate bunny- Along the base (Image 5).
- Toss white sprinkles or edible pearls- Along the sides of the cake (Image 6).
Storage
- Refrigerate- In a sealed container for up to 3 days.
- Freeze- Store cake and frosting individually in sealed containers. When you are ready to enjoy these cakes, thaw and assemble as per instructions below.
- Room temperature- These can can stay out for 3-5 hours.
- Make ahead- These can easily be made 1 day in advance.
More Easter desserts
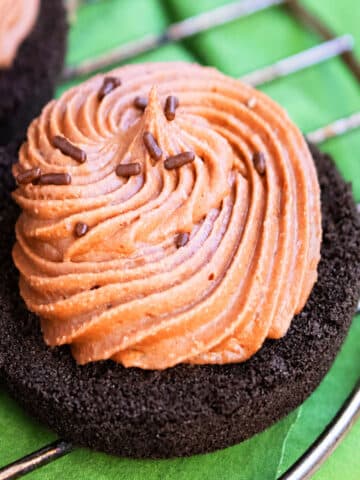
- Birds Nest Cookies
- Easter Chick Cupcakes
- How To Make Butterfly Cake
- How To Make Pavlova Cake
- Church Window Cookies
Recipe
Easy Easter Bunny Cake
Video
Want to Save This Recipe?
Enter your email & I'll send it to your inbox. Plus, get great new recipes from me every week!
By submitting this form, you consent to receive emails from CakeWhiz
Ingredients
- 1 Carrot cake Dimensions: 8x3
- 4 cups Cream cheese frosting
- 4 cups Coconut Shredded or desiccated
- ½ cup Gum drop candies Various colors
- Gel food coloring Pink
Instructions
Classic coconut design
- Bake your cake and allow it to cool to room temperature.
- Fill and frost it in frosting.
- Cover the cake fully with shredded or desiccated coconut.
- To make the ears, cut out two ear shaped cardboard pieces and stick a popsicle stick or wooden skewer behind each ear. The cardboard ears should be the same size. Spread a thin later of frosting on each ear. Cover the center of the ears with pink shredded coconut and cover the edges of the ears with regular white coconut.
- Push these ears into the top.
- Now, make the eyes, nose, whiskers and mouth with colorful gum drop candies. Gum drop candies are really easy to cut with scissors and you can even flatten them with a rolling pin and you can also draw on them with edible markers. If they become too sticky, sprinkle some granulated sugar.
- Stick all these facial features on the cake with frosting and you are done. Enjoy.
Modern Lindt chocolate topper design
- Fill and frost a tall cake with Almond Buttercream Frosting.
- Break up grass candy and stick them along the base of the cake.
- Place chocolate bunny toppers on top. I like to use a big and a small one.
- Add more grass candy around the toppers.
- Place small chocolate bunny along the base.
- Toss white sprinkles or edible pearls along the sides of the cake and enjoy.
Notes
- In the video, I will show you how to make the Lindt chocolate topper cake. When I make the video for the coconut version soon, I will add that tutorial to the video as well.
- Instead of cream cheese frosting, you can use any other white icing. Buttercream frosting is a great option.
- For a super fluffy look, I recommend using shredded coconut over desiccated coconut.
- Try other cake flavors such as lemon, chocolate, vanilla or even orange.
- Please make sure your cake cools to room temperature before you start decorating it or else you will end up with a sticky mess.
- Read additional tips and variations above.
- Leftovers can be stored in a sealed container in the fridge for up to 3 days.
Nutrition
An automated tool is used to calculate the nutritional information. As such, I cannot guarantee the accuracy of the nutritional information provided for any recipe on this site.

Claire
This is such great cake!
I love that the kids can easily help me with it.
So impressive but easy to make!!!
Thank you for sharing.
Shihoko Ura
How cute and adorable! Thank you for a lots of tips to make this cake successfully.
Abeer
@Kristi...Oh man! I have always wanted to use that bunny pan too. We shall both use our pans next year... what do you say?
@Daniela...I hope you had a lovely Easter. You can always make these next year.
@Bibi...Hahah. All good... you can make it next year. I can't wait to visit your blog and see what you have been up to!
Abeer
@Cass... What an awesome birthday cake that must have been! You really must share pics.
@Raven... Bunnies all around every day.
@John... Hahah. Thanks!
@Swathi...Thanks!
@CCU... You are too sweet Uru!
Abeer
@Alex...This cake really was alot of fun and it was a nice change from making fondant cakes.
@Yummychunklet...Thanks!
@Kayle...Perfect indeed! I couldn't think of a more fitting cake for Easter!
@Marta...Hahaha! There are times when i am unable to eat the stuff i make too coz the cuteness is overpowering.
@Belinda... I would love for it to be Easter everyday! That would give me a chance to make something adorable every single day...hehhe
Bibi
Of course, I am week late, lol! Everything looks gorgeous as usual. I am making that Bunny cake next year.
Daniela
These little cakes are so pretty!
It's a pity I stopped by just after Easter but I´ll keep the recipe and instructions for next year.
Kristi
I am so glad you made it!!! My grandma has a bunny cake pan, and I have always wanted to make one too...some day... Great job!!!