Learn how to make fondant roses (ribbon roses) without tools, with this step by step tutorial. Quick, easy, homemade with simple ingredients. Great for decorating cakes and cupcakes. No fondant rose cutter needed!
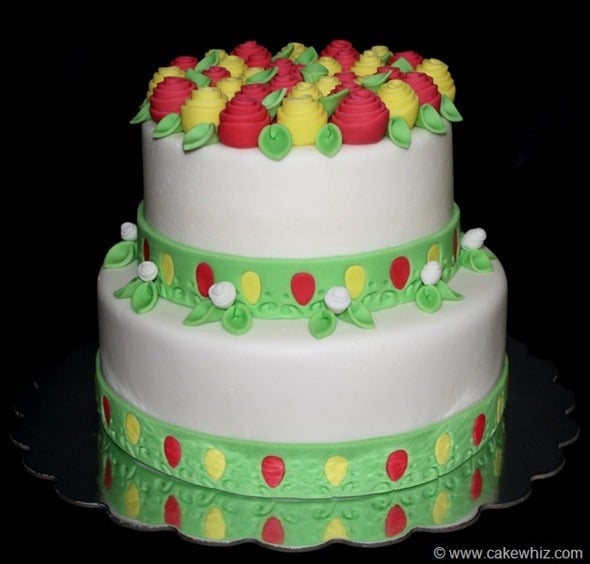
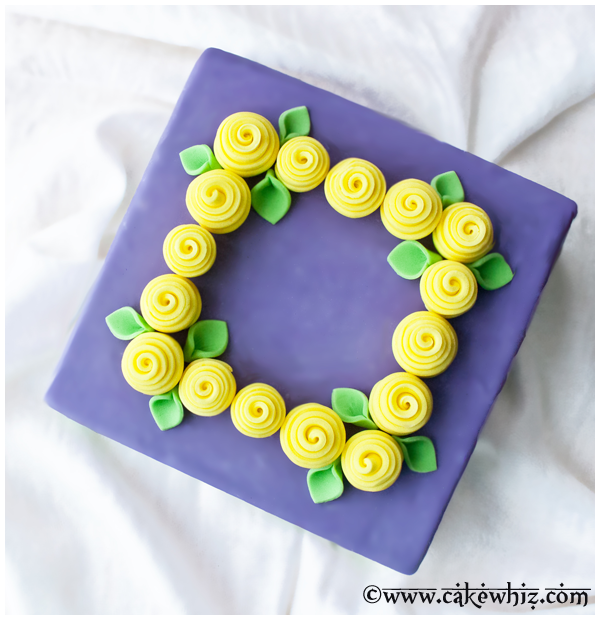
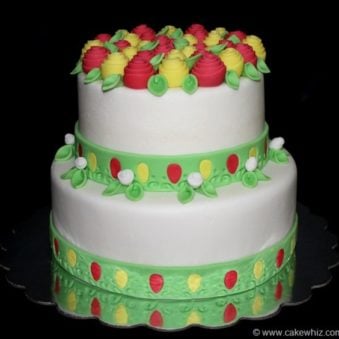
One of my favorite ways to decorate cakes is to use what I already have on hand. I am not a fan of fancy cutters or tools and like simplified steps. That's exactly how I made this beautiful Fondant Flower Cake and these Fondant Daisies. If you enjoyed those, then you are sure to love today's tutorial too.
Want to Save This Recipe?
Enter your email & I'll send it to your inbox. Plus, get great new recipes from me every week!
By submitting this form, you consent to receive emails from CakeWhiz
Table of contents
How to Make Easy Fondant Roses? (Ribbon Roses)
- Roll fondant- Using a rolling pin.
- Cut thin strips- Using a pizza cutter.
- Roll- Fold one corner and start rolling to the end.
- Final touches- Cut the end of your rose with scissors and smooth out the bottom with your fingers.
- Enjoy- Let these dry overnight or until they harden.
Variations
Decorate cupcakes- I decorated a cake but you can make make smaller flowers and use them as cupcake toppers. You can also use them on individual sized mini cakes or petit fours or even cookies.
Make different sizes of flowers- Follow the same technique to make various sizes.
Try other colors- I chose a pink, yellow and green but you can use any colors you like.
Try other cake flavors- Such as Easy Key Lime Cake or this Pineapple Cake (With Cake Mix).
Try other frosting flavors– Such as Marshmallow Frosting or Mint Frosting.

Tips and Techniques for Fondant Rose Cake
For faster drying- Use a 50/50 mixture. Just knead together half fondant and half gum paste and use that instead of just fondant.
Homemade fondant vs. Store-bought fondant- Either can be used. My homemade version tastes incredible!
Can you use marzipan instead of fondant? Yes, you can use that but it tastes different than fondant.
Use pre-colored fondant- If you are short on time, use fondant that's already colored.
Use gel colors- If you are planning on coloring fondant, be sure to use gel colors because they are concentrated and more vibrant than liquid colors. Also, it prevents the fondant from becoming sticky.
How long does it take for fondant flowers to dry? Typically, it takes 24 hours. However, the drying time may vary. This depends on the thickness that you rolled out the fondant. The thinner it is, the faster it dries. The thicker it is, the slower it dries. Drying time is also quicker when you live in dry climates where there is little to no humidity.
Don’t decorate a warm cake- This is very important because if the cake is warm, the decorations will get sticky and messy.
Storage
Room temperature- Once they are dry, store in a cardboard box away from sunlight and moisture for up to 1 month. They can last even longer. I have some that are 3 months old and still good.
Freeze- Fondant decorations cannot be frozen because when they thaw, the flowers will become sticky due to condensation.
Refrigerate- They cannot be refrigerated because they can become sticky from the moisture in the fridge.
More Cake Decorating Tutorials
- How to Make Easy Fondant Bows
- How to Make Easy Fondant Buttons
- How to Make Fondant Baby Shoes
- How to Make Fondant Basket
- How to Make Fondant Pansies
- How to Make Fondant Flowers
Recipe
Easy Fondant Roses (Ribbon Roses)
Video
Want to Save This Recipe?
Enter your email & I'll send it to your inbox. Plus, get great new recipes from me every week!
By submitting this form, you consent to receive emails from CakeWhiz
Ingredients
- 1 cup Marshmallow fondant Pink or Yellow and Green
- Vanilla cake Two 6 inch round cakes, Two 8 inch round cakes
- 4-6 cups American buttercream icing
- 4 cups White fondant
Instructions
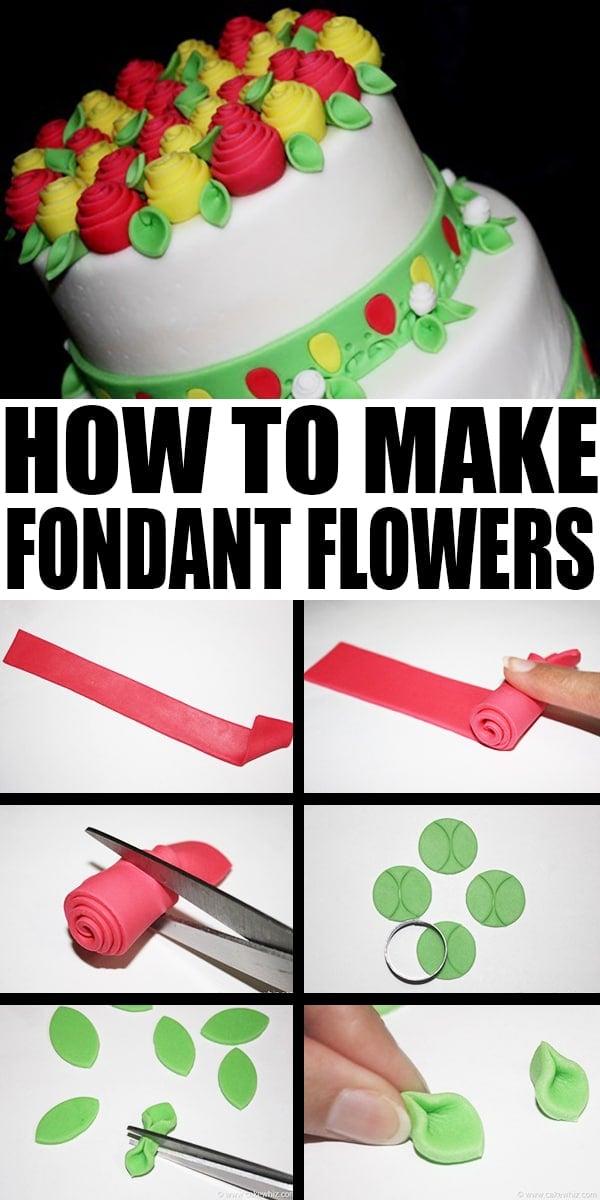
- Use a rolling pin to roll out a ball of pink fondant.
- Using a pizza cutter or a fondant cutter, cut ribbons which are 1 inches wide and 8 inches long. If you want to make smaller roses, cut strips which are thinner and shorter.
- Fold over one corner of the strip.
- Start rolling and continue all the way to the end.
- Cut the end of your rose with scissors.Discard the end.
- Smooth out the bottom of your rose using your fingers.
- Let these dry overnight or until they harden.
- To make leaves, roll out green fondant.
- Cut out circles.
- Using the same cutter, cut out two halves of each circle and you would end up with leaf shapes. Let them dry overnight or until they harden.
- If you wish, you can stop here and actually use those as leaves or you can continue with a few more steps. Pinch the center of each leaf until the ends stick together. Cut the pinched center with scissors. You now have two leaves. Smooth out the ends of of leaves with your fingers.
- While the decorations are drying, bake cakes and allow them to cool completely.
- Also, prepare frosting.
- Place one 8 inch cake on a cake board and spread icing on top. Place the other 8 inch cake on top and press gently to secure it into place.
- Then, ice the entire cake until smooth.
- Cover it in white fondant and keep aside.
- Place one 6 inch cake on another cake board and spread icing on top. Place the other 6 inch cake on top and press gently to secure it into place.
- Then, ice the entire cake until smooth.
- Cover it in white fondant and keep aside.
- To assemble, place the iced 8 inch cake on a cake stand. Push in dowels for support. Then, place the iced 6 inch cake on top.
- Decorate cake with flowers on top and fondant ribbon around the base. Enjoy!
Notes
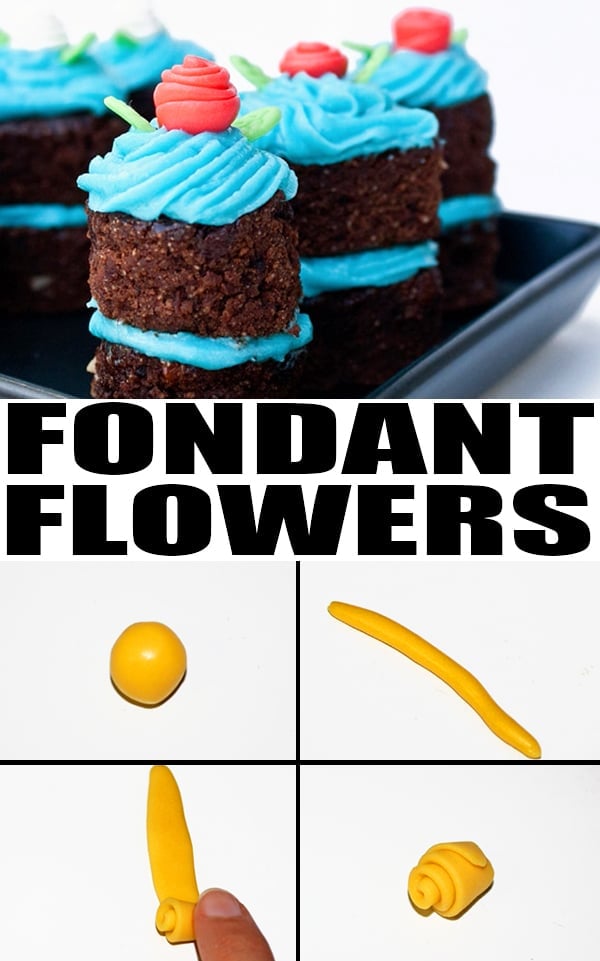
- In this video tutorial, I made rainbow roses with leftover fondant from previous projects and used them to decorate cupcakes. The technique is still the same.
- Read all my tips above.
- These roses can also be made with gum paste or a 50/50 mixture (half fondant, half gum paste) which dries faster.
Nutrition
An automated tool is used to calculate the nutritional information. As such, I cannot guarantee the accuracy of the nutritional information provided for any recipe on this site.

Lori
Beautiful!!! Absolutely beautiful. Love it. I am bookmarking this one for future reference!
Evelyne
How totally absolutely cool. Looks so gorgeous and difficult but your explanations make it less nerve racking to attempt. I just recently made a hotdog out of fondant but not much experience with it besides that.
Mateja
How beautiful are your roses! Like your choice of colors
Christina
So cute!!! I have never used fondant before! I think I need to try!
Shirley
SO beautiful! I've never worked with fondant, but this looks very doable.
torview
beautifully done lovely instructions
Dimah
This cake is gorgeous! you are very talented.
Nice work and thank you so much for sharing!
Wendy Irene
That is so incredibly beautiful!! I can't get over how awesome your tutorials are. Thank you for doing all that work for us! I feel like I could actually do it with your great instructions and photos. I am so excited to see more hearts and flowers!!! Have a wonderful day
Dee Dee
I am defibnally bookmarking this, thank you for the tutorial!
Brandie
This cake is so darn cute! I love it!!