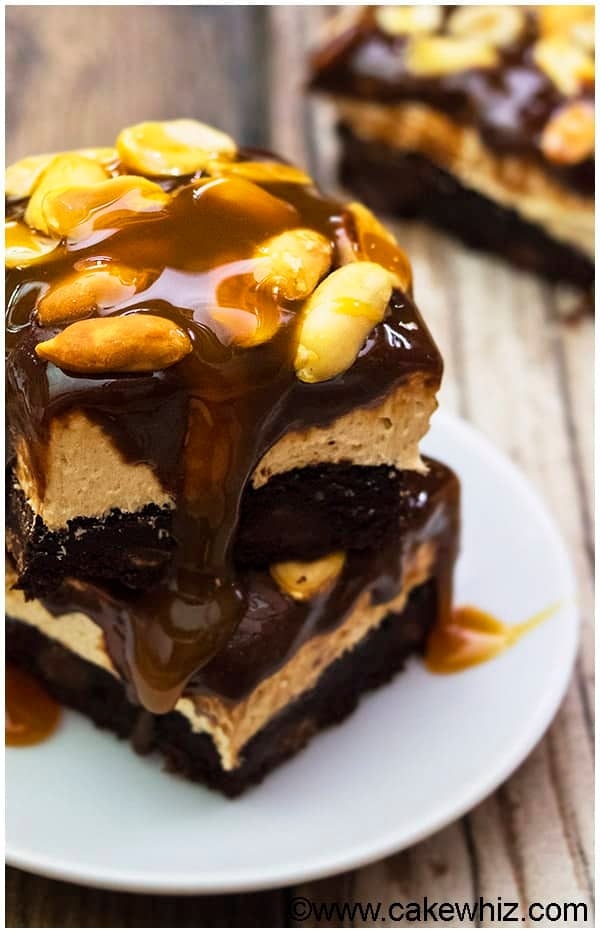
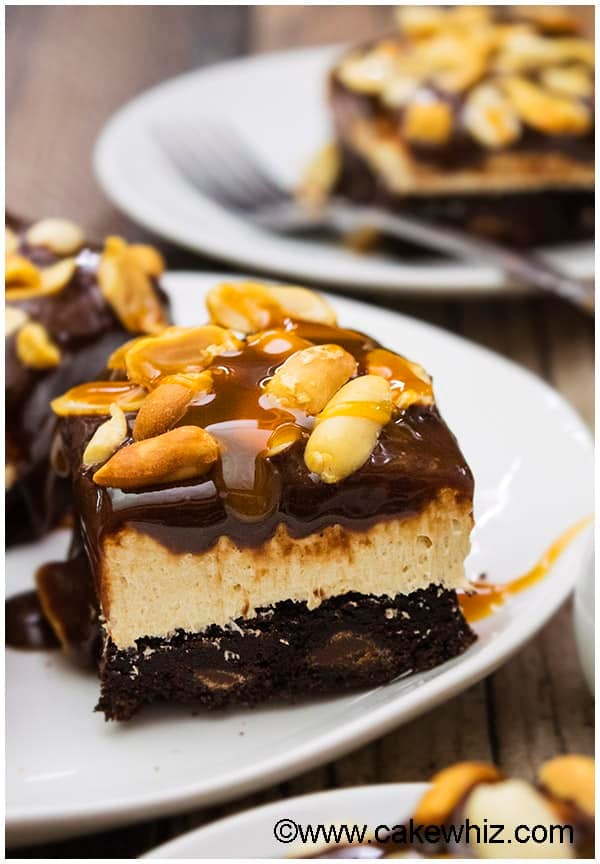
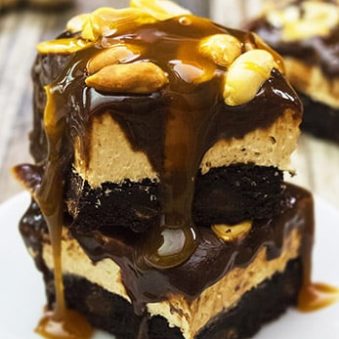
This easy peanut butter cheesecake bars recipe is perfect. These sweet and salty bars are covered in chocolate ganache, caramel sauce, peanuts! It's like enjoying Snickers candy bars.
Want to Save This Recipe?
Enter your email & I'll send it to your inbox. Plus, get great new recipes from me every week!
By submitting this form, you consent to receive emails from CakeWhiz
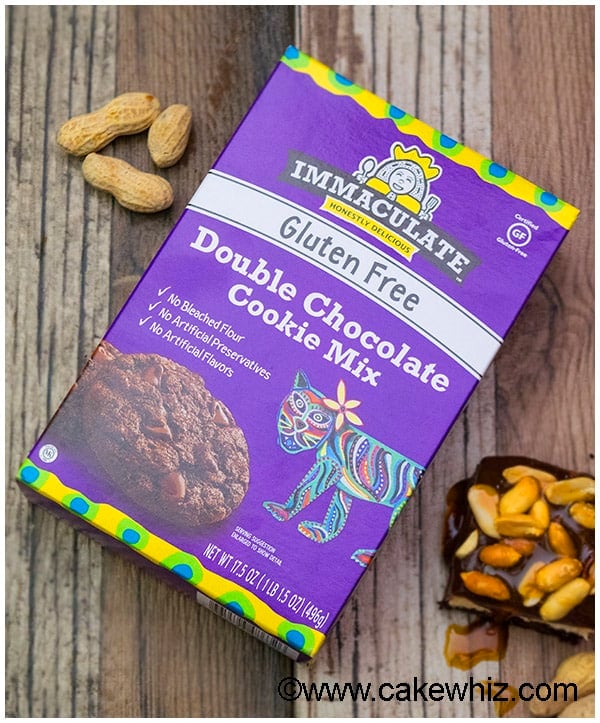
*Thank you Immaculate Baking Co. for sponsoring today's post so that I can share this recipe with all of you. As always, all opinions are mine.*
These sweet and salty bars will disappear off your kitchen counter so fast! If your kids or the adults in your household like that nice combination of cocoa and peanut butter, then you better make a double batch! You may also want to try these Chocolate Peanut Butter Cookies and this insanely deliciousChocolate Peanut Butter Pie (No Bake).
Jump to:
How to make easy chocolate peanut butter cheesecake bars recipe?
- Prepare dough- According to the box instructions.
- Spread it- In a rectangular dish.
- Bake- And allow to cool down.
- Spread cheesecake mixture- On top of the cookie base.
- Cover- And chill.
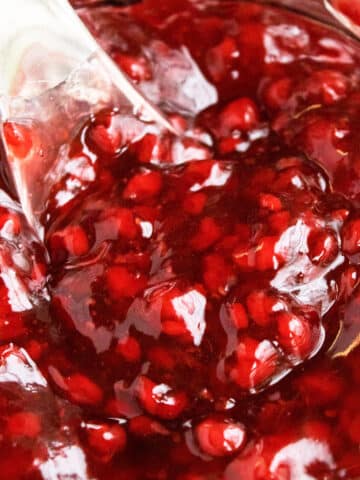
- Make ganache- Spread on top of cheesecake layer.
- Drizzle caramel sauce-And top with peanuts.
- Chill- Until firm.
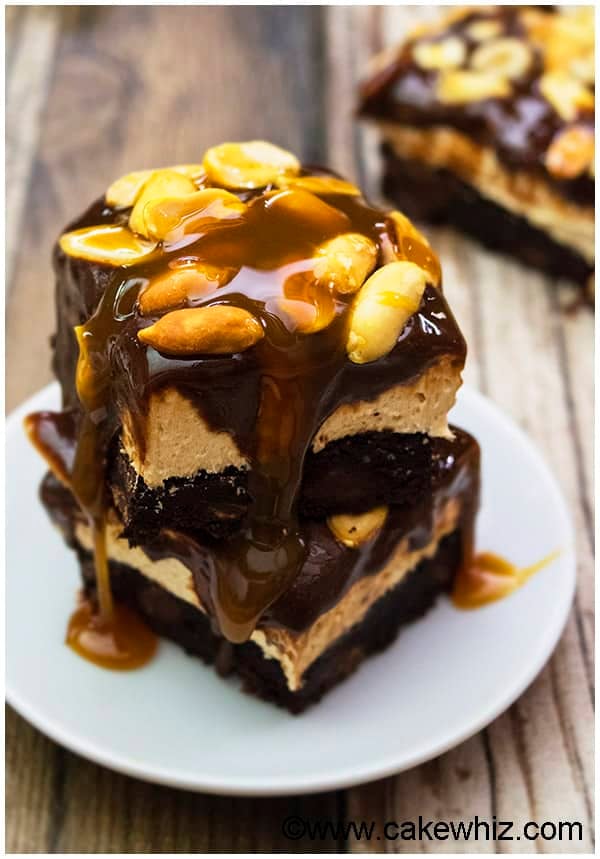
Key ingredients
- Cookie Base- Chocolate cookie mix of your choice.
- No Bake Peanut Butter Cheesecake Layer- Composed of cream cheese, whipped cream, creamy peanut butter.
- Ganache- Composed of dark chocolate chips and heavy cream.
- Toppings- Caramel sauce, salted and roasted peanuts.
Variations
- Try another cookie base flavor from scratch- Such as Easy Peanut Butter Cookies, Salted Caramel Chocolate Chip Cookies, or Chocolate Chip Cookies Recipe.
- Add Reeses pieces- This can easily be changed into delicious Reese's peanut butter bars if you toss in some candy pieces.
- Firmer bars- I wanted these bars to be very ooey gooey so I used a 1:1 chocolate and heavy cream ratio. If you want a firmer, more stable ganache layer (which I recommend), use 2:1 chocolate and heavy cream ratio.
- No bake peanut butter bars- Instead of using a baked cookie base layer, simply use a Graham Cracker Crust or Oreo Pie Crust.
- Top with other nuts- Such as roughly chopped pecans, walnuts, cashews.
- More topping options- Try crushed Oreos, candy bars, mini chocolate chips, sprinkles, melted Nutella or other nut butters.
- Replace caramel sauce- With Homemade Dulce De Leche.
Tips and techniques
- Don't use low fat or fat free cream cheese or whipped cream- Because they don't yield the same creamy results.
- Make sure the cookie base has completely cooled down- Before spreading the cheesecake layer on top so that it doesn't become a melted mess.
- Chill overnight or at least 8 hours before serving- Because this ensures everything will stay nicely put together and cut easily through with a firm texture.
- Cut slices closer to the point when you are ready to serve- Because this prevents the ganache from melting and making a mess. I have noticed that if you let the dish sit on the countertop at room temperature for 10 minutes, it's easier to get perfect square slices.
- Line rectangular dish with parchment paper- Because this prevents sticking and makes for easier cleanup afterwards.
- How to slice bars easily and evenly? Make sure the dessert is chilled and firm. Use a sharp knife and clean knife with paper towels after every cut. Don't use a serrated knife as it leaves weird markings on the slices. Use a ruler to make small markings so you can cut even pieces.
Storage
- Fridge- Store all leftovers in a sealed container for up to 3 days.
- Freezer- I don't recommend this because it doesn't thaw well.
More cheesecake recipes
- No Bake Coffee Cheesecake (Mocha Cheesecake)
- No Bake Peach Cheesecake
- Pumpkin Cheesecake (With Gingersnap Crust)
- Mini Nutella Cheesecake (No Bake)
- New York Cheesecake (No Water Bath)
- Strawberry Cheesecake Cupcakes
By the way, I used Immaculate's cookie mix for the base. My verdict: I couldn't even tell they were gluten free because the texture was great and the flavor was amazing and so "choco-licious."
Recipe
Peanut Butter Cheesecake Bars
Video
Want to Save This Recipe?
Enter your email & I'll send it to your inbox. Plus, get great new recipes from me every week!
By submitting this form, you consent to receive emails from CakeWhiz
Ingredients
Cookie base
- 1 box Chocolate Cookie Mix Or any other chocolate cookie mix for your choice
Cheesecake layer
- 8 oz. Cream cheese Full fat, Room temperature
- 8 oz. Cool Whip Full fat
- ¾ cup Peanut butter Creamy
Ganache
- 2 cups Semisweet chocolate chips Or dark
- 1 cup Heavy cream
Toppings
- 1 cup Caramel sauce Salted
- 1 cup Peanuts Roasted, Salted
Instructions
- Prepare the cookie dough, according to the box instructions. Spread it in an oven-safe rectangular dish (Dimensions:12x8x2) lined with parchment paper. Bake and then allow the cookie base to cool down.
- Prepare cheesecake mixture in a large bowl by mixing together cream cheese, Cool Whip, peanut butter until smooth.
- Spread this mixture mixture evenly on top of the cookie base. Cover with plastic wrap and refrigerate for about 40 minutes.
- Meanwhile, prepare chocolate ganache: Heat chocolate chips and heavy cream in a saucepan over low heat until there are no lumps and everything has melted. Allow this mixture to cool down so it's not scorching hot.
- Spread ganache over the cheesecake layer and gently spread it with a spatula.
- Toss some peanuts and drizzle 2 tablespoons of caramel sauce.
- Chill overnight or at least 6-8 hours.
- Prior to serving, drizzle remaining caramel sauce over each slice and enjoy!
Notes
- Read all my tips above.
- Refrigerate any leftovers and try to finish off everything within 3 days.
Nutrition
An automated tool is used to calculate the nutritional information. As such, I cannot guarantee the accuracy of the nutritional information provided for any recipe on this site.
heather
these sound delicious! like a snickers, but even better (and much better to bring to parties!).
Abeer Rizvi
I didn't even think of that but yes, these would be so much easier to enjoy at parties!